Speed Up Windows Media Player: Media Player Optimization Tips
To speed up Windows Media Player, start by updating your graphics, sound, and system drivers. Also, install all available Windows updates.
Tweak buffering settings under Tools > Options for smoother streaming. Select the right codecs to avoid playback errors.
Adjust playback speed and use the built-in equalizer for better audio. Close unnecessary background programs and disable resource-heavy services.
Regular troubleshooting and maintenance keep things running smoothly. Continue for step-by-step guidance and advanced optimization techniques.
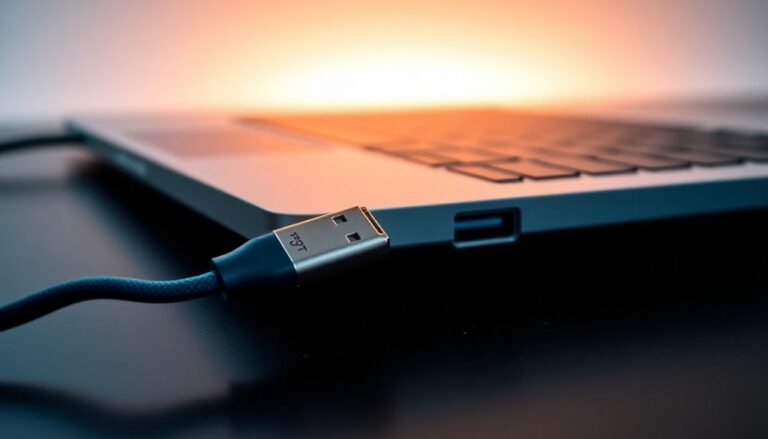
Update Drivers and System Components for Peak Performance

Boost Windows Media Player Performance by Updating Drivers and System Components
To achieve the best performance in Windows Media Player (WMP), regularly updating your system drivers and components is essential. Start by updating your graphics drivers, as outdated GPU drivers often lead to lag, stuttering, and choppy playback in WMP. You can use Device Manager to check for updates or visit your hardware manufacturer’s website to download the latest OEM-specific graphics drivers.
Additionally, update your sound card and DVD drive drivers to fix audio sync issues and playback disruptions caused by corrupted or outdated drivers. Corrupted video files can also result in lag during playback, so it’s important to make sure your media files are intact and not damaged.
Make sure to install all available Windows Updates. These updates often include important patches for media frameworks, codecs, and system stability enhancements that directly improve WMP’s performance. After completing updates, restart your computer to apply the changes effectively.
For even better performance, configure Windows Media Player to use your high-performance GPU via Windows Settings by navigating to Display > Graphics settings. Keeping all your system drivers up to date ensures smoother video playback, enhanced compatibility, and prevents common playback conflicts in Windows Media Player.
Optimize Buffering and Streaming Settings
Optimize Windows Media Player Buffering and Streaming Settings for Smooth Playback
To enhance your Windows Media Player streaming experience, fine-tune the buffering and streaming settings for seamless playback. Start by opening Windows Media Player, then navigate to Tools > Options > Performance. Click on Network Buffering and manually set the buffer size between 10 and 60 seconds. A higher buffer size is recommended for slower or unstable internet connections to reduce interruptions, though it may use more system memory.
Outdated video player and graphic driver can also cause playback issues, so make sure both your Windows Media Player and your graphics drivers are up to date for optimal performance.
After adjusting, apply the changes and restart playback to see the improvements.
Next, optimize your streaming protocols by going to the Network tab in the Options menu. Disable UDP to prioritize TCP or HTTP protocols, which offer more reliable streaming performance. Ensure your firewall or antivirus software is configured to allow Windows Media Player traffic to prevent frequent buffering issues.
For best results, use a wired Ethernet connection instead of Wi-Fi to maintain a stable network connection. Close any bandwidth-intensive applications running in the background to free up network resources.
If you still experience buffering, try resetting your router or modem. Additionally, run the Windows Video Playback Troubleshooter to identify and fix any playback configuration problems.
Fine-Tune Playback Speed and Rate Controls
How to Fine-Tune Playback Speed and Rate Controls in Windows Media Player
Want to customize your audio or video playback experience? Windows Media Player offers easy and precise playback speed adjustments right from the Now Playing screen.
Whether you need to slow down a lecture for detailed note-taking or speed up a training video to save time, here’s a step-by-step guide to fine-tuning playback speed in Windows Media Player:
1. Switch to Now Playing Mode
Start playing your media file, then switch from Library view to the Now Playing screen for access to playback controls.
2. Open Play Speed Settings****
Right-click on a blank area near the playback controls (such as to the left of the Stop button). From the context menu, select Enhancements, then click Play Speed Settings.
3. Adjust Playback Speed Precisely
Use the slider to adjust the speed: drag left to slow down or right to speed up your media playback.
To make finer adjustments, uncheck the box labeled “Snap slider to common speeds.”
4. Apply Your Speed Settings
Optionally, click on the presets like Slow, Normal, or Fast to quickly select a playback rate. Close the Play Speed Settings pane to apply your customized speed.
Pro Tip: Always reset playback speed to normal after using fast or slow modes to ensure the best comprehension and audio quality.
By following these simple steps, you can easily control playback speed in Windows Media Player and enhance your learning or entertainment experience.
For more Windows Media Player tips and tricks, stay tuned!
Ensure Codec and Media Format Compatibility
Ensure Smooth Playback by Installing the Right Codecs for Windows Media Player
Windows Media Player (WMP) requires the correct codecs to decode and play various audio and video formats seamlessly. To avoid playback errors like “Windows Media Player can’t play the file,” it’s crucial to have compatible codecs installed on your PC.
How to Enable Automatic Codec Downloads in Windows Media Player
- Open Windows Media Player.
- Go to Tools > Options > Player tab.
- Check the box for “Download codecs automatically.”
- Set updates to daily for optimal performance.
If you still experience playback issues, download and install a trusted codec pack such as the K-Lite Codec Pack. This codec pack supports popular media formats including MP4, MKV, and AVI, expanding Windows Media Player’s compatibility.
After installation, restart Windows Media Player or your computer to apply the changes.
Check codec information for your media files by right-clicking the file in Windows Media Player and selecting Properties. Identifying missing codecs can help troubleshoot playback problems effectively.
Keep your Windows Media Player updated along with your Windows operating system and video drivers to ensure maximum compatibility and performance.
If errors persist, consider uninstalling and reinstalling codec packs or switch to alternative media players like VLC, which natively supports a broader range of audio and video formats.
Enhance Audio Quality With Equalizer Adjustments

How to Enhance Audio Quality with Windows Media Player Equalizer Settings
To achieve the best audio experience in Windows Media Player, start by ensuring it supports all your media formats.
Then, use the built-in graphic equalizer to customize sound output according to your preferences and listening environment.
Follow these simple steps to optimize audio quality with Windows Media Player’s equalizer:
- Open the Equalizer in Windows Media Player: Right-click anywhere within the player window, hover over Enhancements, and select Graphic Equalizer. If the equalizer is disabled, click Turn on to activate it.
- Select an Equalizer Preset: Use the preset dropdown menu at the top to quickly apply sound profiles like Rock, Jazz, Bass, or Pop. These presets automatically adjust frequency bands to suit different music genres and improve sound clarity.
- Customize Equalizer Frequencies: For personalized audio tuning, choose the Custom option and manually adjust the sliders for frequency bands ranging from 60 Hz to 12 kHz. Increase low frequencies for deeper bass, mid frequencies for clearer vocals, and high frequencies for enhanced treble and detail.
- Hear Changes Instantly: All adjustments apply in real time, allowing you to fine-tune audio settings while playing music or videos. This helps tailor sound output perfectly to your headphones, speakers, or room acoustics.
Streamline System Resources and Background Processes
Optimize Windows Media Player Performance by Streamlining System Resources and Background Processes
Windows Media Player is a trusted choice for media playback, but its background services and active processes can consume significant system resources, affecting your PC’s speed and responsiveness. To enhance performance, start by disabling the Windows Media Player Network Sharing Service (wmpnetwk.exe) through the Services panel. This simple step can free up to 33% of your CPU usage, boosting overall system efficiency.
Next, adjust Media Player settings to turn off automatic media information updates and background library scans. These features often run continuously, causing unnecessary CPU and disk usage.
Use the Windows Resource Monitor to detect any lingering processes such as wmpnetwk.exe or other resource-heavy tasks after closing the player, and manually end them to reclaim system resources.
Before playing media, close all unnecessary applications including browsers, syncing tools, and other media players. This reduces resource competition and prevents background interruptions.
For optimal speed and smooth playback, store your media library on a separate SSD or a fast external drive instead of the system drive. This setup minimizes disk contention, improves read/write speeds, and helps avoid playback glitches or slowdowns.
Maintain Windows Media Player With Regular Troubleshooting
How to Maintain Windows Media Player with Regular Troubleshooting for Smooth Playback
Keep your Windows Media Player running smoothly and avoid playback issues by performing regular troubleshooting and maintenance. Using built-in tools and system settings can help you quickly fix common errors without needing advanced technical skills. Follow these effective tips to maintain optimal performance for Windows Media Player:
- Run Windows Media Player Troubleshooters: Use the built-in troubleshooters to fix configuration and library problems. Open the Run dialog (Win + R), type `msdt.exe -id WindowsMediaPlayerConfigurationDiagnostic`, and press Enter. For best results, run the troubleshooter as an Administrator.
- Repair or Reset Windows Media Player: Navigate to Settings > Apps > Installed Apps > Windows Media Player > Advanced Options. Select “Repair” to fix minor issues or “Reset” to restore default settings without deleting your media files. This helps resolve common playback problems quickly.
- Uninstall and Reinstall Windows Media Player: If Media Player files are corrupted or malfunctioning, uninstall and reinstall the app through Control Panel’s “Turn Windows features on or off.” This process restores essential core files and improves stability.
- Re-register Windows Media Player DLL Files: If you face missing file errors or startup issues, open Command Prompt as Administrator and re-register the necessary DLL files. This step ensures that all essential components are correctly registered and functioning.
By regularly performing these troubleshooting steps, you can ensure Windows Media Player remains reliable, responsive, and delivers smooth media playback every time.
For more Windows Media Player tips and troubleshooting guides, bookmark this page and stay updated.
Frequently Asked Questions
Can Windows Media Player Play DVDS Without Third-Party Plugins?
You can play DVDs in Windows Media Player without third-party plugins only on Windows Vista and Windows 7 (Home Premium, Ultimate, Enterprise editions). On Windows 8, 10, and 11, you’ll need extra software or codecs installed.
How Do I Create and Organize Playlists Efficiently in Windows Media Player?
Think of playlists as musical blueprints—open your Library, click “Create Playlist,” name it, then drag songs over. Reorder tracks by dragging, save your work, and store playlists in organized folders for easy access and tidy structure.
Does Windows Media Player Support Visualizations and How Can I Customize Them?
Yes, Windows Media Player supports audio visualizations. You can customize them by right-clicking the visualizations pane or using the “View” menu. Choose different styles or install third-party plug-ins by placing them in the Visualizations folder.
Can I Sync Media Files Between My PC and Portable Devices Using Windows Media Player?
Like a well-oiled machine, you can sync media files between your PC and portable devices using Windows Media Player. Just connect your device, open the Sync tab, set your preferences, and let WMP handle the transfer automatically.
How Do I Rip Music From CDS Using Windows Media Player?
To rip music from CDs with Windows Media Player, open the program, insert your CD, and click “Rip CD.” Select desired tracks, choose your preferred format and quality under “Rip settings,” then confirm. Files save automatically.
Conclusion
Think of your Windows Media Player as a race car. To win the race, you need the right fuel (updated drivers), smooth roads (optimized settings), and a focused driver (minimal background tasks). By tuning each part—buffering, codecs, audio, and resources—you’ll guarantee a speedy, flawless ride through your media library. So, grab the keys, follow each step, and watch your media player zoom ahead, leaving sluggish performance in the dust. The finish line’s just ahead!