Windows 7 Error: General Windows 7 Error Solutions
If you’re facing Windows 7 errors, start by running Windows Update and updating all device drivers. Use tools like Disk Cleanup and System File Checker (`sfc /scannow`) to remove temporary files and repair corrupted system files.
In Device Manager, check for driver issues and resolve them by reinstalling or rolling back as needed. Disable unnecessary startup programs to improve speed.
If problems persist, scan for malware and try System Restore. The steps ahead will walk you through specific troubleshooting techniques.
Common Types of Windows 7 Errors

Common Types of Windows 7 Errors and How to Fix Them
Troubleshooting Windows 7 effectively requires knowing the most common error types you may face during regular use. Windows 7 update and installation errors often display codes such as 0x80070002 (missing files), 0x80070005 (permission denied), or 0x8007000D (invalid data). These errors usually indicate issues with file access, insufficient permissions, or corrupted update packages that prevent successful updates.
Disk and storage errors like ERROR_DISK_FULL (112) or ERROR_DRIVE_LOCKED (108) point to problems such as low disk space, locked drives, or invalid directories, which can disrupt normal system operations. For more detailed information on these errors, you can check the windowsupdate.log file for specific error codes and troubleshooting clues.
Hardware and driver errors commonly manifest as the Blue Screen of Death (BSOD), ERROR_DEVICE_NOT_CONNECTED (1167), or EXE_MACHINE_TYPE_MISMATCH (216), often caused by incompatible drivers or failing hardware components.
File and program execution errors, including DLL missing errors and ERROR_BAD_EXE_FORMAT (0x800700C1), suggest corrupted, missing, or incompatible files that affect application launches.
Lastly, access and permission errors such as ERROR_LOCKED (212) or access denied messages can block file or registry modifications, requiring adjustments to user permissions or resource availability.
Understanding these Windows 7 error types will help you troubleshoot and resolve issues quickly to maintain system stability.
Fixing Application Freezing and Unresponsiveness
How to Fix Application Freezing and Unresponsiveness on Windows 7
If your Windows 7 applications are freezing or becoming unresponsive, this can be caused by various issues such as insufficient memory, outdated drivers, software conflicts, or disk errors. To resolve these problems and improve system performance, follow these expert troubleshooting steps.
1. Update Windows 7 and Device Drivers
Make sure your Windows 7 operating system is fully updated. Also, update all device drivers, focusing on network adapters and video cards, to ensure compatibility and optimal performance.
2. Use Task Manager to Identify Resource-Heavy Applications
Open Task Manager to monitor CPU and memory usage. Identify applications consuming excessive resources and consider closing or uninstalling unnecessary programs.
3. Disable Unnecessary Startup Programs
Too many startup programs can slow down your computer and cause freezing. Use the System Configuration tool (msconfig) to disable unwanted startup applications.
4. Perform a Clean Boot
A clean boot helps isolate software conflicts by starting Windows with a minimal set of drivers and startup programs. This can help identify if third-party software is causing the freezing.
5. Disconnect External Devices
Sometimes peripherals like USB devices can cause unresponsiveness. Disconnect all external devices to rule out hardware conflicts.
6. Scan for Malware
Use trusted anti-malware tools like Malwarebytes or AdwCleaner to scan and remove viruses, spyware, or other malicious software that may be affecting system stability.
7. Clean the Windows Registry
Use a trusted registry cleaner such as CCleaner to fix registry errors that can cause application freezing.
8. Run Check Disk (chkdsk) and Defragment Your Hard Drive
Check your hard drive for file system errors by running chkdsk. Defragment your hard drive if you’re using a traditional HDD to improve read/write speeds.
9. Monitor Event Logs and Check Disk Health
Use Windows Event Viewer to monitor for disk errors. Consider using third-party disk health tools to perform a deeper analysis of your hard drive’s condition. Regular maintenance and monitoring can help prevent freezing issues before they become severe.
10. Upgrade to an SSD
If disk-related freezing continues, upgrading to a solid-state drive (SSD) can significantly enhance system responsiveness and stability.
By following these proven steps, you can effectively fix application freezing and unresponsiveness on your Windows 7 PC, ensuring smoother and more reliable performance.
For more Windows 7 troubleshooting tips and updates, stay tuned to our blog.
Resolving System Slowdowns and Performance Issues
How to Fix Windows 7 Slowdowns and Boost PC Performance
Windows 7 is a reliable operating system, but over time, system slowdowns and performance issues can occur due to limited disk space, too many startup programs, insufficient memory, malware infections, or outdated hardware.
To improve your Windows 7 PC speed and responsiveness, follow these proven troubleshooting steps.
1. Free Up Disk Space on Windows 7
A nearly full system drive can drastically slow down your PC. Use the built-in Disk Cleanup tool to delete temporary files, system cache, and other unnecessary data.
Regularly defragment your hard drive to optimize file storage and access times. For SSD users, use a specialized 4K alignment tool to maintain peak drive performance.
2. Manage Startup Programs to Speed Up Boot Time
Many programs launch automatically at startup, increasing boot time and consuming resources. Open MSCONFIG or Task Manager to disable non-essential startup items and speed up Windows 7 boot.
3. Optimize Memory Usage and Visual Effects
Monitor memory and CPU usage with Task Manager to identify and close resource-heavy processes.
Adjust visual effects for best performance by navigating to System Properties > Advanced system settings > Performance Settings and choosing “Adjust for best performance.”
4. Scan for Malware and Remove Threats
Malware infections can significantly degrade system speed. Run a full system scan using a trusted antivirus or anti-malware program to detect and remove harmful software slowing down your Windows 7 PC.
Summary: Boost Windows 7 Performance by
- Freeing up disk space and defragmenting your drive
- Disabling unnecessary startup programs
- Optimizing memory and adjusting visual effects
- Scanning for and removing malware infections
Troubleshooting Driver and Hardware Problems
Troubleshooting driver and hardware problems on Windows 7 can be straightforward when you know where to start. If your devices stop working or you see hardware errors, the issue is often related to drivers.
Begin by opening Device Manager (press Windows + X) and look for yellow exclamation marks or error codes like Code 39, which indicates a corrupted or missing driver. Check each device’s Properties for detailed status information and use Event Viewer logs to identify specific problems. Always ensure your hardware and drivers are fully compatible with Windows 7 to avoid conflicts.
To fix common driver errors on Windows 7, run the System File Checker tool by typing `sfc /scannow` in Command Prompt to repair corrupted system files. Additionally, use `chkdsk /r` to scan and fix disk errors that might be affecting driver performance.
You can uninstall and reinstall problematic drivers via Device Manager, or roll back to a previous driver version if a recent update caused issues. For driver updates, rely on Windows Update or download the latest drivers directly from your hardware manufacturer’s official website.
If multiple devices fail or you encounter hardware conflicts, test each component separately and consider checking for motherboard problems.
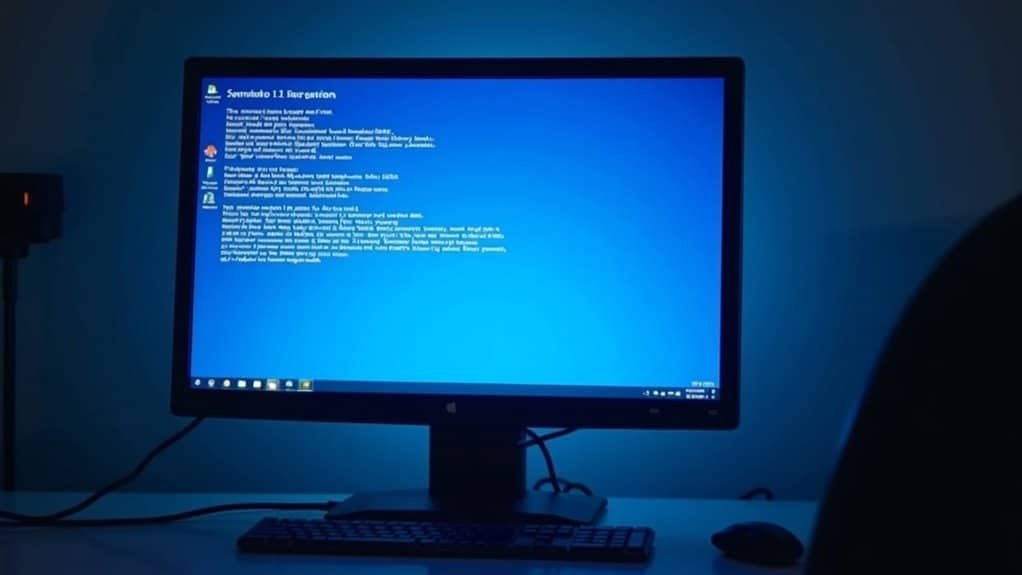
Dealing With Blue Screen of Death (BSOD) Events
How to Fix Blue Screen of Death (BSOD) Errors in Windows 7: Step-by-Step Troubleshooting Guide
Experiencing a Blue Screen of Death (BSOD) on your Windows 7 computer can be frustrating and disruptive. BSOD errors often result from driver conflicts, hardware failures, or corrupted system files.
To effectively resolve BSOD issues, follow this comprehensive troubleshooting guide designed to capture detailed error information and systematically address common causes.
1. Disable Automatic Restart on System Failure
Prevent your PC from restarting automatically after a BSOD by disabling the “Automatically restart” option in System Properties. This allows you to view and note the stop code and error message, which are crucial for diagnosing the problem.
2. Boot into Safe Mode or Use Recovery Options****
If Windows 7 won’t start normally, boot into Safe Mode or access Recovery Options. Use System Restore to roll back recent changes or Startup Repair to fix boot-related problems that might trigger BSOD errors.
3. Run System File Checker (SFC) Scan
Open Command Prompt as an administrator and run the command `sfc /scannow`. This scans and repairs corrupted or missing system files that could be causing the blue screen.
4. Test Your Hardware Components
Faulty hardware can cause frequent BSOD crashes. Use Windows Memory Diagnostic to check RAM integrity and run `chkdsk /f /r` to scan and repair hard drive errors.
By following these proven steps, you can diagnose and fix the root causes of Blue Screen of Death errors on your Windows 7 PC, improving system stability and performance.
For more tips on preventing BSODs and optimizing your Windows experience, explore our detailed troubleshooting resources.
Addressing Windows Update and Installation Failures
Common Windows 7 Update Issues and How to Fix Installation Failures
Windows 7 update failures can leave your PC vulnerable and prevent access to important new features. To fix common Windows Update problems, start by running the built-in Windows Update troubleshooter, which automatically detects and resolves routine errors.
Ensure your internet connection is stable, as network-related error codes like 0x8024402F or 0x80072EE2 often indicate connectivity problems. Access Windows Update by navigating to Start > Settings > Windows Update > Check for Updates to verify your update status.
Temporarily disable antivirus or firewall software, as these can block updates. Performing a clean boot helps identify if third-party programs are causing update interruptions.
For stuck updates or error code 0x80070057, reset Windows Update components by stopping the update services using commands like `net stop wuauserv` and `net stop bits`. Then, rename the SoftwareDistribution and catroot2 folders before restarting the services to clear corrupted update files.
Additionally, free up disk space and update any incompatible device drivers to improve update success. If update failures persist, run system file repair tools such as SFC (System File Checker) and DISM (Deployment Image Servicing and Management) to fix corrupted system files.
Always disconnect unnecessary peripherals during updates to avoid hardware conflicts. By following these proven Windows 7 update troubleshooting steps, you can resolve installation errors and keep your system secure with the latest updates.
Handling File Access and Security Permission Errors

How to Fix File Access and Security Permission Errors in Windows 7
Windows 7 offers a strong security framework, but file access and permission errors can still prevent you from opening or modifying important files. These common issues are usually caused by insufficient permissions, file corruption, or restrictive security settings.
To fix file access errors in Windows 7, follow these effective troubleshooting steps:
1. Verify User Permissions
Ensure your user account has the necessary permissions or is part of the Administrators group. Right-click the file or folder, select Properties, and navigate to the Security tab to review access rights.
2. Take Ownership of Files and Folders
If access is denied, take ownership by going to Advanced Security Settings. You can also use Command Prompt tools like `takeown` and `icacls` with administrative privileges to regain control over files.
3. Use Safe Mode to Release Locked Files
Sometimes files are locked by running programs. Boot Windows 7 into Safe Mode to safely close interfering applications and free the file for editing or deletion.
4. Avoid Over-Permissive Settings
Avoid assigning “Everyone” full control to files or folders, as this can create security vulnerabilities. Instead, assign permissions carefully based on user roles.
5. Regularly Back Up Important Data
Back up your files frequently to protect against data loss or permission corruption caused by system errors or malware.
By following these tips, you can effectively resolve file access and security permission errors in Windows 7, ensuring smooth file management and maintaining system security.
For more Windows 7 troubleshooting guides and security tips, explore our comprehensive resources.
Using Built-in Recovery and Troubleshooting Tools
Use System Restore to quickly revert your Windows system files and settings to an earlier restore point, effectively fixing instability caused by recent changes.
Utilize System Image Recovery to restore your entire Windows PC from a previously created backup image, ensuring full system recovery.
When suspecting hardware problems, run the Windows Memory Diagnostic tool to check your RAM for errors.
For advanced Windows troubleshooting, open Command Prompt and execute powerful commands like chkdsk /f /r to scan and repair disk errors, or sfc /scannow to detect and fix corrupted system files.
These built-in recovery and troubleshooting tools help maintain optimal Windows performance and fix common issues efficiently.
Preventive Maintenance Tips for Stability and Performance
Preventive Maintenance Tips to Optimize Windows 7 Stability and Performance
Keep your Windows 7 PC running smoothly and avoid unexpected crashes or slowdowns by following essential preventive maintenance tips. Proper system upkeep ensures optimal stability and peak performance. Key areas to focus on include managing disk space, maintaining your hard drive, updating system software, and controlling resource usage.
1. Manage Disk Space Effectively
Regularly use the built-in Disk Cleanup tool and manually delete temporary files to free up valuable disk space. Aim to maintain at least 10% free disk space or a minimum of 20 GB to enhance system reliability and speed.
2. Maintain Hard Drive Health
Perform disk error checks and defragment your hard drive routinely via Drive Properties > Tools tab. These steps help prevent file fragmentation and detect disk errors early, ensuring longer hard drive life and smoother performance.
3. Update BIOS and Device Drivers
Keep your BIOS and device drivers up to date using manufacturer-provided utilities. Updating these components improves hardware compatibility, fixes bugs, and prevents system instability.
4. Optimize Startup Programs and Visual Effects
Use MSCONFIG to disable unnecessary startup programs, which can significantly reduce boot times and free up system resources. Additionally, turn off non-essential visual effects to boost overall system responsiveness.
Additional Tips:
- Disable Hibernate if not used to save disk space.
- Limit System Restore disk usage to conserve storage while maintaining recovery options.
- Schedule regular maintenance tasks like disk checks and defragmentation to automate upkeep.
By implementing these Windows 7 preventive maintenance strategies, you can maximize your computer’s stability, enhance speed, and extend hardware lifespan.
Stay proactive with system care to enjoy a reliable and efficient Windows 7 experience.
Frequently Asked Questions
How Can I Back up My Data Before Attempting Error Fixes?
You should use Backup and Restore Center or create a system image to copy your data to an external drive. You can also use cloud backup software. Always verify your backup before fixing errors to prevent data loss.
What Are the Best Third-Party Tools for Diagnosing Windows 7 Errors?
You should use Restoro for all-in-one repairs and malware checks, ESET SysInspector for deep diagnostics, SeaTools or HDDScan for drive health, MemTest86 for RAM testing, and HWMonitor to track system temperatures and voltages.
How Do I Create a System Restore Point Manually in Windows 7?
To manually create a system restore point in Windows 7, open System Properties, go to the System Protection tab, click “Create,” type a descriptive name, and confirm. Wait for confirmation, then close all dialog boxes.
Can Windows 7 Errors Affect Dual-Boot Systems With Other Operating Systems?
Yes, Windows 7 errors can disrupt dual-boot systems. You might encounter bootloader corruption, partition inaccessibility, or driver conflicts. Always verify boot configurations, check partition health, and update drivers to maintain stable dual-boot operations with other operating systems.
How Do I Find Official Microsoft Support for Discontinued Windows 7 Issues?
Steering through Microsoft’s support for Windows 7 is like searching for treasure in a retired vault. You’ll find guidance in Microsoft’s End of Support FAQs, lifecycle policy pages, and community forums, but official update support’s sailed away.
Conclusion
You might think Windows 7 is too outdated to bother fixing, but with the right troubleshooting steps, you can solve most errors and keep your system running smoothly. By addressing common issues—like application freezes, slowdowns, and driver problems—you’ll extend your computer’s life and improve its performance. Don’t forget to use Windows’ built-in tools and follow preventive maintenance tips. Staying proactive isn’t just for new operating systems—it’s essential for reliable, secure computing on Windows 7, too.