Windows Not Loading After BIOS: Fix Boot Sequence Issues
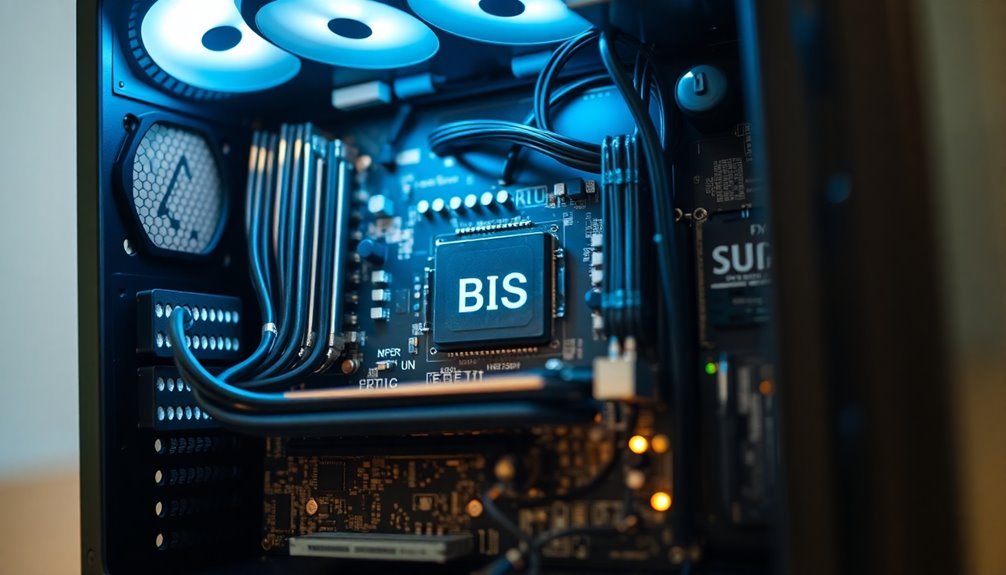
If Windows won’t load after a BIOS change, start by entering your BIOS setup and confirm your boot device order. Make certain your Windows drive or Windows Boot Manager is first.
Double-check you haven’t switched between UEFI and Legacy modes. Also, verify Secure Boot and SATA settings match your original configuration.
If issues persist, try resetting BIOS to defaults. Then, use Windows Recovery tools for repairs.
With the right steps, you can fix boot sequence problems and restore access. For a deeper fix, see what follows next.
Common Reasons Windows Fails to Boot After BIOS Changes
Why Windows Fails to Boot After BIOS Changes: Common Causes and Fixes
If Windows won’t boot after making BIOS changes, it’s typically due to several technical issues disrupting the system’s ability to locate and load the operating system. A failed or interrupted BIOS update can corrupt the firmware, resulting in black screens, infinite boot loops, or failure to start—issues frequently reported on popular brands like Dell and MSI. Incorrect BIOS settings, such as wrong boot order or switching between UEFI and Legacy BIOS modes, often prevent Windows from detecting the boot drive properly. In some cases, the BIOS update may introduce hardware incompatibilities if the version isn’t fully compatible with your motherboard or CPU, causing crashes or missing boot devices during startup. BIOS changes can also expose existing Windows system corruption, triggering boot errors like 0xc0000221 or 0xc0000098. Additionally, hardware problems such as loose cables, faulty connections, or a weak CMOS battery can block access to the boot drive and stop Windows from loading. Resetting the CMOS is a reliable way to fix boot configuration issues that may arise after BIOS changes, as it restores default hardware settings and can resolve startup errors caused by incorrect or corrupted firmware settings. Understanding these common reasons why Windows fails to boot after BIOS changes helps you troubleshoot effectively and restore normal startup quickly.
How to Access and Navigate BIOS Setup
How to Access and Navigate BIOS Setup on Your PC
If you need to change BIOS settings to fix boot order, switch between UEFI and Legacy modes, or address hardware compatibility issues that stop Windows from loading, accessing the BIOS setup is essential. The BIOS is a firmware interface that initializes hardware and allows the operating system to communicate with your PC’s components.
To enter BIOS, restart your computer and immediately press the designated key—commonly Del, F2, F10, or Esc—right after powering on. If your PC boots too quickly, you can access BIOS through Windows by following these steps: go to Settings → Update & Security → Recovery → Advanced Startup → Restart now.
Then select Troubleshoot → Advanced options → UEFI Firmware Settings → Restart. On modern UEFI systems, you can also hold the Shift key while clicking Restart from the Start menu or sign-in screen to directly enter BIOS.
Once inside the BIOS setup utility, navigate using the arrow keys or your mouse if supported by your UEFI interface. Use Enter to select options and Esc to go back to previous menus. Remember to save any changes before exiting BIOS to apply your new settings.
Key Tips for BIOS Access:
- Common BIOS keys include Del, F2, F10, and Esc.
- Holding Shift and clicking Restart ensures direct entry into UEFI BIOS.
- BIOS navigation is primarily keyboard-based, though newer UEFI BIOS versions support mouse input.
Setting the Correct Boot Order for Windows
Why does your PC sometimes fail to start Windows or show the message “Operating system not found”? This common issue usually occurs because the BIOS boot order isn’t set correctly.
To resolve this, access your BIOS setup by pressing the appropriate key (such as ESC, F2, F10, or F12) immediately after turning on your computer. Once in the BIOS, go to the “Boot” menu and set the Windows Boot Manager or the SSD containing your Windows installation as the first boot device.
If you notice multiple Windows Boot Manager entries, ensure that one is prioritized at the top of the boot order. Duplicate entries generally don’t cause problems but should be reviewed.
Move USB drives, optical drives, and network boot options below your SSD, or disable them unless you’re actively using these devices to install or repair Windows.
Avoid setting USB keys or external drives as the primary boot device to prevent boot errors and unnecessary startup delays. Remember to save your changes before exiting the BIOS.
Configuring the correct boot order is essential for a smooth and reliable Windows startup every time. For more tips on troubleshooting Windows boot issues, visit our site and learn how to optimize your PC boot settings effectively.
Understanding UEFI Vs Legacy Boot Modes
Understanding UEFI vs Legacy Boot: Key Differences and Troubleshooting Tips
Configuring the correct boot order in your BIOS is crucial, but equally important is knowing whether your system uses UEFI or Legacy boot mode. UEFI (Unified Extensible Firmware Interface) is the modern firmware standard that delivers faster startup times, supports drives larger than 2 TB, and includes advanced security features like Secure Boot.
In contrast, Legacy BIOS relies on older technology, supports only MBR partitions with smaller drive sizes, and lacks enhanced security measures.
If your Windows PC fails to load after the BIOS screen, it’s essential to verify whether your firmware and disk partitions are using UEFI or Legacy mode. Boot mode mismatches often cause startup issues and prevent your system from booting properly.
Here are the main differences between UEFI and Legacy boot modes:
- UEFI supports GPT partition style and advanced security features, while Legacy uses MBR partitioning with limited capabilities.
- UEFI firmware usually provides a graphical user interface, whereas Legacy BIOS displays a simple text-based screen.
- Switching boot modes after Windows installation can lead to boot failures due to incompatible partition schemes.
To ensure smooth startup and avoid boot problems, always match your boot mode with your Windows installation type.
For optimal performance and security, UEFI boot mode with GPT partitions is recommended on modern systems.
Adjusting Secure Boot and SATA Settings
How to Fix Boot Sequence Issues by Adjusting Secure Boot and SATA Settings in BIOS
If you’re experiencing boot sequence problems, it’s essential to check and configure Secure Boot and SATA settings correctly in your BIOS or UEFI firmware. Follow these steps to ensure your system boots smoothly:
1. Enter BIOS Setup: Restart your computer and press the designated key (such as F2, DEL, or ESC) during startup to access BIOS or UEFI settings.
2. Configure Secure Boot:
- Ensure BIOS is set to UEFI mode, as Secure Boot requires UEFI rather than Legacy BIOS.
- Confirm your system drive uses the GPT partition style, which is compatible with Secure Boot.
- If Secure Boot options are grayed out or missing, update your BIOS firmware to the latest version.
- Look for Secure Boot settings under Security or Boot tabs.
- Try toggling between “Standard” and “Custom” Secure Boot modes.
- Reset Secure Boot keys to factory defaults if activation issues persist.
3. Verify SATA Settings:
- Check that the SATA controller mode matches your Windows installation, typically AHCI mode.
- Changing SATA mode after installing Windows can lead to boot failures, so verify this setting carefully.
- Ensure your boot device priority prioritizes the correct Windows drive to avoid boot errors.
4. Disable Fast Boot if Needed:
– Fast Boot can conflict with Secure Boot, so disable it in BIOS if you encounter boot problems after enabling Secure Boot.
Important: Always back up your data before making BIOS or firmware changes to prevent accidental data loss.
By properly adjusting Secure Boot and SATA settings in BIOS, you can resolve boot sequence issues and improve system security and stability.
For more detailed guidance, search for “how to configure Secure Boot and SATA settings in BIOS” or visit your motherboard manufacturer’s support page.
Resetting BIOS to Default or Optimized Settings
How to Reset BIOS to Default or Optimized Settings for PC Stability
If your computer is experiencing persistent boot errors or hardware conflicts, resetting the BIOS to its default or optimized settings can help restore system stability. Follow these step-by-step instructions to reset BIOS or UEFI settings effectively:
- Restart your PC and enter the BIOS or UEFI setup. During startup, press the manufacturer-specific key such as F2, DEL, or ESC to access the BIOS menu.
- Navigate using your keyboard or mouse to find the option labeled “Load Setup Defaults,” “Restore Defaults,” or similar wording.
- Confirm the selection to reset BIOS settings to default or optimized values.
- Save changes and exit the BIOS setup, usually by pressing the F10 key. Your computer will reboot automatically.
If resetting BIOS resolves your configuration issues, Windows should load normally without errors.
What to Do If You Can’t Access BIOS
In cases where BIOS can’t be accessed through keyboard shortcuts, a manual BIOS reset is required:
- Power off the PC and disconnect all power sources.
- Ground yourself to avoid static discharge.
- Remove the CMOS battery on the motherboard for several minutes, then reinsert it.
- For some desktop models, change the motherboard jumper settings as instructed by the manufacturer.
- Newer Dell computers may require holding the power button for 30 seconds to reset BIOS.
Tips for Resetting BIOS Safely
- Use quick hotkeys for instant BIOS resets when available.
- Perform manual resets carefully to avoid hardware damage.
- Always follow safety precautions and check your device’s warranty guidelines before proceeding.
Resetting BIOS to default or optimized settings is a crucial troubleshooting step to fix boot errors, hardware conflicts, and improve overall PC performance.
Following this guide ensures a smooth and safe BIOS reset process to get your computer running optimally again.
Keywords: reset BIOS, default BIOS settings, optimized BIOS settings, BIOS reset guide, how to reset BIOS, CMOS battery removal, BIOS troubleshooting, computer boot errors, motherboard jumper reset
Using Windows Recovery Tools for Boot Repair
Effective Windows Boot Repair Using Windows Recovery Tools
Persistent boot failures in Windows can be frustrating, but using Windows Recovery Tools can help you troubleshoot and fix these issues efficiently. To begin, access the Windows Recovery Environment (WinRE) by pressing the “F11” key during your PC’s startup.
Once in WinRE, navigate to Troubleshoot > Advanced options** where you’ll find essential tools including Startup Repair, Command Prompt, System Restore, and Uninstall Updates**.
Start with Startup Repair for an automated diagnosis and repair of common boot problems. If the automated tool doesn’t resolve the issue, use the Command Prompt for manual boot repair commands.
Run the following commands:
- `bootrec /fixboot` – writes a new boot sector to fix boot issues
- `bootrec /fixmbr` – repairs the master boot record (MBR)
- `bootrec /rebuildbcd` – rebuilds the boot configuration data (BCD)
- `bootrec /scanos` – scans for Windows installations not currently in the boot list
After addressing boot records, run `sfc /scannow` to scan and repair corrupted system files.
Also, execute `chkdsk c: /f` to check and fix disk errors on the system drive.
If you can’t access WinRE directly, create a bootable Windows recovery USB drive using reliable tools like MiniTool Partition Wizard or the official Microsoft Media Creation Tool.
Configure your BIOS settings to boot from this recovery media and use the graphical interface to perform repairs.
By following these Windows boot repair steps with Recovery Tools, you can quickly resolve startup issues and restore your PC to working condition.
For more detailed guides and troubleshooting tips, explore Bing’s resources on Windows recovery and repair.
Rolling Back or Reflashing a Corrupted BIOS
How to Roll Back or Reflash a Corrupted BIOS to Fix Boot Issues
If your computer fails to start due to a corrupted or unstable BIOS, rolling back or reflashing the BIOS can help restore system functionality. This guide explains the step-by-step process to safely update or revert your BIOS and resolve boot problems effectively.
Step 1: Access the BIOS Setup Utility
Restart your PC and enter the BIOS setup by pressing the designated key (such as F2, DEL, or ESC) during startup. Look for options to roll back or update the BIOS firmware within the utility.
Step 2: Use Manufacturer-Specific Recovery Tools
Many manufacturers offer specialized tools for BIOS recovery. For example, HP provides the Windows + B key recovery method, while Dell uses dedicated BIOS installer programs. Check your manufacturer’s website for detailed instructions and download the latest BIOS files.
Step 3: Download the Correct BIOS Firmware
Always download BIOS updates directly from the official motherboard or system manufacturer’s website. Ensure the BIOS file matches your exact motherboard model to avoid flashing errors.
Step 4: Prepare a Bootable USB Drive
Create a bootable USB drive containing the BIOS firmware using recommended tools. If you encounter flashing failures, try reformatting the USB drive and recreating the bootable media.
Step 5: Flash the BIOS Carefully
Follow all on-screen prompts precisely during the flashing process. Avoid powering off your system until the update completes to prevent further corruption.
Step 6: Reset CMOS if Needed
If your system still fails to boot after reflashing, consider resetting the CMOS battery to clear BIOS settings. Refer to your motherboard manual for instructions on how to safely perform this step.
Additional Tips:
- Always back up important data before performing BIOS updates.
- Consult your motherboard manual or contact manufacturer support for recovery procedures tailored to your hardware.
Best Practices to Prevent Boot Issues After BIOS Updates
Effective Strategies to Prevent Boot Issues After BIOS Updates
BIOS updates are essential for system performance and security but can sometimes cause boot problems if not handled carefully. To prevent boot issues after BIOS updates, follow these best practices:
- Back Up Critical Data: Always create a full backup of your important files before starting a BIOS update to avoid data loss in case of unexpected failures.
- Ensure Stable Power Supply: Use an uninterruptible power supply (UPS) for desktops or ensure your laptop is fully charged and plugged in. Power interruptions during the update can corrupt the BIOS and cause boot failures.
- Verify BIOS Compatibility: Double-check that the BIOS update file matches your exact motherboard model and revision to prevent incompatibility and bricking your device.
- Disconnect External Devices: Remove all non-essential external drives and peripherals before updating. This reduces confusion in the boot sequence and potential conflicts.
- Reset BIOS Settings After Update: Immediately reset BIOS settings to factory defaults once the update completes. This clears outdated configurations that might interfere with booting.
- Configure Secure Boot and UEFI: Enable Secure Boot and UEFI mode while disabling Legacy BIOS (CSM) to enhance security and system stability. Restrict boot devices to authorized hardware only.
- Set Proper Boot Order: Ensure Windows Boot Manager is prioritized at the top of the boot sequence to avoid boot delays and errors.
- Monitor Firmware Integrity: Regularly use manufacturer-provided tools to verify BIOS integrity and detect unauthorized changes. Keeping logs of BIOS activity aids in troubleshooting.
- Use Recovery Options When Needed: If boot problems occur post-update, promptly use BIOS recovery features or restore default settings to regain system functionality.
By carefully following these guidelines, you can minimize boot issues related to BIOS updates and maintain a stable, secure computing environment.
For more detailed troubleshooting tips and BIOS update guides, visit your motherboard manufacturer’s official website.
Frequently Asked Questions
Can a BIOS Update Erase My Data or Installed Programs on Windows?
A BIOS update won’t erase your data or installed programs on Windows. You should back up important files anyway, since update failures can cause boot issues. Always follow manufacturer instructions and guarantee a stable power supply during the process.
Will Changing BIOS Settings Affect Dual-Boot Systems With Linux and Windows?
If you change BIOS settings, you might open a can of worms for your dual-boot system. Always double-check boot mode and disk priority: mismatches can prevent either Linux or Windows from booting until you adjust settings or repair boot loaders.
How Do I Identify My Motherboard Model for the Correct BIOS Update?
To identify your motherboard model, open System Information with “msinfo32,” check the BIOS screen, inspect the board physically, or use Command Prompt or tools like CPU-Z. Always double-check the model before downloading any BIOS updates.
Is It Possible to Recover Files if Windows Won’t Boot After a BIOS Change?
Even if your system feels locked behind iron gates after a BIOS change, you can still recover files. Boot from recovery media, use Command Prompt or Notepad to copy files, and transfer them to an external drive.
Can Antivirus or Security Software Block the Windows Boot Process After BIOS Updates?
Yes, antivirus or security software can block Windows from booting after BIOS updates. Check BIOS Secure Boot and TPM settings, then temporarily disable security software to troubleshoot. Update both BIOS and security software to prevent compatibility issues.
Conclusion
If Windows still won’t load after BIOS changes, don’t panic—this isn’t your first rodeo, and you’ve got the tools to fix it. Double-check your boot order, mode, and security settings. If things stay stubborn, reset BIOS to defaults or use Windows recovery tools. Troubleshooting methodically helps you avoid guesswork and wasted time. Next time you update BIOS, remember these steps to keep your system running smoother than dial-up on a good day.


