BitLocker Issue Windows 11: Fix Drive Encryption Problems

If you’re having BitLocker issues in Windows 11, start by checking your disk partitions and TPM settings. Then, confirm that the Boot Configuration Data isn’t corrupted.
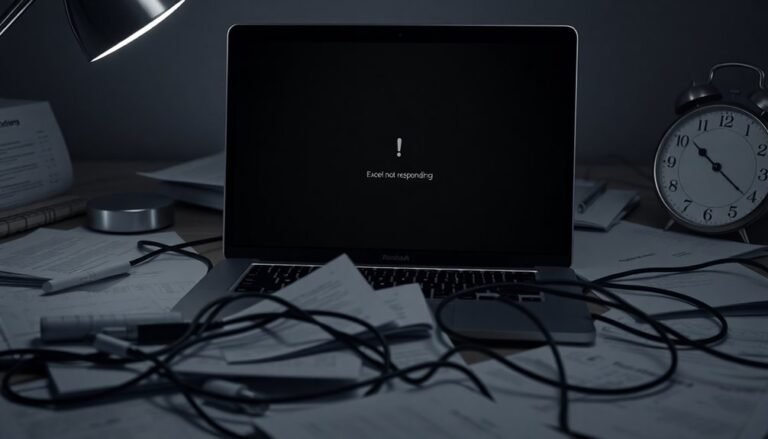
Fix system file errors with the System File Checker (SFC) tool and update your device. Pause or disable BitLocker if encryption is stuck.
Always back up your recovery key to avoid data loss. Also, avoid conflicts with third-party encryption tools.
For automatic activation on new installs, use supported tools or update the registry. You’ll discover more targeted solutions and best practices just ahead.
Common BitLocker Errors After Windows 11 Imaging and Deployment

Common BitLocker Errors After Windows 11 Imaging and Deployment: How to Fix Them
When deploying Windows 11 images, many IT professionals face common BitLocker errors that prevent smooth activation and recovery. One of the most frequent issues is BitLocker activation failure caused by Boot Configuration Data (BCD) errors. You might encounter error messages such as, “The path specified in the Boot Configuration Data (BCD) for a BitLocker Drive Encryption integrity-protected application is incorrect.”
This error usually results from incorrect or corrupted BCD settings, a problem often triggered after imaging regardless of your device’s hardware brand or the deployment tool used. These issues have been reported across both physical laptops and virtual machines, indicating that the problem is not limited to a specific hardware platform or virtualization environment.
Another major cause of BitLocker errors during Windows 11 deployment is partitioning conflicts. If the partition layout defined in your unattend.xml file clashes with the partitioning scheme applied by your imaging tool, BitLocker activation can fail or BCD path errors may appear.
Windows 11 images typically require at least three partitions: EFI system partition, Microsoft reserved system partition, and recovery partition. Any discrepancy between your image’s partition layout and the target device’s partition structure significantly increases the risk of BitLocker activation failures.
To avoid these common BitLocker problems after Windows 11 deployment, ensure your Sysprep configuration, unattend.xml settings, and imaging strategies are fully aligned.
Verifying that partitioning schemes are consistent and BCD paths are correctly set will help guarantee seamless BitLocker activation and protect your encrypted drives from recovery issues.
Follow these best practices to troubleshoot and fix BitLocker errors effectively during Windows 11 imaging and deployment.
Resolving BitLocker Installation Blockages on Windows 11
How to Fix BitLocker Installation Blocked Issues on Windows 11
BitLocker is a powerful drive encryption feature in Windows 11, but sometimes its installation can be blocked due to update conflicts, existing encryption, or corrupted system files. To fix BitLocker installation blocked problems, follow these effective troubleshooting steps:
1. Check for Problematic Windows Updates
Sometimes, specific Windows updates like KB5043145 can cause BitLocker installation to fail. To identify and uninstall these updates:
- Go to Settings > Update & Security > Windows Update > Update History
- Click Uninstall updates and remove any update causing errors
- Restart your PC and try enabling BitLocker again
2. Pause or Disable Existing BitLocker Encryption
If BitLocker encryption is already active, it might block new installations or updates. To pause or turn off BitLocker:
- Open Control Panel > System and Security > BitLocker Drive Encryption
- Select the affected drive and choose Pause Protection or Turn off BitLocker
Alternatively, use PowerShell with administrator rights:
- Run `Suspend-BitLocker -MountPoint “
:” -RebootCount 0` before updates - Run `Resume-BitLocker -MountPoint “
:”` after updates complete
3. Clean the Disk Using Diskpart in Windows Installation Environment
For persistent BitLocker installation blocked errors, you may need to remove all partitions and encryption metadata:
- Boot from Windows Installation media
- Press Shift + F10 to open Command Prompt
- Type `diskpart` and press Enter
- Use `list disk` to identify your disk, then `select disk
` - Run `clean` to erase all partitions and BitLocker data
4. Repair Corrupted System Files with SFC Scan
Corrupted system files can interfere with BitLocker setup. Fix them by running:
- Open Command Prompt as administrator
- Enter `sfc /scannow` and let the process complete
- Restart your computer and attempt BitLocker installation again
BitLocker installation can also fail if there are compatibility issues with existing software or system configurations, so it is important to ensure all drivers and critical applications are up to date before proceeding.
By following these proven methods, you can resolve BitLocker installation blocked issues on Windows 11 quickly and securely.
For the best security, keep your system updated and monitor BitLocker status regularly.
Understanding BitLocker Encryption Changes in Windows 11
Understanding BitLocker Encryption Changes in Windows 11 Version 24H2
After fixing installation issues, it’s crucial to know how BitLocker encryption has changed in Windows 11, especially with the latest 24H2 update. Windows 11 24H2 now enforces BitLocker full-disk encryption by default on almost all supported devices, enhancing security across the board.
When you sign in with a Microsoft account during the Out-of-Box Experience (OOBE), BitLocker automatically activates—even on Windows 11 Home edition. Microsoft has removed the BYPASSNRO setup option, making it much harder to skip encryption during device setup.
BitLocker in Windows 11 version 24H2 requires TPM 1.2 or TPM 2.0, Secure Boot, and modern storage hardware. Unlike previous versions, it no longer depends on HSTI or Modern Standby, which expands compatibility with a wider range of hardware.
Additionally, devices with untrusted Direct Memory Access (DMA) interfaces are now supported, and OEMs no longer need registry tweaks to enable default encryption.
Important: Upgrading to Windows 11 24H2 may trigger automatic BitLocker encryption on all drives, including non-system volumes. To avoid data loss, always back up your BitLocker recovery key.
Issues with TPM or Secure Boot can prevent decryption and result in permanent data loss.
Stay informed about these BitLocker enhancements in Windows 11 version 24H2 to ensure your device stays secure and your data remains protected.
Automatic BitLocker Activation During Clean Installs

Automatic BitLocker Encryption Activates by Default in Windows 11 Version 24H2 Clean Installs
Starting with Windows 11 version 24H2, Microsoft has introduced automatic BitLocker encryption during clean installations on most supported devices, including both Home and Pro editions. When you perform a fresh Windows 11 install, BitLocker encryption is enabled by default on your system drive and any connected fixed drives, often without explicit user prompts.
For Windows 11 Home edition, this automatic BitLocker activation depends on the device manufacturer setting an encryption flag in UEFI firmware—meaning many custom or DIY PC builds are typically exempt from this feature.
This default automatic BitLocker encryption is designed to enhance data protection immediately after installation. However, it can pose risks if you’re unaware or unprepared. Not backing up your BitLocker recovery key can result in permanent data loss, especially if hardware issues or locked access occur.
To avoid unwanted automatic BitLocker encryption, you can use tools like Rufus to create your Windows 11 installation media and select the option to disable BitLocker during setup. Alternatively, applying a registry modification by setting PreventDeviceEncryption = 1 during installation can prevent encryption activation.
Before reinstalling Windows 11, always verify BitLocker status in Control Panel and disable it if necessary to prevent unexpected encryption that might lock you out of your data. Following these best practices ensures a smooth Windows 11 clean install experience without BitLocker surprises.
Keywords: Windows 11 automatic BitLocker encryption, disable BitLocker Windows 11, Windows 11 clean install BitLocker, prevent BitLocker activation, Windows 11 version 24H2 encryption, BitLocker recovery key backup
Managing BitLocker Recovery and User Access
How to Manage BitLocker Recovery Keys and User Access on Windows 11
Enabling BitLocker encryption on your Windows 11 device is essential for protecting your data, but managing BitLocker recovery keys and user access is equally important to prevent data loss and downtime. If you encounter a BitLocker recovery screen, you’ll need the unique 48-digit BitLocker recovery key created during the setup process.
Here’s how to effectively manage your BitLocker recovery keys and user access:
1. Back Up Your BitLocker Recovery Key in Multiple Secure Locations****
Always back up your BitLocker recovery key immediately after enabling BitLocker. Store copies in several secure places, such as your Microsoft account, Azure Active Directory (Azure AD), a USB drive, or a printed copy stored safely. This ensures quick access if recovery is needed.
2. Use the Recovery Key ID to Identify the Correct Key****
When prompted for recovery, the BitLocker recovery screen displays a recovery key ID. Use this ID to locate the matching 48-digit key online at [https://aka.ms/myrecoverykey](https://aka.ms/myrecoverykey) or through your organization’s IT support if your device is domain-joined.
3. Verify User Identity Before Sharing Recovery Keys
In organizational environments, always confirm the identity of users requesting the recovery key to prevent unauthorized access. Follow your company’s security protocols when sharing or entering recovery keys.
4. Rotate and Update Recovery Keys After a Recovery Event
After successfully recovering your device with a BitLocker key, rotate or update the recovery keys to maintain strong security and mitigate future risks.
By following these best practices for managing BitLocker recovery keys and user access on Windows 11, you can safeguard your encrypted data while minimizing potential disruptions.
For more detailed guidance, visit Microsoft’s official BitLocker recovery resources.
Best Practices and Troubleshooting for BitLocker in Windows 11
Maximize Windows 11 security with BitLocker encryption by following expert best practices and troubleshooting tips. BitLocker delivers strong encryption for your devices, but to ensure optimal protection, you must configure policies correctly, set up drives properly, and manage encryption keys efficiently.
Start by enforcing BitLocker settings through Microsoft Intune for cloud-managed devices or Group Policy Objects (GPO) in Active Directory environments. Before enabling BitLocker, verify that your system supports TPM 2.0 and includes a separate system partition with at least 250 MB of free, unencrypted space. Use the Device Encryption Support tool in Windows 11 System Information to confirm your device’s eligibility.
If you experience the “Waiting for Activation” status after preprovisioning, resolve it by adding a secure key protector via Control Panel, PowerShell commands, or the manage-bde.exe utility. Always back up your BitLocker recovery keys securely to Azure Active Directory (Azure AD), Microsoft Intune, or on-premises Active Directory to avoid potential data loss.
For troubleshooting, update your TPM firmware regularly, repair corrupted system files, and ensure your disk partitions meet BitLocker requirements. Avoid using third-party encryption software alongside BitLocker to prevent conflicts and errors.
Finally, maintain continuous compliance by regularly checking BitLocker encryption status and policy adherence across your Windows 11 devices.
Implementing these BitLocker best practices will help safeguard your Windows 11 environment, enhancing data protection and minimizing security risks.
Frequently Asked Questions
Can Bitlocker Be Used on External Drives With Windows 11 Home Edition?
You can’t enable BitLocker encryption for external drives directly on Windows 11 Home. However, you can access and use BitLocker-encrypted drives created on Pro editions by entering the recovery key or password each time you connect them.
Is Bitlocker Compatible With Third-Party Disk Imaging Software?
You’ll find BitLocker sometimes aligns with third-party imaging tools—if they use sector-by-sector cloning. It’s essential you verify compatibility, as restoring images might disable encryption, requiring you to re-enable BitLocker and safeguard recovery keys again.
How Does Bitlocker Affect SSD Lifespan and Performance in Windows 11?
BitLocker slows your SSD’s performance by up to 45% due to software encryption, mainly impacting random access speeds. However, it doesn’t greatly reduce SSD lifespan, as it doesn’t substantially increase write cycles or wear over time.
Can Bitlocker Keys Be Stored in Azure Active Directory Automatically?
You can automatically store BitLocker keys in Azure Active Directory when you join or enroll devices properly, but if you skip Intune setup or miss required licenses, those keys won’t escrow, complicating recovery and compliance troubleshooting later.
What Happens if I Change My Motherboard After Bitlocker Encryption?
If you change your motherboard after enabling BitLocker, your system will detect a TPM mismatch and prompt for the BitLocker recovery key on boot. Without the key, you can’t access your encrypted drive or data.
Conclusion
To fix BitLocker issues in Windows 11, you diagnose errors, resolve installation blocks, and adapt to new encryption policies. You check for automatic activation, manage recovery keys, and guarantee user access. You follow best practices, apply troubleshooting steps, and document changes. By staying proactive, updating procedures, and consulting Microsoft resources, you keep drive encryption secure, compliant, and efficient. Tackle problems early, address every warning, and protect your data with confidence and clarity.