Zoom Camera Not Working Windows 11: Fix Zoom Video Issues
If your Zoom camera isn’t working on Windows 11, begin by checking the camera access settings and ensure Zoom has the necessary permissions.
Next, verify that the correct camera is selected in Zoom’s video settings and close any other applications that might be using the camera.
Additionally, inspect hardware connections, update drivers via Device Manager, and make sure that the Zoom app is current.
If you still encounter issues, there are more troubleshooting steps you can take for a comprehensive solution.
Enable Camera Access in Windows 11 Settings
To enable camera access in Windows 11 settings, start by checking the individual app permissions. Ensure that Zoom is listed and that its access is enabled. If you notice any apps with disabled permissions, be sure to toggle those settings on as well.
If you’re experiencing issues with multiple cameras, navigate to Bluetooth & devices > Cameras to view all connected devices. Make sure that your preferred camera is enabled for use. Additionally, you can manage cameras from the settings to ensure the appropriate one is selected for Zoom.
Remember, if you’ve made any changes to your camera settings, it might be necessary to restart your computer for those changes to take effect.
Grant Zoom Permission and Check Video Settings
To ensure a seamless video experience during your Zoom meetings, it’s crucial to grant Zoom permission for camera access and verify video settings after confirming that camera access is enabled in Windows 11 settings.
Here’s a step-by-step guide to help you optimize your setup:
- Grant Zoom Permissions: When launching the Zoom app, pay attention to any permission prompts that appear. Ensure that camera access is granted for Zoom to function correctly.
- Check Video Settings: In the Zoom application, navigate to the Video Settings dropdown. Make sure you’ve selected the appropriate camera device and not one that’s set by default; this can prevent your camera from activating.
- Close Other Applications: Make sure no other applications are using the camera, as this can block Zoom’s access. Close any apps that might interfere with camera functionality.
- Enhance Video Quality: To improve your video quality, enable the “HD video” option and select “Original ratio” in the settings. These adjustments will enhance the clarity and presentation of your video feed.
- Adjust for Low Light: If you’re in a dimly lit environment, consider activating the “Adjust for low light” feature. This setting can improve your visibility during video calls.
- Restart Zoom: After making any changes, it’s a good practice to quit and restart Zoom to ensure that all settings take effect adequately. Additionally, restart your computer after adjusting camera settings to see if the issue persists.
By following these steps, you’ll be well-equipped to enjoy a high-quality video experience in your Zoom meetings.
Optimize your Zoom settings for the best video performance!
Troubleshoot Camera Hardware and Drivers
Troubleshooting Camera Hardware and Drivers: A Step-by-Step Guide****
If you’re experiencing issues with your camera, whether it’s an external webcam or a built-in camera, follow these troubleshooting steps to resolve hardware and driver problems effectively.
1. Check Physical Connections****: Begin by ensuring that your camera is securely connected to your PC. For external webcams, try plugging it into different USB ports to identify any faulty connections.
For built-in cameras, verify that they’re enabled in your Windows settings.
2. Refresh Hardware Recognition: Unplug your camera and then reconnect it. This can help Refresh Hardware Recognition.
After reconnecting, restart your PC to reset the connection, which can often resolve minor issues.
3. Access Device Manager****: To further investigate, access the Device Manager by right-clicking “This PC” and navigating to “Cameras” or “Imaging devices.”
Look for any warning icons that may indicate driver issues.
4. Update Drivers: If you spot any problems, update your drivers.
You can do this automatically through Device Manager or manually by visiting the manufacturer’s website to download the latest versions.
5. Reinstall Camera Drivers: If updating the drivers doesn’t resolve the issue, consider uninstalling the camera driver.
After uninstallation, reboot your PC to allow Windows to reinstall the driver fresh, which can rectify persistent issues.
6. Stay Updated with Windows: It’s essential to keep an eye on Windows updates, as they can significantly impact your camera’s performance.
Regular updates ensure your drivers and hardware settings remain optimal.
Keep Zoom Application Up to Date
How to Keep Your Zoom Application Updated for Optimal Performance
Keeping your Zoom application updated is crucial for optimal performance and access to the latest features. To check for updates on Windows 11, open the Zoom application and click on the profile icon located in the upper-right corner.
Select “Check for Updates” from the drop-down menu. If an update is available, follow the on-screen prompts to download and install it. It’s important not to shut down your computer or close the Zoom application during this process, as doing so may interrupt the installation.
Be aware that some managed versions may have auto-updates disabled. If you experience this issue, consider reinstalling Zoom by completely removing the old version using a cleaning tool like CleanZoom.
To ensure you receive the most reliable updates, always download Zoom directly from the official website. Regularly checking for updates not only helps you benefit from improvements and new features but also reduces potential bugs, ensuring your video calls remain smooth and efficient.
Stay informed and keep your Zoom application up to date for the best video conferencing experience!
Resolve Windows 11 Specific Camera Restrictions
To ensure seamless video calls on Windows 11, it’s crucial to not only update your Zoom application but also to address specific camera restrictions that may be affecting functionality.
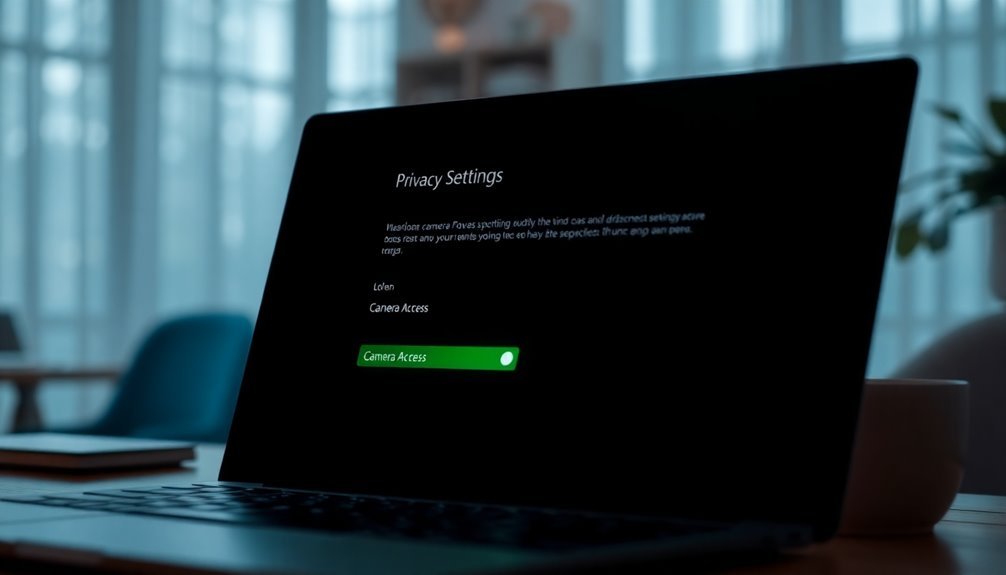
Start by checking your camera permissions: navigate to Settings > Privacy & Security > Camera. Ensure that camera access is enabled and that Zoom has permission to utilize your camera. If you encounter any issues, try toggling the camera access off and then back on.
Next, it’s important to inspect your camera drivers using Device Manager. Right-click your camera device, select “Update Driver,” and allow Windows to search for any available updates.
If problems persist, consider uninstalling the driver. Be sure to check the box labeled “Delete driver software” and then restart your computer to let Windows reinstall a generic driver.
Keep an eye on any recent Windows updates that may interfere with your camera’s performance. If your camera ceased functioning after an update, rolling back the driver might help resolve the issue.
Lastly, check for any physical privacy shutters on your camera hardware; if they’re closed, Windows will recognize the camera as disabled.
Inspect Additional Software and System Conflicts
When troubleshooting camera issues on Zoom, it’s crucial to consider potential conflicts with other software or system settings. Applications such as Skype, Microsoft Teams, and Discord may try to access your webcam simultaneously, preventing Zoom from functioning correctly.
Ensure these applications aren’t running in the background; you can manually close them using Task Manager.
Additionally, certain antivirus programs like McAfee and Norton may limit camera access for security purposes. To identify possible conflicts, temporarily disable any webcam protection features within your antivirus software.
Be aware that recent Windows updates can reset camera permissions, so it’s important to check your privacy settings and confirm that Zoom has the necessary access.
Also, make sure your camera drivers are up to date; rolling back to an earlier version or reinstalling them might resolve any problems you encounter.
Lastly, conflicts with third-party tools or your graphics card could impact Zoom’s performance. Consider disabling any unnecessary software or adjusting your graphics settings for optimal results.
Test Alternative Camera Applications
If you’ve eliminated software and system conflicts as possible causes for your camera issues on Zoom, testing alternative camera applications can help identify whether the problem is with Zoom or your webcam hardware.
Begin with the pre-installed Windows Camera app, which provides basic functionality and can quickly confirm if your webcam is functioning correctly. If the Windows Camera app fails to work, explore third-party alternatives like Photo Booth Pro or Webcamoid, which offer more features and creative effects.
For more advanced users, OBS Studio is an excellent option, allowing detailed recording and the management of multiple video sources.
By utilizing these alternative camera applications, you can assess your camera’s performance outside of Zoom, helping to isolate the issue to settings, drivers, or hardware problems.
Additionally, these apps enable you to evaluate video quality and adjust settings that may not be available in Zoom, making this process vital for effective troubleshooting.
This will ensure that you’re addressing the correct problem, leading to a smoother online meeting experience.
User-Reported Workarounds for Camera Issues
When experiencing camera issues on Zoom for Windows 11, there are several user-reported workarounds that can effectively restore camera functionality.
First, ensure that camera access and permissions are properly configured in Windows Settings. Navigate to Privacy & Security, and toggle on “Camera access.” Don’t forget to enable app-level permissions specifically for Zoom.
If you’re still encountering issues with your camera, try updating or reinstalling the camera driver through Device Manager. To do this, right-click on the camera device, select “Uninstall,” and then restart your PC. This will prompt Windows to automatically reinstall the default driver for your camera.
Another helpful tip is to use keyboard shortcuts, such as Fn + F10 on certain laptops, to reactivate the camera.
Additionally, make sure to close any applications that may be conflicting with Zoom by accessing the camera, as these can lock the camera and prevent Zoom from functioning properly.
After shutting down other apps, restart Zoom to check if the issue has been resolved. Implementing these workarounds may quickly help fix your Zoom video problems when using Windows 11.
Adjust Zoom Advanced Video Settings
To enhance your Zoom video experience after resolving camera issues with user-reported workarounds, it’s crucial to adjust the advanced video settings in the Zoom desktop app.
Begin by signing in to the app and clicking on your profile picture to access the Settings menu. From there, navigate to the Video category and select the Advanced Video Settings tab.
First and foremost, ensure that you have chosen the correct default camera from the dropdown menu. An incorrect camera selection can lead to video malfunction.
If you encounter any video issues, try changing the “Video capturing method” to “Media Foundation,” which can help resolve compatibility issues.
If your subscription supports it and your internet connection has adequate bandwidth, consider enabling HD video for better clarity.
Keep in mind that slow internet speeds may negatively affect video quality.
To enhance your appearance during calls, utilize the “Touch up my appearance” slider and adjust the low light settings as needed.
After making these adjustments, it’s a good practice to test your video settings before entering meetings.
This will ensure that all elements are functioning smoothly, contributing to a more professional and visually appealing video experience on Zoom.
Utilize Windows 11 Troubleshooting Tools
To efficiently resolve Zoom camera issues on Windows 11, utilize the built-in troubleshooting tools that can help diagnose and fix potential problems. Follow these simple steps for optimal results:
- Access Settings: Open the Settings menu by either selecting it from the Start menu or pressing the shortcut keys Win + I. Once there, navigate to System > Troubleshoot > Other Troubleshooters.
- Execute the Camera Troubleshooter: Locate the Camera troubleshooter and click on Run. This helpful tool scans for hardware conflicts, driver problems, and privacy settings that may be interfering with your camera.
- Analyze the Reports: After running the troubleshooter, review the summary of findings it provides. Follow any suggested actions, such as updating incompatible drivers or adjusting specific settings, to enhance your camera functionality.
Frequently Asked Questions
Why Does My Camera Work in Other Apps but Not Zoom?
Your camera likely lacks the necessary permissions for Zoom, even if it works in other apps. Check your privacy settings, verify Zoom’s selected camera, and guarantee the app has access to your camera.
Can I Use Multiple Cameras With Zoom on Windows 11?
Yes, you can use multiple cameras with Zoom on Windows 11. Just guarantee your system meets hardware requirements, then set up additional cameras in Zoom or use software like OBS to manage multiple feeds effectively.
What Should I Do if My Camera Is Showing a Black Screen?
So, your camera’s gone incognito, huh? First, reboot your computer, check other apps hogging the camera, update your drivers, and verify Zoom has permission. If all else fails, reset the camera settings—just like magic!
How Can I Test My Camera Before Joining a Zoom Meeting?
To test your camera before joining a Zoom meeting, visit zoom.us/test. You’ll see your video feed, allowing you to adjust framing and lighting. Verify everything looks good before the actual meeting starts.
Are There Specific Zoom Settings for Low-Bandwidth Environments?
Think of your bandwidth as a narrow river. In low-bandwidth environments, disable video, mute when not speaking, limit screen sharing, and turn off other applications to guarantee smoother Zoom communication and conserve precious bandwidth.
Conclusion
To sum up, if you’re facing camera issues on Zoom in Windows 11, don’t let it be a modern-day tragedy. By enabling camera access, checking Zoom permissions, and exploring troubleshooting tools, you can quickly reclaim your video calls. Keep your application updated and test alternatives if needed. With these tips, you’ll guarantee you’re always ready for a virtual face-to-face, turning potential tech woes into seamless connections. Remember, a clear video can make all the difference!