Windows 7 WiFi Not Working: Fix Windows 7 Wireless Connection

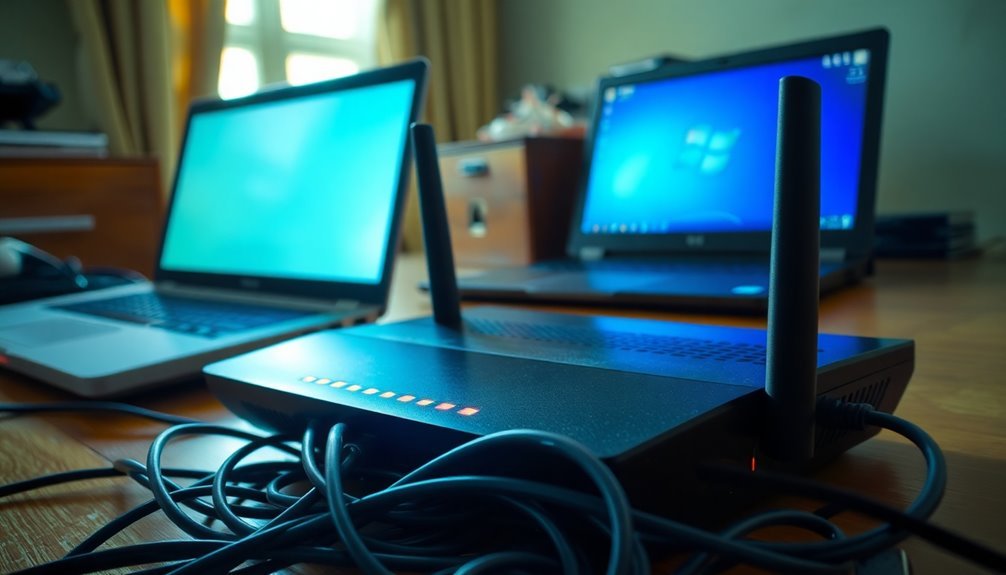
If your Windows 7 WiFi isn’t working, start by power cycling your router and modem. This simple step can often resolve connectivity issues.
Next, check for outdated drivers in Device Manager and update them from the manufacturer’s site. Keeping drivers up to date is essential for optimal performance.
Utilize the Windows Network Troubleshooter to diagnose any issues. This built-in tool can help identify and resolve common network problems.
Ensure that your network settings are correct. Make sure you’re connected to the right SSID and that you have entered the correct password.
If you’re still experiencing problems, consider advanced troubleshooting techniques. These methods can assist you in identifying and resolving more complex issues.
Discover more effective solutions ahead to help you get your WiFi working smoothly again.
Common Causes of Windows 7 WiFi Connectivity Issues
When facing WiFi connectivity issues on Windows 7, it’s important to understand the common culprits that could be causing the problem. One major factor often lies in outdated or incompatible network drivers. If your wireless drivers haven’t been recently updated, you may notice inconsistent connectivity, especially following a router firmware update.
For Windows 7 users, it’s advisable to manually download the latest drivers directly from the manufacturer’s website, as the operating system may not automatically install the latest versions.
Router and network configuration settings can also play a significant role in disrupting your internet connection. Changes to your SSID or network passwords can lead to immediate connectivity problems. Additionally, mismatches in security protocols or frequency bands can further complicate the situation. If you encounter issues connecting to a specific network, it may indicate a configuration mismatch that needs to be addressed.
Another important aspect to consider is hardware limitations. Older wireless adapters may struggle to maintain a reliable connection, and physical modifications, like the addition of new network cards, might only offer a temporary fix.
Lastly, IP address conflicts or incorrect subnet settings are crucial factors that could prevent Windows 7 from establishing a valid connection. Therefore, it’s essential to review and verify these configurations to ensure a stable WiFi experience.
Basic Troubleshooting Steps to Resolve WiFi Problems
To effectively resolve WiFi problems on Windows 7, it’s essential to follow a series of basic troubleshooting steps that can quickly restore your internet connection.
Start by power cycling your networking hardware. Shut down your PC, unplug both your router and modem, wait approximately 45 seconds, then reconnect the devices. Once everything is stable, power on your PC and check the WiFi connectivity to see if the issue has been resolved.
If you’re still experiencing problems, utilize the Windows Network Troubleshooter. Navigate to Control Panel > Network and Internet > Network and Sharing Center. From there, select “Fix a Network Problem” to initiate diagnostics that can help identify and resolve issues.
When problems persist, open Command Prompt with administrative privileges. You can do this by searching for ‘cmd’ in the Start menu, then right-clicking and selecting “Run as Administrator.” Execute the following commands one by one for effective troubleshooting: `netsh winsock reset`, `netsh int ip reset resetlog.txt`, and `ipconfig /flushdns`. Configuring the WLAN AutoConfig service is also crucial to ensure your WiFi adapter functions correctly.
Another important step is to manage the WLAN AutoConfig service. Type `services.msc` in the Run dialog (accessed by pressing Win + R), locate the WLAN AutoConfig service, and restart it to refresh the service.
Finally, head over to Network Connections, right-click on your wireless adapter, and choose to disable and then re-enable it. After completing these steps, test your WiFi again to check for stable connectivity.
Following these troubleshooting steps should help you effectively solve WiFi issues on your Windows 7 device.
Driver and Device Management for Wireless Adapters
Effective management of drivers and devices is essential for ensuring that your wireless adapter operates optimally on Windows 7. Proper procedures for driver installation and device management can prevent connectivity issues and enhance performance.
Here are some key steps to consider for optimal wireless adapter functionality:
- Use Device Manager: To manually install drivers, navigate to Device Manager and select the appropriate .inf file for your wireless adapter.
- Remove Conflicting Drivers: Before installing new drivers, it’s critical to eliminate any old or conflicting drivers to prevent installation errors and ensure smooth functioning.
- Download Latest Drivers: Always obtain the most recent drivers directly from the official vendor websites. This ensures you have the latest features and fixes.
- Check Hardware ID: If you encounter missing drivers, check the hardware ID in Device Manager and search online to find the correct drivers for your wireless adapter.
- Use .exe Installers: For ease of installation, utilize .exe installers for automatic setups unless specific circumstances require manual .inf installation.
If your wireless adapter doesn’t appear in Device Manager, try scanning for hardware changes.
Additionally, ensure that the device is enabled in your BIOS settings.
It’s crucial to use the correct driver version that matches your system type to avoid compatibility issues. By meticulously managing drivers for your Windows 7 wireless adapter, you can effectively troubleshoot and resolve many common connectivity problems.
Checking Network Configuration Settings
After ensuring that your wireless adapter drivers are properly managed, the next important step in troubleshooting WiFi connection issues on Windows 7 is to check your network configuration settings.
Begin by navigating to the Network and Sharing Center. You can do this by right-clicking the network icon located near the system clock or via the Control Panel. In this section, you’ll have the ability to manage wireless networks, view saved profiles, and set priorities for your connections.
Next, review your adapter settings in the “Change adapter settings” area to confirm that your wireless adapter is enabled. Keep in mind that a disabled adapter won’t detect any WiFi networks, regardless of the hardware status.
Ensure that your network settings are correctly configured, typically using automatic IP and DNS addressing unless a static IP is explicitly needed. Confirm you’re connecting to the correct SSID and that your security settings align with your router’s specifications.
Lastly, make sure to review your firewall settings to allow wireless traffic, and consider removing and re-adding any problematic profiles to refresh your network configuration.
This comprehensive approach can help you resolve WiFi connection issues effectively on Windows 7.
Advanced Troubleshooting Techniques

When dealing with persistent WiFi issues on Windows 7, basic troubleshooting may not suffice. Implementing advanced troubleshooting techniques can significantly enhance your connectivity experience. Here are some effective strategies to resolve your WiFi problems:
- Update Wireless Network Adapter Drivers: Access Device Manager to update your wireless network adapter drivers. Keeping these drivers up-to-date is essential for resolving communication issues between your computer and router.
- Utilize Built-in Windows Troubleshooting Tools: Navigate to the Network and Sharing Center and use Windows’ integrated troubleshooting tools. These tools perform a systematic diagnosis that can help identify and resolve network issues efficiently.
- Optimize Network Adapter Settings: Adjust your network adapter settings to ensure compatibility with your router’s wireless capabilities and secure protocols. This optimization can lead to improved performance and stability.
- Perform a Network Reset: Consider executing a network reset. This process clears out all settings and reinitializes your networking components, providing a clean slate to tackle ongoing WiFi problems.
- Inspect Hardware for Faults: Examine your hardware for any potential faults. If internal issues are suspected, try using external USB WiFi adapters as a temporary solution to troubleshoot and enhance your connection.
Understanding Common Symptoms of WiFi Issues
Diagnosing Common WiFi Issues: A Guide to Recognizing Symptoms****
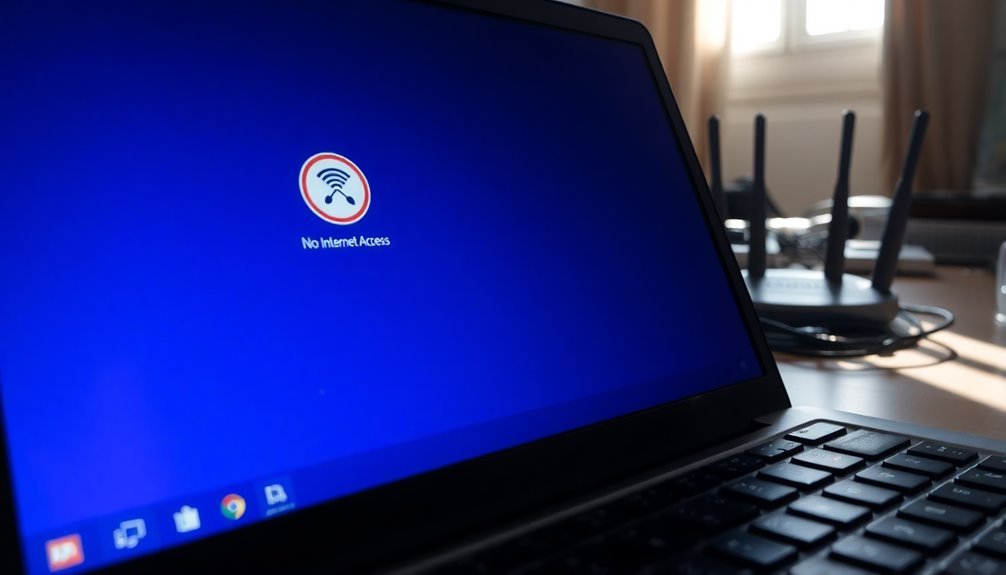
When it comes to identifying WiFi issues, understanding the common symptoms that disrupt internet connectivity is crucial. One of the first signs you may encounter is that your Wi-Fi network doesn’t appear at all. This can happen if your router isn’t broadcasting its SSID, or if airplane mode is inadvertently enabled on your device.
If you’ve recently upgraded from an older version of Windows, you might find that wireless networks aren’t registering. In such cases, it’s essential to check your network adapter in the Device Manager. If the adapter is disabled or missing, you won’t see any available connections.
Another common symptom of WiFi issues is the Wi-Fi icon on your taskbar not indicating a connection or displaying an exclamation mark. You may notice visible networks that appear greyed out, which often points to driver problems or conflicts within the network settings.
Authentication issues may also occur, often due to incorrect passwords or mismatches in encryption settings, which can block access to your network.
Physical distance from the router and various obstacles, such as walls or furniture, can lead to weakened signals and connectivity instability. Moreover, hardware faults in your router or network card can result in persistent disconnections, even when all settings appear correctly configured.
Recognizing these symptoms is the fundamental first step in troubleshooting WiFi connectivity issues, helping you identify and resolve the problem efficiently.
Resolving Specific Error Messages Related to WiFi
When facing specific error messages related to WiFi connectivity, it’s crucial to address troubleshooting systematically to regain a stable connection. Here are common WiFi error codes and effective solutions to resolve them:
- Error Code 10: This often indicates an issue with your wireless drivers. To fix it, consider updating the drivers or restoring your system to a prior state where the WiFi connections worked well.
- Error Code 22: For this error, the device may be disabled; re-enabling it in Device Manager is a good first step. Sometimes, a simple restart of your computer can also resolve the issue.
- Error Code 28: If you receive this code, it usually means that the driver isn’t installed. Uninstall the current driver and restart your computer, or manually download the latest driver directly from the manufacturer’s website.
- Error Code 43: This error suggests there may be a hardware issue or driver conflict. Try updating or rolling back your drivers. Additionally, ensure that the device is enabled in BIOS settings.
- Error Code 45: This indicates that the wireless device isn’t connected. Check all physical connections, display hidden devices in Device Manager, and uninstall any outdated or irrelevant entries.
Importance of Keeping Wireless Drivers Updated
Keeping your wireless drivers updated is essential for ensuring optimal connectivity and enhanced security. By regularly updating these drivers, you can patch vulnerabilities that exist in the communication between your Wi-Fi hardware and your system, significantly lowering the risk of cyberattacks and malware. Outdated drivers can leave your system exposed to potential security threats, making updates critical for a safe online experience.
In addition to security improvements, updating your wireless drivers optimizes communication protocols. This leads to enhanced latency and throughput, resulting in fewer dropped connections and better support for the latest Wi-Fi standards. Staying current with driver updates ensures compatibility with modern routers and access points, providing a seamless internet experience.
Moreover, updated wireless drivers contribute to system stability by fixing existing bugs and improving error handling. This results in more reliable internet access—especially important during critical tasks. Regular driver maintenance not only extends your device’s lifespan but also boosts battery life by reducing unnecessary processing loads.
By prioritizing the updating of your wireless drivers, you not only improve your overall user experience but also create a more secure, efficient, and reliable wireless environment.
Stay ahead of potential threats and enjoy high-performance connectivity by keeping your wireless drivers up to date.
When to Seek Professional Help for Network Problems
Understanding the significance of updating wireless drivers is key to knowing when to seek professional help for network issues. If you’re facing persistent connectivity problems despite basic troubleshooting efforts, it’s time to reach out to an expert.
Here are some scenarios where professional assistance is essential:
- You’ve exhausted all basic troubleshooting steps but still can’t restore WiFi access.
- Your network issues are impacting crucial business operations and need immediate attention.
- You’re managing complex network setups that require specialized diagnostic tools.
- There are potential security threats, like malware or cyber-attacks, that need urgent assessment.
- Network performance issues are hindering remote work or disrupting cloud services.
In these situations, contacting IT professionals can save you valuable time and prevent further complications. They’ve the expertise and tools required for effective troubleshooting, ensuring a swift resolution and enhanced security for your network.
Don’t wait for minor issues to escalate; early intervention can protect your business operations and improve overall network reliability.
Frequently Asked Questions
Can I Use an Ethernet Cable if Wifi Is Not Working?
Yes, you can use an Ethernet cable if Wi-Fi isn’t working. It provides a faster, more stable connection, bypassing wireless issues. Simply plug in the cable, and your device typically recognizes the wired connection automatically.
How Do I Enable the Wifi Adapter in BIOS?
To enable the WiFi adapter in BIOS, press the designated key during startup, navigate to network settings, locate the wireless adapter option, and change its status to “Enabled.” Save changes before exiting BIOS.
What Should I Do if My Wifi Is Slow?
Think of your WiFi as a busy highway. To ease congestion and boost speed, start by restarting your modem and router, minimizing active devices, checking for interference, and ensuring your equipment is up-to-date.
Is It Safe to Reset My Router to Factory Settings?
Yes, it’s generally safe to reset your router to factory settings. However, make sure you back up your current configuration first, as all settings will erase. Reconfiguration is necessary to restore secure internet access afterward.
How Can I Check if My Wifi Hardware Is Faulty?
To assess your Wi-Fi hardware’s health, inspect the wireless adapter in Device Manager, check connectivity indicators, and test the signal with tools. A thorough evaluation can pinpoint compatibility, driver, or hardware issues affecting performance.
Conclusion
In the world of technology, your WiFi connection is like the lifeblood flowing through a circuit; without it, you’re cut off from essential resources. By following the troubleshooting steps outlined and ensuring your drivers are up-to-date, you can restore that crucial connection. Remember, a stable network isn’t just a luxury—it’s a necessity. If issues persist despite your efforts, don’t hesitate to seek professional help; sometimes, even the most skilled technicians need a guiding signal to navigate complex problems.