Windows Error Diagnostics: General Error Troubleshooting

To troubleshoot Windows errors, start with built-in tools like Event Viewer for logs and Reliability Monitor for stability issues. Use Memory Diagnostic to check for RAM problems.
Run CHKDSK and SFC via Command Prompt to fix disk and system file errors. Update drivers using Device Manager.
Check for malware with your security software to ensure system safety. Adjust privacy and diagnostic data settings in Windows to manage what’s collected.
The next steps will show you how to pinpoint and resolve specific problems efficiently.
Overview of Windows Diagnostic Tools

Comprehensive Guide to Windows Diagnostic Tools for Effective Troubleshooting
When troubleshooting Windows system issues, leveraging powerful Windows diagnostic tools can help you quickly identify and resolve problems. Start by using Event Viewer to access detailed logs of system, security, and application events. You can filter events by date, type, or source to efficiently pinpoint errors or warnings impacting your system’s performance.
Use Task Manager and Resource Monitor to monitor real-time CPU, memory, disk, and network usage. These tools help detect performance bottlenecks and allow you to end unresponsive processes, improving system responsiveness. The Administrative Tools folder contains various utilities that provide both event logs and performance information for in-depth system analysis.
The Windows Reliability Monitor offers a visual timeline of system stability, highlighting critical events and recent changes that may cause problems.
For hardware diagnostics, the Windows Memory Diagnostic Tool scans your RAM for potential errors after rebooting your PC. Additionally, Performance Monitor and other Administrative Tools provide in-depth tracking of performance counters, helping you identify resource-heavy applications and long-term trends affecting your system.
By systematically using these Windows diagnostic tools, you can enhance troubleshooting efficiency and maintain optimal system performance.
Explore these essential tools today to keep your Windows PC running smoothly.
Identifying Common Windows Error Types
Common Windows Error Types: Causes and Solutions
Windows operating systems are built for stability, but users often face various common Windows error types that can interrupt workflows and reduce system performance. Understanding these error categories is crucial for effective troubleshooting and quick resolution.
DLL Errors in Windows occur when essential Dynamic Link Library files are missing or corrupted, causing application crashes or malfunctioning programs. Shared DLL files are crucial for Windows and third-party software, and their corruption or deletion can lead to program crashes or registration failures.
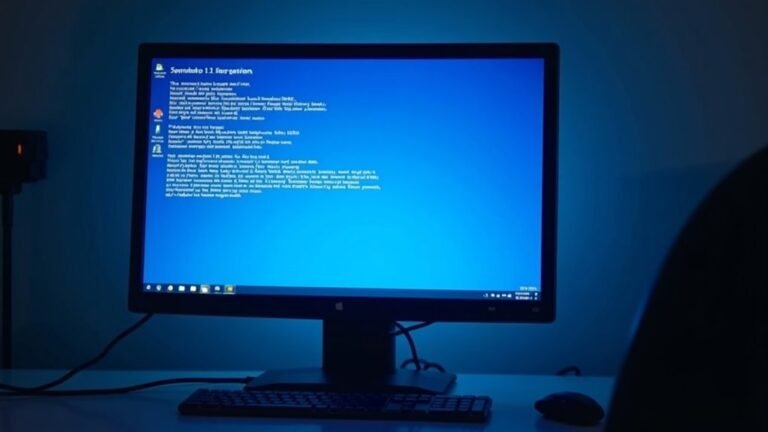
The infamous Blue Screen of Death (BSoD) indicates critical system failures often related to hardware issues or corrupt system files, requiring immediate attention.
Disk Errors, such as “disk full” warnings or unreadable files, may result from failing hard drives, sudden removal of storage devices, or corrupted sectors. Addressing these promptly can prevent data loss.
Driver Errors frequently lead to hardware malfunction and typically require driver updates or reinstallation to restore proper device functionality.
Access Errors, including ERROR_ACCESS_DENIED, signal permission restrictions or locked files that block user operations.
System Error Codes like ERROR_FILE_NOT_FOUND or ERROR_PATH_NOT_FOUND highlight missing files or directories essential for software operation.
Application Errors often arise from incompatible file formats, program corruption, or attempts to open multiple instances of the same application.
Update and Connection Errors, such as error code 0x80070002 or various network-related errors, are commonly caused by missing update files, denied access rights, or connectivity problems.
Identifying and fixing these Windows error types ensures smoother system performance and enhanced user experience.
By recognizing these common Windows error types and their causes, users can implement targeted solutions to maintain system health and productivity.
For more troubleshooting tips and detailed guides on fixing Windows errors, continue exploring our resources.
Step-by-Step Guide to Running System Diagnostics
How to Run System Diagnostics on Windows: A Step-by-Step Guide
If you’re experiencing persistent errors or performance issues on your Windows PC, running system diagnostics is a crucial first step to identify and resolve problems.
Windows offers several built-in diagnostic tools that can help you pinpoint hardware and software issues quickly and efficiently.
Follow this comprehensive step-by-step guide to run system diagnostics on your Windows machine:
1. Access System Diagnostics During Startup
Press the F2 key while your computer boots to enter the System Diagnostics menu. Here, you can perform hardware tests such as the Fast Test or explore advanced diagnostic options to check components like memory, hard drive, and CPU.
2. Use Windows Settings for Built-In Troubleshooting
Navigate to Settings > System > About or Settings > Update & Security to find troubleshooting tools and performance monitoring features. These built-in utilities can help detect and fix common system issues without needing third-party software.
3. Monitor Performance with Performance Monitor
Press Windows + R, type perfmon, and hit Enter to open the Performance Monitor. This tool provides real-time system metrics, helping you track CPU usage, memory consumption, disk activity, and network performance to diagnose bottlenecks.
4. Run Command-Line Diagnostics for System Integrity
Open Command Prompt as Administrator and execute the following important commands to scan and repair system files and disk errors:
- `sfc /scannow` — Checks and repairs corrupted system files.
- `DISM.exe /Online /Cleanup-image /Restorehealth` — Repairs the Windows image.
- `chkdsk /f /r` — Scans and fixes disk errors and bad sectors.
5. Quickly Find Diagnostic Tools with Windows Search
Type keywords like “diagnostics” or “performance” in the Windows search bar to quickly access relevant utilities and troubleshooters.
By following these steps to run system diagnostics on Windows, you can effectively identify hardware faults, software corruption, and performance issues, helping keep your PC running smoothly.
For more troubleshooting tips and Windows optimization guides, stay tuned to our blog.
Analyzing Diagnostic Logs and Reports

Effective troubleshooting begins with mastering diagnostic logs and reports. Utilize powerful tools like Windows Event Viewer to open and analyze event log files (.evtx), capturing critical system, security, and application events.
Enhance your diagnostics with PowerShell commands such as Get-WinEvent and Get-EventLog, allowing precise filtering by event ID, log type, or timeframe to target relevant issues quickly. For more advanced log analysis, leverage LogParser’s SQL-like queries to extract detailed insights.
Focus on recent errors, warnings, and critical events to efficiently identify problems. Pay close attention to essential fields including Event ID, Task Category, Severity Level, Keywords, User, Computer, and OpCode to accurately diagnose root causes and contextualize events.
Use timestamps to build comprehensive event timelines and correlate related entries across Application and System logs. When working with large volumes of data, apply filters or implement Sigma rules to streamline your analysis process.
Troubleshooting Memory, Driver, and Registry Issues
Troubleshooting Windows system instability and Blue Screen of Death (BSOD) errors? Focus on fixing memory, driver, and registry issues to stabilize your PC.
Memory problems, outdated or faulty drivers, and corrupted registry files are common causes of Windows crashes and BSODs. Start by running the Windows Memory Diagnostic Tool (`mdsched.exe`) to check for defective RAM. Disable any overclocking settings to rule out memory instability.
Next, open Device Manager to identify driver problems—update or reinstall drivers, especially for storage devices and graphics cards, to ensure compatibility and performance. Performing a thorough malware scan is crucial since malware infections can corrupt the Windows registry and cause memory errors.
If your issues began after installing new hardware or software, try uninstalling or rolling back those changes to restore system stability.
Key Steps to Troubleshoot BSOD and Windows Instability:
- Run Windows Memory Diagnostic after reboot to test RAM health.
- Reseat or replace faulty RAM modules to fix physical memory issues.
- Update or roll back drivers flagged with warnings in Device Manager.
- Perform malware scans to prevent registry corruption and memory errors.
- Use System Restore to undo problematic registry or system changes.
Resolving File and Folder Operation Errors
How to Fix File and Folder Operation Errors in Windows
File and folder operation errors in Windows can disrupt your productivity, whether you’re denied access, encounter corrupted directories, or see error messages like “the directory isn’t empty.”
These common issues often result from file system corruption, permission conflicts, malware infections, or problematic Windows updates.
Here are effective solutions to resolve these file and folder errors:
1. Run CHKDSK to Repair File System Corruption
Use the CHKDSK utility with administrative privileges to scan and fix file system errors on the affected drive. This tool helps restore corrupted directories and improves system stability.
2. Fix Permission Issues with PowerShell
Reset or adjust folder permissions using PowerShell commands such as `get-acl` and `set-acl`. This method resolves access denied errors caused by incorrect permission settings.
3. Remove Stubborn Files and Folders
If you can’t delete a folder because it’s “not empty,” check for hidden files or system locks. Boot into Safe Mode or use command-line tools like `del` and `rmdir` to force removal of stubborn items.
4. Scan for Malware
Malware infections can modify files and folder permissions, leading to unexpected errors. Run a full system scan with your antivirus software to detect and remove malicious threats.
5. Use System File Checker (SFC) for Faulty Updates
Corrupted system files from faulty updates or software conflicts can cause file operation errors. Run the System File Checker tool (`sfc /scannow`) to repair damaged Windows system files.
Regular maintenance with CHKDSK and SFC is essential to prevent many file and folder operation errors.
Following these troubleshooting steps will help you fix Windows file access issues quickly and efficiently. For more Windows troubleshooting guides, stay tuned to our blog.
Managing Privacy and Diagnostic Data Collection

Managing Privacy and Diagnostic Data Collection in Windows: A Complete Guide
Windows uses diagnostic data to enhance your device’s security and performance, but you have full control over what information is shared with Microsoft.
Diagnostic data is divided into two categories: required and optional. Required data includes vital system information such as Windows version, installed drivers, and update status, ensuring your device operates securely and efficiently.
Optional diagnostic data, which you can enable or disable, provides additional insights like browsing history and advanced error reports but isn’t mandatory.
How to Manage Privacy and Diagnostic Data Collection in Windows
- Open Settings > Privacy > Diagnostics & feedback to choose the diagnostic data level you want to send to Microsoft.
- Use the Diagnostic Data Viewer tool to review exactly what diagnostic information your device transmits.
- Delete diagnostic data stored on your device or request its removal from Microsoft through the Microsoft Privacy Dashboard.
- For Windows Enterprise or Education editions, you can completely disable diagnostic data collection if necessary.
- Check data retention policies to understand how long your diagnostic data is stored and when it’s automatically deleted.
By customizing these privacy settings, you ensure your personal data is handled according to your preferences, enhancing your Windows privacy and security.
Stay in control of your diagnostic data today to protect your privacy and optimize your Windows experience.
Ensuring Compatibility With Windows Versions and Tools
Ensuring Compatibility With Windows Versions and Diagnostic Tools for Seamless Troubleshooting
As Microsoft phases out support for older Windows versions, ensuring your diagnostic tools and hardware are fully compatible with the latest Windows operating systems is essential for uninterrupted troubleshooting and system maintenance.
Microsoft’s Windows support lifecycle indicates that Windows 10 support ends in October 2025, with many diagnostic software vendors now focusing exclusively on Windows 11 or newer versions.
Before upgrading to Windows 11, verify that your PC meets the minimum system requirements: a dual-core 1 GHz CPU, 4GB RAM, 64GB storage, DirectX 12 compatible GPU, UEFI firmware with Secure Boot capability, TPM 2.0 module, and a 720p display.
Utilize Microsoft’s PC Health Check tool or run dxdiag.exe to confirm your system’s compatibility.
If your setup depends on legacy diagnostic tools, check for the latest software updates or refer to manufacturer compatibility lists to ensure support on Windows 11.
Always confirm that your diagnostic tools officially support your Windows version to prevent installation issues and ensure accurate error detection and resolution.
Proactive hardware and software upgrades are key to avoiding disruptions as diagnostic platforms evolve alongside Windows updates.
Optimize your PC maintenance strategy by staying informed about Windows compatibility requirements and diagnostic tool support to maintain efficient and reliable system troubleshooting.
Frequently Asked Questions
Can I Automate Windows Diagnostics to Run on a Schedule?
Yes, you can automate Windows diagnostics on a schedule. Use Task Scheduler to run built-in tools or PowerShell scripts at set intervals. Configure tasks for off-peak hours, automate logs, and update scripts for reliable, ongoing monitoring.
How Do I Share Diagnostic Logs With Remote Technical Support?
You can share diagnostic logs by exporting them from your device, then emailing both the log and its review document to support. Always use secure methods, verify sensitive data’s removed, and follow your organization’s recommended sharing procedures.
Are There Diagnostic Tools for Non-Windows Operating Systems?
Absolutely, you’ve got a whole toolbox at your fingertips for non-Windows systems. Fire up tools like MemTest86 for RAM, Prime95 for CPUs, or Apple Diagnostics on Macs—these help you pinpoint hardware problems quickly and efficiently.
What Should I Do if Diagnostics Find No Issues but Problems Persist?
If diagnostics find nothing but issues persist, update drivers, check for software conflicts, run extended memory tests, and review event logs. Reset BIOS to defaults, guarantee proper cooling, and consider a clean boot to isolate troublesome startup items.
Can Windows Diagnostics Identify Failing Hardware Components Like Hard Drives or GPUS?
You might expect Windows diagnostics to magically name the exact dying part, but they usually just wave a vague flag. Don’t rely on them alone—use third-party tools or vendor tests to pinpoint hard drive or GPU failures.
Conclusion
Think of Windows diagnostics as your toolkit for guiding through a maze—each tool lights your path past errors and system obstacles. By running diagnostics, analyzing logs, and resolving issues with memory, drivers, or files, you’re actively steering your PC toward stability. Remember to manage privacy settings and make certain your tools fit your Windows version. With these strategies, you’ll turn troubleshooting into a routine maintenance check, keeping your system running smoothly and efficiently.