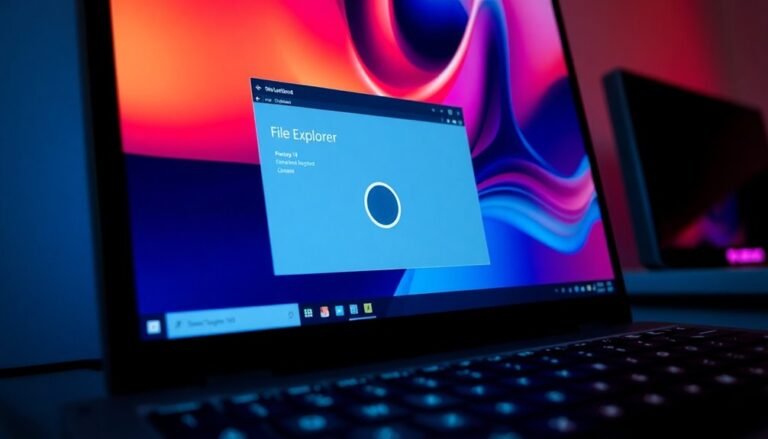
Speed Up Windows Explorer: File Manager Performance Tips

To speed up Windows Explorer, start by disabling animation effects and unnecessary visual features in Settings to reduce lag. Restart Explorer from Task Manager if it’s slow.
Optimize search indexing by including only frequently accessed folders and disabling resource-hungry background processes. Check for file system errors with SFC and Disk Cleanup.
Tune your virtual memory for better performance. Keeping your folder views simple and clearing the thumbnail cache regularly also helps.
Explore further for advanced performance tweaks.
Restarting and Resetting Windows Explorer

How to Restart and Reset Windows Explorer for Improved Performance
If Windows Explorer is running slowly or becomes unresponsive, restarting or resetting the process can fix common issues without restarting your entire PC. Here’s a quick guide to restarting and resetting Windows Explorer on Windows 10 and Windows 11:
Restart Windows Explorer via Task Manager****
- Press Ctrl + Shift + Esc to open Task Manager.
- In the Processes tab, locate Windows Explorer.
- Right-click Windows Explorer and select Restart.
This will refresh your desktop, taskbar, and Start menu, but note that any open File Explorer windows will close. Windows Explorer, or File Explorer, is essential for navigating and managing files and folders, making it a core part of the Windows user experience.]
Reset Windows Explorer Completely
- Open Task Manager and go to the Details tab.
- Find explorer.exe, right-click it, and choose End task to stop the process.
- Click File > Run new task.
- Type explorer.exe and press Enter to launch Windows Explorer again.
Alternatively, hold Ctrl + Shift and right-click the taskbar to access the hidden Exit Explorer option for a clean shutdown, then restart Explorer from Task Manager or the Run dialog.
Restart Windows Explorer Using Command Prompt****
Open Command Prompt and run the following commands:
“`
taskkill /f /im explorer.exe
start explorer.exe
“`
This method forcefully stops and restarts Windows Explorer, helping to restore system responsiveness without closing other programs.
By following these simple steps to restart or reset Windows Explorer, you can quickly resolve performance issues, improve system responsiveness, and avoid full system restarts.
For more Windows troubleshooting tips, keep exploring our guides.
Disabling Visual Effects and Animations
How to Disable Visual Effects and Animations in Windows 11 for Better Performance
If you want to improve your Windows 11 performance by reducing visual effects and animations, follow these simple steps.
First, go to Settings > Accessibility > Visual Effects and toggle off Animation effects to minimize UI animations. This helps speed up your system without completely disabling all effects.
For more precise control, open Performance Options by searching for “Adjust the appearance and performance of Windows,” then uncheck Animate windows when minimizing and maximizing to further reduce animation delays.
Additionally, you can speed up context menus by modifying the MenuShowDelay value in the Windows Registry. Remember to back up your registry before making any changes to avoid potential issues.
Disabling visual effects can reduce system resource usage, which helps improve overall performance, especially on older hardware.
Managing Search Indexing and Background Processes
Optimize Windows Explorer Search Indexing to Enhance PC Performance
Windows Explorer’s search functionality is a powerful tool for quickly finding files, but its search indexing and background processes can sometimes slow down your PC, especially on older computers or systems with limited resources.
By optimizing search indexing settings, you can significantly improve Windows Explorer speed and overall system performance. Follow these expert tips to manage search indexing effectively:
- Switch to Classic Indexing Mode: Navigate to Settings > Privacy & security > Searching Windows and select the Classic mode. This limits indexing to common folders, reducing CPU and disk usage for faster performance.
- Customize Indexed Locations: Access Advanced indexing options to include only frequently searched folders. Exclude large or unnecessary directories to minimize indexing overhead and speed up searches.
- Refine Indexed File Types: Remove rarely used or large file formats from the index to decrease index size and reduce background activity, enhancing system responsiveness.
- Configure Indexer Backoff Settings: Choose whether indexing should pause during active computer use (default) or run continuously for quicker updates. Keep in mind, continuous indexing may impact performance.
- Manage the Windows Search Service: For maximum PC performance, temporarily stop or set the Windows Search service to manual. Note that doing this disables fast search capabilities.
By fine-tuning these Windows Explorer search indexing settings, you can enjoy faster file searches and a smoother computing experience.
Optimize your PC today for better speed and efficiency!
System File Checking and Disk Maintenance
Boost Windows Explorer speed and ensure reliable performance by maintaining system file integrity and disk health. Start by running the Deployment Image Servicing and Management (DISM) tool: open an elevated Command Prompt and enter `DISM.exe /Online /Cleanup-image /Restorehealth`.
After DISM completes, run the System File Checker with the command `sfc /scannow` to detect and repair corrupted system files. Make sure to keep the Command Prompt window open until the scan reaches 100%. If the SFC scan stalls or fails, try running it in Safe Mode and temporarily disable background services like BITS or Windows Search. For persistent problems, consider manually replacing damaged files or performing a Windows reinstallation as a last resort.
In addition to system file checks, perform regular disk maintenance to optimize Windows Explorer speed. Use Disk Cleanup to remove unnecessary files and free up disk space. Run `chkdsk` to fix file system errors and maintain disk health.
Regularly defragment hard disk drives (HDDs) to improve performance—note that defragmentation isn’t needed for solid-state drives (SSDs). To maximize Windows Explorer responsiveness, always keep at least 15-20% of your disk space free.
Power Management and Performance Settings

Power Management and Performance Settings for Optimal PC Speed
- Configure both minimum and maximum processor states to 100% within Windows Power Options to maximize CPU performance.
- Utilize PowerSettingsExplorer.exe to access and modify hidden power parameters easily, eliminating the need for complex registry edits.
- Disable Windows power-saving features that turn off USB and network devices by adjusting settings in Device Manager, ensuring continuous device connectivity.
- Set Processor idle demote and promote thresholds to 100% to minimize Deferred Procedure Call (DPC) latency and enhance system responsiveness.
- Turn off Ethernet and Network Interface Card (NIC) power-saving options to maintain stable and uninterrupted data transfers.
Additionally, consistently monitor CPU temperatures to prevent thermal throttling and maintain peak performance.
Implementing these power management and performance settings can significantly improve your PC’s speed and reliability.
Folder and File Management Optimization
Effective folder and file management is essential for enhancing the speed and responsiveness of Windows Explorer. Implement a clear and consistent folder naming convention, and keep folder nesting to a maximum of three or four levels to reduce navigation time and avoid confusion.
Organize related files into thematic folders and regularly archive or transfer old data to external storage to maintain streamlined, efficient directories. Pin your frequently used folders to Quick Access for immediate retrieval, while removing unnecessary ones to reduce clutter.
Customize Windows Libraries to aggregate similar files from multiple locations, ensuring only workflow-relevant folders remain visible.
Use descriptive, keyword-rich file names that include dates or project identifiers, and avoid special characters to boost search accuracy in Windows Explorer.
Utilize the Detail view to sort files by metadata such as date modified or file type for quicker file location. Optimize Windows Search Indexing by including only pertinent folders and periodically rebuilding the index to maintain fast and precise search results.
Regularly relocate large or infrequently accessed files from your primary drive to improve overall system performance.
Clearing Thumbnail Cache and Temporary Files
How to Clear Thumbnail Cache and Temporary Files to Speed Up Windows Explorer
If Windows Explorer is running slow or takes a long time to display folder contents, an oversized or corrupted thumbnail cache is often the cause. Windows stores thumbnail images in cache files such as thumbcache_xxx.db, located in your user profile’s AppData folder.
Over time, these cache files can grow to hundreds of megabytes, especially if you frequently browse folders filled with images, videos, or documents. Excessive or corrupted thumbnail caches can significantly slow down Explorer’s startup and folder loading times, particularly on slower hard drives.
To improve Windows Explorer performance, regularly clearing the thumbnail cache and related temporary files is essential. Follow these effective methods to clear Windows thumbnail cache:
- Use Windows Disk Cleanup and select the “Thumbnails” option to remove old cache data safely.
- Manually delete thumbnail cache files from `%userprofile%AppDataLocalMicrosoftWindowsExplorer`.
- Restart Windows Explorer or reboot your PC after clearing cache files to apply changes immediately.
- Automate thumbnail cache cleanup using Windows Storage Sense or trusted third-party cleanup tools.
- Clear the icon cache as well to fix sluggishness caused by corrupted visual elements.
Scheduling regular maintenance to clear thumbnail cache and temporary files helps maintain smooth and fast Windows Explorer performance. Implement these tips to optimize your PC and avoid slow folder browsing issues caused by bloated or corrupted caches.
Optimizing Folder Templates and Views
Optimize File Explorer Performance by Managing Folder Templates and Views
Enhance your Windows File Explorer speed by minimizing unnecessary columns and grouping in folder views.
Apply specialized folder templates consistently to folders with similar content to prevent repeated template detection and metadata processing, significantly boosting performance.
Quickly switch between different folder views using keyboard shortcuts like Ctrl+Shift+1 through Ctrl+Shift+8 for efficient navigation.
If you encounter issues with custom folder views, easily reset them to default settings via Options > View > Reset Folders.
Effective folder template management is key to improving File Explorer responsiveness and overall user experience.
Adjusting Virtual Memory and Page File Settings

How to Optimize Virtual Memory and Page File Settings to Speed Up File Explorer
If your File Explorer feels slow or unresponsive, adjusting your virtual memory (paging file) settings can significantly improve performance, especially on computers with limited RAM or heavy multitasking.
Windows typically manages virtual memory automatically, but customizing these settings can help optimize system responsiveness.
Follow these steps to fine-tune your virtual memory for better File Explorer performance:
- Open Settings > System > About, then click Advanced system settings on the right.
- In the System Properties window, go to the Advanced tab and click Settings under Performance.
- Select the Advanced tab again, then click Change under the Virtual memory section.
- Uncheck Automatically manage paging file size for all drives to enable manual configuration.
- Choose your system drive (preferably an SSD) and set the initial paging file size to 1.5 times your installed RAM and the maximum size to 3 times your RAM.
- Click Set, then OK to save your changes.
- Restart your computer to apply the new virtual memory settings.
Tips for optimal virtual memory configuration:
- Always place the paging file on a fast SSD for quicker data access.
- Avoid enabling paging files on slower HDDs to prevent bottlenecks.
- Monitor system performance after changes and adjust sizes if necessary.
By properly configuring virtual memory and page file settings, you can reduce File Explorer lag, enhance multitasking capabilities, and ensure smoother Windows performance.
For more Windows optimization tips, explore our guides on system tuning and performance enhancement.
Frequently Asked Questions
Does Third-Party Antivirus Software Slow Down Windows Explorer Performance?
Yes, third-party antivirus software can slow down Windows Explorer by scanning files in real time. You can reduce this impact by adjusting scan settings, excluding trusted folders, or choosing a lightweight antivirus solution with minimal system overhead.
Can Network Drive Mapping Affect Explorer’s Speed?
Picture Explorer dragging heavy anchors—network drive mapping can absolutely slow you down. If mapped drives point to offline or slow resources, you’ll face delays. Disconnect unreachable drives or fix network issues to restore snappy Explorer performance.
How Do Windows Updates Impact Explorer Responsiveness?
Windows updates can boost Explorer’s speed with optimizations, but sometimes they introduce bugs that slow window actions or increase resource use. If you notice slowdowns after updating, check for patches, disable thumbnails, or consider rolling back the update.
Are SSDS Faster for File Browsing Than HDDS?
Yes, you’ll notice much faster file browsing with an SSD than an HDD. SSDs access files instantly, avoid mechanical delays, and handle small files efficiently. If you’re troubleshooting slow browsing, upgrading to an SSD usually solves the issue.
Does File Compression Influence Folder Loading Times?
Yes, file compression influences folder loading times. You’ll often see faster loads on slower drives since less data transfers, but decompression uses CPU. If your CPU’s busy or files aren’t compressible, you might notice slowdowns instead.
Conclusion
If you follow these tips, your Windows Explorer will feel like it’s running on rocket fuel. You’ll zip through files so fast you’ll wonder if your PC’s secretly upgraded itself. Don’t let sluggish performance drive you mad—restart Explorer, trim visual effects, clear caches, and tweak settings. Each step is a troubleshooting power-up, transforming your file manager from a sluggish snail to a lightning-fast tool. Take control, and make slowdowns a thing of the past!