Windows 11 Slow Animations: Disable or Speed Up Windows Animations
If Windows 11 animations feel slow, you can speed them up or disable them for better responsiveness. Go to Settings > System > About > Advanced system settings > Performance and select “Adjust for best performance” or customize specific effects.
Update your graphics drivers using Device Manager or your GPU’s tool. For advanced tweaks, edit registry values like MenuShowDelay and AnimationsDuration.
Disabling unnecessary startup apps also helps. Keep going to discover more ways to optimize animations and improve overall system speed.
Common Causes of Slow Animations in Windows 11
Common Causes of Slow Animations in Windows 11 and How to Fix Them
Windows 11 offers smooth, modern animations that enhance your user experience, but sometimes these animations can become slow or laggy. Slow animations in Windows 11 are often caused by demanding visual effects settings, high CPU or memory usage, power mode configurations, or hardware limitations.
To improve animation performance, start by adjusting your visual effects settings. Navigate to Settings > Accessibility > Visual Effects and turn off animation and transparency effects to reduce system strain.
Additionally, background apps consuming excessive CPU or RAM can cause delays. Use Task Manager to disable unnecessary startup programs, freeing up resources for smoother animations.
Power settings also impact animation speed. If you’re using power-saving or balanced modes, animations may slow down due to reduced performance scaling. For faster UI responsiveness, switch to the Best Performance mode under Settings > System > Power & Battery. Many users with high-end laptops have reported animation stutter specifically on 4K displays, especially when using Windows 11 compared to Windows 10.
Advanced users can tweak the Windows Registry to speed up menu animations by modifying the MenuShowDelay value, but always back up your registry before making changes to avoid system issues.
Hardware factors like high-resolution displays, limited RAM, or older CPUs can also bottleneck animation rendering, especially if hardware acceleration is disabled or your system is heavily loaded.
Ensuring your drivers are up to date and closing unnecessary applications can help maintain smooth animations.
Updating Graphics Drivers and Windows for Smoother Animations
How to Update Graphics Drivers and Windows for Smoother Animations on Windows 11
Experiencing lag or stuttering in Windows 11 animations? This is often due to outdated graphics drivers or system software. To fix this and ensure smooth animations, it’s essential to keep both your Windows operating system and graphics drivers up to date.
Step 1: Run Windows Update
Navigate to Settings > Windows Update** and click Check for updates**. Installing all available updates not only enhances system security but also includes stable, Microsoft-validated graphics drivers optimized for Windows 11. Keeping your system updated is important because feature updates for Windows 11 often include performance improvements that can directly impact the speed of desktop animations.
Step 2: Update Graphics Drivers via Device Manager
Open Device Manager, expand Display Adapters, right-click your GPU, and select Update driver. Choose Search automatically for updated driver software to let Windows find the best driver for your hardware.
Step 3: Get the Latest Drivers from GPU Manufacturer Tools
For the newest features and performance improvements, use your GPU manufacturer’s software:
- NVIDIA GeForce Experience for NVIDIA GPUs
- AMD Radeon Software for AMD GPUs
- Intel Driver & Support Assistant for Intel integrated graphics
These tools provide the latest drivers that mightn’t yet be available through Windows Update or Device Manager.
Final Step: Restart Your PC
Always restart your computer after updating drivers or Windows to ensure all changes take effect and animations run smoothly.
Regularly updating Windows 11 and your graphics drivers is key to maximizing animation smoothness, enhancing system responsiveness, and improving overall performance. Follow these steps to keep your PC running at its best.
Disabling Visual Effects to Boost Performance
Optimize Windows performance by disabling visual effects through registry edits.
Advanced users can adjust registry values such as AnimationDuration and MenuShowDelay to customize or completely disable system animations.
After making these changes, restart your PC to apply the settings and experience faster, more responsive Windows operation.
Improve your PC speed today by fine-tuning visual effect settings via the Windows registry.
Turning Off Transparency Effects for Faster UI
How to Turn Off Transparency Effects in Windows 11 for Faster Performance
If you want to speed up your Windows 11 PC, turning off transparency effects is a simple and effective solution. Transparency effects enhance the visual appeal of your desktop but increase the workload on your system’s GPU and CPU, especially if you’re using a laptop or a device with integrated graphics.
This can lead to slower performance, laggy animations, and choppy window transitions. Disabling transparency effects reduces the demand on the Desktop Window Manager (DWM.EXE), improving overall responsiveness.
This is particularly useful for high-resolution displays and multitasking scenarios where system resources are stretched thin. Turning off these effects results in smoother task switching, faster app launches, and more fluid window movements without impacting core functionality.
Follow these steps to disable transparency effects in Windows 11 for a performance boost:
- Open Settings from the Start menu.
- Navigate to Personalization > Colors.
- Locate and toggle off the Transparency Effects option.
- The changes take effect immediately—no reboot needed.
Adjusting Performance Settings in System Properties
How to Improve Windows 11 Performance by Adjusting Visual Effects in System Properties
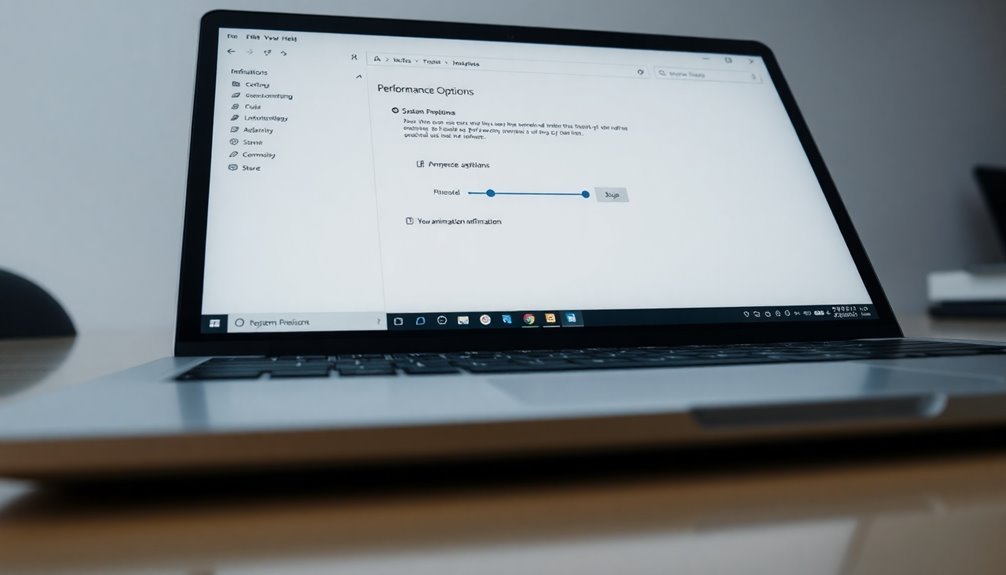
Boost your Windows 11 performance by optimizing visual effects through the System Properties Performance Settings. To get started, right-click the Start button and select System. Next, click on Advanced system settings on the right panel.
In the System Properties window, navigate to the Advanced tab. Under the Performance section, click Settings to open the Performance Options window.
Here, you can customize visual effects such as animations, shadows, and font smoothing to enhance system speed. For the best performance, select “Adjust for best performance” to disable all unnecessary visual effects.
Alternatively, choose “Custom” to enable or disable specific features like window animations or menu fades based on your preference.
Adjusting these settings can significantly increase responsiveness, especially on older or low-spec Windows 11 PCs. Keep in mind that disabling effects might make fonts and icons appear less smooth, simplifying the overall interface.
After applying your changes, click Apply and then OK. Restart your device to ensure all settings take effect.
For optimal results, combine these visual effect adjustments with a suitable power plan to maximize Windows 11 performance. Follow these steps to speed up your PC and enjoy a smoother Windows 11 experience.
Editing Registry Values to Speed Up Animations
How to Speed Up Windows 11 Animations by Editing Registry Values
To boost the performance of Windows 11 and make your system feel faster, you can speed up animations by editing specific registry values. This advanced method complements visual effects optimization done through System Properties.
Step 1: Open Registry Editor
Press `Win + R`, type `regedit`, and hit Enter to launch the Registry Editor. Navigate to the following path:
“`
HKEY_CURRENT_USERControl PanelDesktop
“`
Step 2: Modify Key Animation Settings
In this location, focus on these important registry keys:
- MinAnimate: Set this DWORD value to `0` to disable window minimize and maximize animations for quicker window transitions.
- MenuShowDelay: Lower this value (such as to `20`) to reduce the delay before menus appear, making your Windows 11 interface more responsive.
Step 3: Backup Registry Before Changes
Always back up the registry keys you plan to modify. To do this, right-click on the `Desktop` key, select Export, and save the backup file. This step ensures you can restore your settings in case of accidental errors.
Important Tips and Warnings
- Only adjust animation-related registry keys to avoid system instability.
- After editing, sign out or restart your PC to apply changes.
- These tweaks are especially effective for improving responsiveness on older PCs or high-resolution displays.
- Make incremental changes and test performance to find the optimal settings for your system.
Managing Startup Apps to Improve Animation Fluidity
How to Manage Startup Apps in Windows 11 to Improve Animation Smoothness
Windows 11 offers visually appealing animations that enhance user experience, but their smoothness depends on your system’s resource availability right after startup. Too many startup apps can overload your CPU and disk, leading to choppy or delayed animations.
To boost animation fluidity and overall system performance, managing startup apps is essential.
Follow these simple steps to optimize startup app management in Windows 11:
1. Access Startup Apps Settings****
Go to Settings > Apps > Startup to see a list of applications that launch at startup. Pay attention to the impact ratings labeled as “Low,” “Medium,” or “High.”
2. Disable Non-Essential Startup Apps
Toggle off apps with “Medium” or “High” impact that you don’t need immediately after login. This action frees up CPU and memory resources, resulting in smoother animations and faster system responsiveness.
3. Use Task Manager for Quick Startup Management
Press Ctrl + Shift + Esc to open Task Manager, then navigate to the Startup tab. Right-click on unnecessary startup programs and select Disable. Avoid disabling critical drivers or essential security software to maintain system stability.
4. Manage Startup Shortcuts via Run Dialog****
For advanced users, type shell:startup (for current user) or shell:common startup (for all users) in the Run dialog (Win + R). Remove unwanted shortcuts from these folders to reduce the background load during startup.
5. Regularly Review Startup Apps
Periodically check your startup list to ensure no new apps are slowing down your system. Keeping startup apps to a minimum helps maintain smooth animations and enhances overall Windows 11 performance.
By effectively managing startup applications in Windows 11, you can significantly improve animation fluidity and enjoy a faster, more responsive computing experience right after login.
Implement these tips today to optimize your system startup and boost your PC’s performance.
Keywords: Windows 11 startup apps, improve animation smoothness, disable startup programs, optimize Windows 11 performance, manage startup applications
Fine-Tuning Animation Effects Using System Settings
Essential Steps to Fine-Tune Animation Effects Using System Settings
- Enable or disable animation effects through the Accessibility settings for improved system performance.
- Open Performance Options to customize animation parameters tailored to your preferences.
- Choose specific animation effects to enable or disable, enhancing speed and responsiveness.
- Apply and save animation settings individually for each user account to ensure a personalized experience.
Additional Tips for Optimizing Animation Performance
Top Tips to Optimize Animation Performance in Windows 11
To boost animation performance and improve Windows 11 responsiveness, start by disabling specific animation effects. Press Win + R, type `sysdm.cpl`, go to the Advanced tab, click Performance Settings, and uncheck “Animate windows when minimizing and maximizing.” This simple step removes slow zoom animations while keeping other effects smooth.
For advanced users, editing the Windows Registry can further fine-tune animations. Open Regedit, navigate to `HKCUControl PanelDesktopWindowMetrics`, and lower animation-related values. Always back up your registry before making changes to prevent system issues.
Updating your GPU drivers and enabling hardware acceleration is essential for smooth animations. This allows your graphics card to efficiently handle visual effects. If your GPU is underpowered, consider reducing or disabling animations and transparency settings to enhance performance.
You can also explore trusted third-party tools or scripting solutions for more detailed control over animations when built-in options are limited.
Additionally, use Task Manager to disable unnecessary startup programs and background processes, freeing up system resources and ensuring faster, lag-free animations in Windows 11.
Implement these proven tips to optimize animation performance and enjoy a smoother Windows 11 experience.
Frequently Asked Questions
Can Third-Party Animation Tools Fix or Enhance Windows 11 Animations?
You can use third-party tools to adjust, speed up, or disable Windows 11 animations, but you can’t fully replace or overhaul them. These apps tweak system settings, offering quicker changes, but deeper animation alterations aren’t possible without modifying the OS.
Are There Risks to Disabling All Animations for Accessibility Needs?
When you disable all animations, you reduce distractions and sensory overload, but you risk abrupt UI changes, losing visual cues, and causing confusion. You should test settings, consider user needs, and offer customization for ideal accessibility.
How Do Slow Animations Affect Battery Life on Laptops?
When you let animations take their sweet time, your laptop quietly works overtime—using more GPU and CPU resources. This subtle ballet drains your battery faster. Speeding them up or disabling them helps you stretch battery life efficiently.
Can Windows 11 Animations Be Customized With Third-Party Themes?
Yes, you can customize Windows 11 animations with third-party themes using tools like UltraUXThemePatcher or WindowBlinds. You’ll install the patcher, apply themes, and adjust animation styles, but expect possible system instability, antivirus alerts, and uneven effects.
Are Slow Animations a Sign of Hardware Failure or Impending System Issues?
Don’t panic—slow animations rarely scream “hardware death!” You should first update drivers, run system diagnostics, and check for background overload. Only escalating, persistent lag with other symptoms should make you suspect hardware degradation or imminent failure.
Conclusion
If Windows 11 animations are slowing you down, why settle for less? You’ve learned how to update drivers, tweak settings, and disable unnecessary effects—all with just a few clicks. Don’t let laggy visuals hold you back. Take control: adjust performance options, edit registry values, and manage startup apps for a snappier experience. With these steps, your system can feel faster and more responsive. Now, it’s your move—optimize, streamline, and enjoy smoother Windows 11 animations.