Windows 7 Update Error 80072efe: Fix Update Download Error

To fix Windows 7 Update Error 80072efe, first double-check your internet connection, system date, and time. Disable any VPNs or proxies that may interfere with the connection.
Make sure your firewall or antivirus isn’t blocking Windows Update. Run the Windows Update Troubleshooter from the Control Panel for automatic fixes.
Next, stop the Windows Update service and rename the Catroot2 folder to reset update components. After that, install Service Pack 1 along with all critical updates.
If you want complete steps—including firewall tweaks and special patches—there’s more guidance just ahead. Follow these instructions to ensure a smooth update process.
Common Causes of Windows 7 Update Error 80072efe

Windows 7 Update Error 80072efe is a common issue that can prevent your system from successfully downloading and installing important updates. This error often occurs due to network connectivity problems, such as unstable internet connections, misconfigured routers, or restrictive firewalls blocking communication with Windows Update servers.
Additionally, using proxies or VPNs can interfere with update traffic, causing error 80072efe. Since Windows 7 support has officially ended, updates now depend on a limited number of servers, making a stable and secure connection essential for successful updates. If the system date/time settings are incorrect, this can also contribute to update errors by interfering with server certificate validation.
Another major cause of Windows 7 Update Error 80072efe is corrupted Windows Update cache or damaged system files. Problems with the Catroot2 folder, which stores update signatures, or system file corruption caused by malware or improper shutdowns can lead to failed update attempts.
Incorrect date and time settings on your computer can also disrupt certificate validation, blocking secure connections to update servers. Furthermore, third-party antivirus programs, incompatible software, or missing system prerequisites can create conflicts that trigger error 80072efe during Windows 7 update attempts.
To fix Windows 7 Update Error 80072efe, ensure your internet connection is stable, disable any VPNs or proxies, and check firewall settings. Running the Windows Update Troubleshooter, resetting the Windows Update components, and verifying system date and time can also help resolve this error.
Keeping your system free from malware and temporarily disabling antivirus software during updates can improve success rates. By addressing these common causes, you can troubleshoot and resolve Windows 7 Update Error 80072efe effectively.
Essential Preliminary Checks Before Troubleshooting
Essential Preliminary Checks to Fix Windows 7 Update Error 80072efe
Before tackling advanced solutions for the Windows 7 Update Error 80072efe, performing essential preliminary checks can save you time and ensure your system is ready for updates.
These basic troubleshooting steps help identify common issues that cause update failures. Follow this comprehensive checklist to optimize your Windows 7 update process:
- Verify your Windows 7 edition, service pack version, and activation status to confirm update eligibility.
- Check your hardware specifications including RAM, disk space, and processor speed, and ensure your system date, time, and timezone settings are accurate.
- Test your internet connection stability and review firewall, proxy, or VPN settings to ensure they aren’t blocking access to Microsoft update servers.
- Restart your PC, clear the Software Distribution folder, and run the “sfc /scannow” command to fix corrupted system files affecting updates. Installing Windows updates is crucial, as they include bug fixes, feature upgrades, and security patches that protect your system and improve its performance.
- Ensure all required prerequisite updates and servicing stack updates are installed, as missing these often cause error 80072efe.
By completing these essential preliminary checks, you lay the groundwork for resolving Windows 7 Update Error 80072efe efficiently and effectively.
For more detailed guidance, continue exploring advanced troubleshooting steps tailored to Windows 7 update errors.
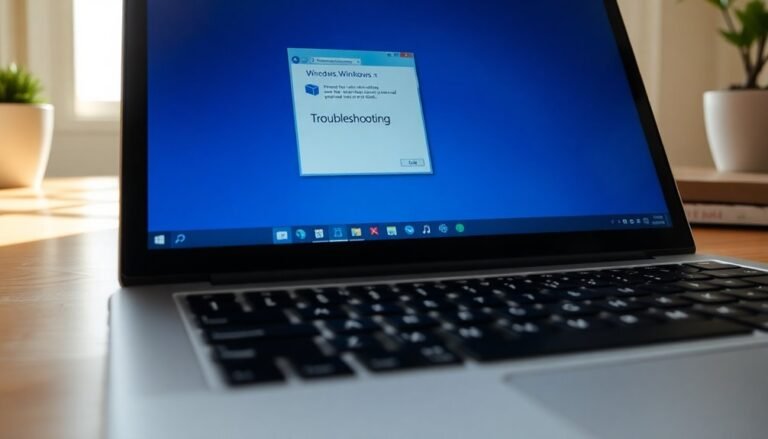
Using the Windows Update Troubleshooter
Windows 7 Update Error 80072efe can occur due to various reasons, but using the Windows Update Troubleshooter is one of the most effective ways to fix common update issues quickly.
To start, open the Control Panel by typing “control” in the Start menu search bar. In the Control Panel, enter “troubleshoot” in the search box and select “Troubleshooting.”
Next, click “View all” on the left pane and choose “Windows Update.” Select “Advanced,” then check the box for “Apply repairs automatically” to let the troubleshooter fix problems on its own.
Click “Next” to begin scanning for Windows Update errors, such as failed downloads or interrupted services. The troubleshooter will detect these issues and attempt automatic repairs to resolve them.
After the process completes, review the status and click “View detailed information” to see a full report of identified problems, error codes, and fixes applied.
Remember to restart your computer after running the Windows Update Troubleshooter to ensure all changes take effect.
If the Windows 7 Update Error 80072efe persists, run the troubleshooter again or visit Microsoft’s official support site for additional troubleshooting steps.
Using the Windows Update Troubleshooter regularly helps maintain smooth and error-free updates on Windows 7.
Fixing Corrupted Catroot2 Folder

How to Fix a Corrupted Catroot2 Folder to Resolve Windows Update Errors
If you’re experiencing Windows update errors, a corrupted Catroot2 folder might be the cause. Follow these simple steps to fix the Catroot2 folder and restore smooth Windows updates:
1. Stop Essential Windows Services
Open Command Prompt as an administrator and run the following commands to stop critical services:
“`
net stop cryptsvc
net stop wuauserv
net stop msiserver
net stop bits
“`
2. Locate and Rename the Catroot2 Folder****
Navigate to the folder path: `C:WindowsSystem32catroot2` using File Explorer. Rename the folder to `catroot2.old` to back up the corrupted folder. Alternatively, you can delete the contents inside the folder if you prefer.
3. Fix Access Denied Issues****
If you encounter “Access Denied” errors while renaming or deleting the folder, adjust folder permissions by right-clicking the folder, selecting Properties > Security > Advanced, changing the Owner, and granting yourself full control.
4. Restart Your PC
Restart your computer to allow Windows to automatically recreate the Catroot2 folder with fresh system files.
Following these steps will help fix the corrupted Catroot2 folder and can resolve common Windows update errors. For more tips on troubleshooting Windows update issues, stay tuned to our blog.
Keywords: fix corrupted Catroot2 folder, Windows update errors, Catroot2 folder missing, how to repair Catroot2, Windows update troubleshooting
Installing Critical Update Client Patches and Service Pack 1
How to Fix Windows 7 Update Error 80072efe by Installing Critical Update Client Patches and Service Pack 1 (SP1)
If you’re experiencing Windows 7 update error 80072efe, the key solution is to install critical update client patches along with Service Pack 1 (SP1). Follow these step-by-step instructions to resolve persistent update issues and keep your system secure.
1. Download the Correct Windows 7 SP1 Installer
Visit the official Microsoft website or the Microsoft Update Catalog to download the appropriate Service Pack 1 installer for your system—choose either the 32-bit or 64-bit version based on your Windows 7 edition.
2. Verify Your System Build Number
Ensure your Windows 7 installation is at least build 7600 (RTM) before proceeding with the SP1 installation.
3. Install Required Servicing Stack Updates (SSU)
Before installing SP1, download and install any necessary Servicing Stack Updates to prepare your system for the update process.
4. Create a System Backup or Restore Point
Protect your data by creating a backup or system restore point in case you need to revert changes.
5. Prepare Your System for Installation
Temporarily disable antivirus software and disconnect from the Internet to avoid interruptions. Remove any external USB devices and close all unnecessary applications.
6. Run the SP1 Installer as Administrator
Right-click the SP1 installer file and select “Run as administrator.” Follow the on-screen prompts. Your computer will restart automatically during the installation.
7. Verify Installation and Update Status
After restarting, check your Windows Update status or System Properties to confirm SP1 is installed successfully.
8. Enable TLS 1.2 for Secure Connections
Open Internet Options, navigate to the Advanced tab, and enable TLS 1.2 to ensure secure Windows Update connections.
9. Re-enable Antivirus and Reconnect to the Internet
Once the installation is complete and verified, turn your antivirus back on and reconnect your system to the Internet.
10. Apply Additional Critical Updates
Regularly check Windows Update and apply any further critical updates to maintain system stability and security.
By following these optimized steps, you can effectively fix Windows 7 update error 80072efe and ensure your system runs smoothly with the latest critical updates and Service Pack 1 installed.
For more troubleshooting tips and update guides, visit the official Microsoft support site.
Adjusting Firewall and Antivirus Settings
How to Fix Windows 7 Update Error 80072efe by Adjusting Firewall and Antivirus Settings
If you’ve installed critical update client patches and Service Pack 1 but still face Windows 7 update error 80072efe, your firewall or antivirus settings might be blocking update traffic. To resolve this issue and ensure successful Windows updates, follow these proven steps:
1. Enable Windows Firewall
Start by opening the Windows Firewall Control Panel and confirm that the firewall is enabled and actively running. A disabled firewall can cause security risks, but misconfigured rules may block update downloads.
2. Allow Windows Update Through Firewall Exceptions
Instead of turning off the firewall entirely, add Windows Update-related applications and services to the firewall exceptions list. This allows necessary network traffic without compromising security.
3. Avoid Blocking Incoming Connections for Allowed Apps
Ensure that the firewall doesn’t block all incoming connections for apps permitted through the exceptions list, as this can prevent updates from downloading properly.
4. Adjust or Temporarily Disable Third-Party Antivirus and Firewall Software
Many antivirus programs include built-in firewalls or web filtering features that might conflict with Windows Firewall. Temporarily disable these components or adjust their settings to troubleshoot the update error 80072efe.
5. Reset Firewall Settings to Default
If you suspect firewall misconfiguration is causing the problem, reset your firewall settings to their default state. This can eliminate conflicting or overly restrictive rules.
By carefully managing your firewall and antivirus settings, you can fix Windows 7 update error 80072efe and keep your system secure and up-to-date.
For more tips on troubleshooting Windows update errors, visit our comprehensive support guides.
Resolving Network Connectivity Issues

How to Fix Windows 7 Update Error 80072EFE by Resolving Network Connectivity Issues
If you’re encountering the Windows 7 update error 80072EFE even after adjusting your firewall settings, network connectivity problems are likely the root cause. Follow these step-by-step solutions to troubleshoot and fix your network issues efficiently.
1. Use the Built-in Network Troubleshooter
Navigate to Control Panel > Network and Internet > Network and Sharing Center**, then click on “Fix a Network Problem”. This launches the Windows Network Diagnostics tool, which automatically detects issues such as faulty network adapters or disconnected cables. Follow the on-screen instructions to resolve detected problems**.
2. Reset Network Configuration via Command Prompt
For persistent network errors, resetting your network stack can help. Open Command Prompt as Administrator, then run these commands one by one:
“`
netsh winsock reset
netsh int ip reset
ipconfig /release
ipconfig /renew
ipconfig /flushdns
“`
These commands reset Windows network settings, renew your IP address, and clear the DNS cache, which often resolves connectivity and update errors.
3. Update Network Adapter Drivers
Outdated or corrupted network drivers can cause update error 80072EFE. Open Device Manager, expand Network adapters, and check for any warning icons. Right-click your network adapter and select “Update Driver”. If Windows doesn’t find an update automatically, download the latest driver directly from your network adapter manufacturer’s website and install it manually.
4. Verify IP Address Settings
Incorrect IP settings can lead to connectivity problems. Go to Control Panel > Network and Internet > Network and Sharing Center > Change adapter settings**, right-click your active network connection, select Properties, then double-click Internet Protocol Version 4 (TCP/IPv4). Ensure both “Obtain an IP address automatically” and “Obtain DNS server address automatically”** are selected to avoid IP conflicts.
5. Use Advanced Network Diagnostics with Event Tracing for Windows (ETW)
For advanced users, leveraging Event Tracing for Windows (ETW) provides detailed network diagnostics that can help identify deeper issues affecting Windows Update connectivity.
By following these expert-recommended troubleshooting steps, you can effectively resolve Windows 7 update error 80072EFE caused by network connectivity problems.
For more Windows 7 update fixes and network troubleshooting tips, stay tuned to our blog.
Addressing Windows 7 End of Support Limitations
Windows 7 End of Support: Key Limitations and How to Overcome Them
Windows 7 was a popular operating system, but since its official end of support on January 14, 2020, it presents serious security and compatibility challenges.
Microsoft no longer provides free security updates, patches, or technical support for Windows 7, leaving your PC vulnerable to cyber threats, malware, and software incompatibility. Continuing to use Windows 7 puts your data, privacy, and compliance at significant risk.
Top Solutions to Address Windows 7 End of Support Issues:
- Upgrade to Windows 10 or Windows 11: Transitioning to a modern Windows version ensures ongoing security updates, improved hardware compatibility, and access to the latest features.
- Use Virtualization Platforms like Azure Virtual Desktop: Safely run legacy Windows 7 applications in a virtual environment while protecting your primary system from vulnerabilities.
- Access Microsoft 365 Apps via Office on the Web: Leverage cloud-based Office apps to maintain productivity without relying on outdated desktop software.
- Avoid New Hardware Upgrades on Windows 7: New CPUs and motherboards aren’t compatible with Windows 7, so plan hardware updates alongside OS migration.
- Create a Migration Plan for Legacy Applications: Move critical apps to supported platforms to ensure long-term security, compliance, and performance.
By addressing Windows 7 end of support limitations proactively, you can protect your system, data, and business operations while benefiting from modern Windows capabilities.
Upgrade or migrate now to stay secure and compliant.
Frequently Asked Questions
Can Error 80072EFE Cause Data Loss or System Instability?
Error 80072efe doesn’t directly cause data loss, but if you repair it improperly or malware’s involved, you risk losing data and destabilizing your system. Incomplete updates leave you vulnerable to bugs, crashes, and security threats.
Is It Safe to Use Third-Party Update Tools for Windows 7?
You shouldn’t rely on third-party update tools for Windows 7. They’re often insecure, unreliable, and can’t provide official patches. Instead, upgrade your operating system to guarantee security, compatibility, and compliance with legal and organizational requirements.
How Do I Check Windows Update Log Files for Detailed Error Information?
Picture yourself opening C:WindowsWindowsUpdate.log in Notepad—scroll to the update’s date, then scan for “FAILED” or error codes. Note timestamps, cross-reference with CBS.log if needed, and research codes for targeted troubleshooting.
Does Error 80072EFE Affect Windows Activation or Product Key Validation?
Yes, error 80072efe affects activation and product key validation because it blocks your PC from reaching Microsoft’s servers. You’ll see activation failures, but your product key stays valid until you resolve network or server communication issues.
Can Dual-Booting With Another OS Interfere With Windows 7 Updates?
Think of your system as two roommates: dual-booting rarely disrupts Windows 7 updates directly. You’ll find updates work independently, but major Windows updates can overwrite bootloaders, requiring you to repair GRUB or your Linux boot setup afterward.
Conclusion
You’ve tackled troublesome update errors with tried-and-true troubleshooting. By checking connections, correcting catroot2 corruption, and clearing firewall flaws, you’ve conquered common causes of code 80072efe. Installing important patches and prioritizing SP1 propels your PC past pesky problems. Don’t forget, diligent defense against outdated software and securing stable network settings keeps updates smooth. Stay systematic, stay safe, and Windows 7 will work wonders without worry. Persistent problems? Patience pays—repeat these steps for seamless solutions.