Windows Issues and Troubleshooting: Complete Problem-Solving Guide
To quickly troubleshoot Windows issues, start by noting error codes and using built-in tools like Task Manager, Event Viewer, and Troubleshooters. Close unresponsive apps and update drivers if necessary.
If the system is slow or freezes, scan for malware to rule out infections. For device or network problems, check connections and run diagnostics in Device Manager.
When facing BSOD crashes, analyze stop codes and boot into Safe Mode. To resolve Windows Update errors, clear disk space and update system files.
Explore each step further for more detailed solutions tailored to your specific problem.
Common Windows Error Codes and Their Solutions

Common Windows Error Codes and How to Fix Them
When Windows displays an error code, it highlights specific issues related to hardware, drivers, or system files that require your attention. Understanding these error codes can help you quickly identify and resolve problems to keep your system running smoothly. Monitoring and addressing error codes is crucial for effective workstation maintenance.
Device Manager Error Codes: Code 1, Code 10, Code 31, and Code 43
These codes typically indicate problems with device configuration or corrupted drivers. To fix these errors, update, uninstall, or reinstall the device drivers via Device Manager.
If Windows can’t automatically detect the appropriate drivers, manually download and install the latest driver files from the manufacturer’s website.
Windows Update Error 0x80070087
This error signals corrupted update files or incomplete installations. To troubleshoot Windows Update error 0x80070087, navigate to Control Panel > Update & Security, and run the built-in Windows Update troubleshooter.
This tool automatically diagnoses and repairs common update-related issues.
Common System Errors: ERROR_ALREADY_EXISTS (183), ERROR_INVALID_FUNCTION (1), ERROR_BAD_EXE_FORMAT (193)
These errors typically relate to file conflicts, invalid functions, or application compatibility problems. To resolve these errors, carefully review the error messages, consult Microsoft’s official documentation, and ensure your system components and software are up to date.
By understanding and addressing these common Windows error codes, you can improve your PC’s performance and prevent recurring system issues.
For more Windows troubleshooting tips and solutions, keep visiting our site.
Fixing Unresponsive Applications and System Freezes
How to Fix Unresponsive Applications and Prevent System Freezes on Windows
Experiencing sudden application freezes or a completely unresponsive Windows system? These issues often stem from resource limitations, outdated software, or hardware problems. Follow this comprehensive guide to quickly fix unresponsive applications and stop system freezes.
Step 1: Use Task Manager to Close Unresponsive Applications
Press Ctrl+Shift+Esc to open Task Manager. Identify any unresponsive applications and select “End Task” to force close them. This immediate action can restore system responsiveness.
Step 2: Run System File Checker (SFC)
Open Command Prompt as an administrator and enter the command:
`sfc /scannow`
This scans and repairs corrupted system files that could cause freezes or crashes.
Step 3: Use DISM Tool for Advanced Repairs
After SFC, run the Deployment Image Servicing and Management (DISM) tool using:
`dism /online /cleanup-image /restorehealth`
This fixes deeper Windows image issues that may affect system stability.
Step 4: Update Device Drivers
Outdated or faulty drivers often lead to system instability. Check Device Manager or visit your hardware manufacturer’s website to download and install the latest drivers. Ensuring you have the latest drivers helps prevent conflicts that can cause programs to stop responding.
Step 5: Scan for Malware
Malware infections can cause unresponsiveness and crashes. Use trusted antivirus software to perform a full system scan and remove any threats.
Step 6: Adjust User Account Control (UAC) and Security Settings
If UAC settings are too restrictive, they might interfere with applications. Modify UAC settings carefully and review your security software to prevent false positives.
Step 7: Manage Windows Updates and Compatibility
Temporarily uninstall any recent problematic Windows updates that coincide with freezes. For older software, enable compatibility mode to improve performance.
Additional Tips to Prevent Freezes and Application Crashes
- Regularly update Windows to benefit from the latest fixes and improvements.
- Limit the number of startup programs to reduce resource strain.
- Maintain your hardware by checking for overheating and running diagnostics.
Addressing Slow Performance and System Optimization
How to Fix Slow Windows Performance and Optimize Your PC
If your Windows PC is running slow, common causes include unnecessary startup programs, hardware limitations, and low disk space. To speed up your Windows system, start by opening Task Manager and navigating to the Startup tab. Disable non-essential programs that launch at boot to reduce load times and free up system resources.
Next, manage background processes and browser extensions that consume CPU and memory. Limit the number of open browser tabs and remove unused extensions for improved performance.
Check your hardware specifications—insufficient RAM can cause sluggishness, so consider upgrading your RAM. Switching from a traditional hard drive to a solid-state drive (SSD) can dramatically improve data access speeds.
Maintain your Windows PC’s health by managing disk space efficiently. Use Disk Cleanup to delete temporary files, disable hibernation to free up disk space if you don’t use it, and regularly defragment your hard drives (HDDs) to optimize file storage.
Additionally, keep your Windows operating system, drivers, and applications up to date to ensure peak performance.
Key Tips to Speed Up Your Windows PC:
- Disable unnecessary startup programs in Task Manager
- Upgrade RAM or install an SSD for faster performance
- Use Disk Cleanup and defragment HDDs regularly
- Update Windows, drivers, and software to the latest versions
Troubleshooting Device and Peripheral Malfunctions
Troubleshooting device and peripheral malfunctions on Windows can be straightforward if you follow these essential steps. Start by identifying the specific device with issues, such as a keyboard, mouse, or printer, and carefully observe the symptoms. Common problems include devices not powering on, not being recognized by the system, or behaving erratically.
Determine whether the issue affects a single device or multiple peripherals and USB ports. Use Windows Device Manager to check for warning signs, error codes, or yellow exclamation marks that indicate driver problems. Testing the device on another computer can help rule out hardware failure.
Next, inspect all physical connections by ensuring that cables are securely connected and undamaged. Check USB or other interface ports for debris or physical damage, and try switching ports to identify any port-specific problems.
Updating or reinstalling device drivers through Device Manager often resolves many peripheral issues. If problems started after a recent driver update, rolling back to a previous driver version may help. Additionally, restarting your PC and running the built-in Hardware and Devices troubleshooter can fix common faults.
Make sure your Windows operating system is up to date by installing the latest updates. If the device still malfunctions, boot your computer in Safe Mode or use a different user profile to isolate deeper software or hardware conflicts.
Following these troubleshooting steps can help you quickly resolve device and peripheral malfunctions on Windows, improving your system’s performance and reliability. For more Windows troubleshooting tips and device support, keep exploring our guides.
Resolving Blue Screen of Death (BSOD) Issues
How to Fix Blue Screen of Death (BSOD) Errors in Windows: Step-by-Step Guide
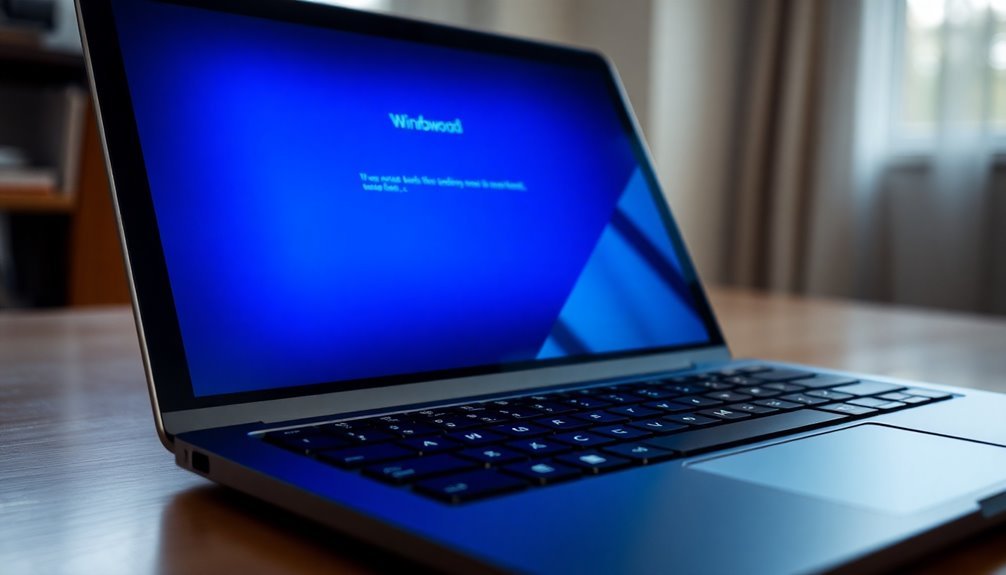
Experiencing a Blue Screen of Death (BSOD) on your Windows PC can be frustrating and disruptive. BSOD errors indicate serious system issues that cause Windows to stop working to prevent further damage. To effectively fix BSOD errors, it’s crucial to identify the underlying cause and apply targeted troubleshooting methods.
Common Causes of BSOD Errors
- Faulty RAM or hard drives
- Outdated or incompatible device drivers
- Recent hardware or software changes
- Software conflicts and malware infections
- Overclocking or system overheating
How to Diagnose and Resolve BSOD Errors
1. Identify the Stop Error Code
When a BSOD occurs, note the stop code displayed on the screen. Use Microsoft’s official documentation or trusted online resources to understand the specific error and possible causes.
2. Boot Windows in Safe Mode
Restart your PC in Safe Mode to load Windows with minimal drivers and services. This helps isolate whether the issue is caused by third-party software or drivers.
3. Check Hardware Health
Run built-in diagnostics tools such as Windows Memory Diagnostic and Check Disk (chkdsk) to test RAM and hard drives. Replace any faulty hardware components to prevent recurring crashes.
4. Update Drivers and Windows
Ensure all device drivers and Windows updates are current. Outdated drivers are a common cause of BSOD errors, so use Device Manager or manufacturer websites to download the latest versions.
5. Scan for Malware
Use reputable antivirus software to scan your system for malware, which can corrupt system files and cause crashes.
6. Undo Recent Changes
If the BSOD started after installing new software or hardware, try uninstalling the recent changes or performing a System Restore to revert to a previous stable state.
Prevent BSOD Errors with Regular Maintenance
- Keep Windows and all drivers up to date
- Perform regular system scans for malware
- Avoid overclocking hardware beyond recommended settings
- Backup important data regularly to prepare for unexpected system failures
By following these proven steps, you can effectively troubleshoot and fix Blue Screen of Death errors, improving your Windows PC’s stability and performance.
For more detailed guides and troubleshooting tips, visit Microsoft’s official support site or trusted tech forums.
Overcoming Windows Update Failures
How to Fix Windows Update Failures: Step-by-Step Guide
Windows update failures can prevent critical security patches and feature enhancements from installing, leaving your PC vulnerable. If you’re experiencing Windows Update errors, follow these proven troubleshooting steps to get your system up to date.
1. Check Disk Space for Windows Update
Make sure your system drive has at least 10 to 15 GB of free disk space. Insufficient storage often causes update failures.
2. Verify Your Internet Connection
A stable internet connection is essential. Switch to a wired Ethernet connection if possible, and disable VPNs or proxy servers that might interfere with downloads.
3. Disable Third-Party Antivirus and Firewall Temporarily
Security software can block Windows updates. Temporarily turn off any third-party antivirus or firewall programs before attempting to update.
4. Update Device Drivers and Remove Conflicting Software
Outdated or incompatible drivers can cause update errors. Update all device drivers and uninstall software known to conflict with Windows Update.
5. Clear Windows Update Cache
Delete the contents of the SoftwareDistribution folder to clear corrupt update files. This often resolves stuck or failed updates.
6. Restart Your Computer
A simple reboot can fix temporary glitches affecting the update process.
7. Manually Download Updates from Microsoft Update Catalog****
If automatic updates fail, manually download and install updates from the official Microsoft Update Catalog website.
8. Run System File Checker (SFC)
Use the SFC tool to scan and repair corrupted system files that may be blocking Windows updates.
9. Ensure Windows Update Service Is Running
Check that the Windows Update service is active and allowed through your firewall, enabling updates to download and install correctly.
By following these expert tips on fixing Windows Update problems, you can maintain your PC’s security and enjoy the latest Windows features.
For more detailed guides and troubleshooting tips, visit our Windows Update help section.
Essential Built-in Troubleshooting Tools and Techniques
Essential Built-in Windows Troubleshooting Tools and Techniques for Faster Issue Resolution
Windows troubleshooting can sometimes be challenging, but Windows offers powerful built-in tools that make diagnosing and fixing problems easier than ever. To quickly resolve common issues, start with the Windows Troubleshooters found in Settings > Update & Security > Troubleshoot. These automated troubleshooters scan for frequent problems related to network connectivity, audio devices, and hardware components, and attempt to repair them without requiring advanced technical skills.
For more detailed diagnostics, use Event Viewer to access categorized error logs. By reviewing error codes in Event Viewer, you can perform targeted searches to find specific solutions. You can also configure custom alerts to monitor recurring system problems, helping you stay ahead of potential issues.
When your PC’s performance slows down, leverage Resource Monitor and Task Manager to identify processes that are consuming excessive CPU, memory, or disk resources in real time. These tools help pinpoint bottlenecks and optimize system performance quickly.
For managing storage devices, Disk Management provides an intuitive interface to inspect, format, and partition your drives, helping you resolve disk-related problems efficiently.
Top Windows built-in troubleshooting tools to use include:
- Event Viewer: Access detailed error logs and diagnostic codes for targeted troubleshooting
- Resource Monitor: Monitor real-time resource usage by processes to identify performance issues
- Windows Troubleshooters: Run automated scans and fixes for common Windows problems
Leveraging these essential Windows troubleshooting tools and techniques ensures faster issue detection and resolution, keeping your PC running smoothly.
For step-by-step guides and tips on using these utilities, explore Windows support resources and boost your troubleshooting skills today.
Advanced Command Prompt Repairs and Recovery Methods
Advanced Command Prompt Repairs and Recovery Methods for Windows
When facing complex Windows system issues, built-in troubleshooting tools may not suffice. Advanced repairs using the Command Prompt (CMD) can effectively resolve these problems. To access the advanced Command Prompt, restart your PC into Safe Mode with Command Prompt by holding Shift and clicking Restart, then selecting option 6. Alternatively, use the Windows Recovery Environment or boot from Windows installation media to open CMD.
For disk errors, run the command `chkdsk
To repair Windows image corruption, use the Deployment Image Servicing and Management tool with the command `DISM /Online /Cleanup-Image /RestoreHealth`. If system files are damaged or missing, execute `sfc /scannow` in an elevated Command Prompt to scan and automatically repair corrupted system files.
Fix Windows bootloader problems by running the following commands: `bootrec.exe /fixmbr` to repair the Master Boot Record (MBR), `bootrec.exe /fixboot` to fix the boot sector, and `bootrec.exe /rebuildbcd` to rebuild the Boot Configuration Data (BCD).
For network-related startup issues, reset network settings using NET commands in CMD.
To restore your system to a previous working state, launch the System Restore utility with `rstrui.exe`. Use `diskpart` for advanced disk partitioning or formatting tasks before reinstalling Windows.
Always execute Command Prompt commands carefully to prevent accidental data loss.
Frequently Asked Questions
How Do I Recover Accidentally Deleted Files in Windows?
To recover accidentally deleted files, first check the Recycle Bin and restore if possible. If emptied, use File History or “Restore previous versions.” For permanently deleted files, try Windows File Recovery or third-party recovery software for deeper scans.
What Steps Should I Take if Windows Won’T Boot at All?
Of course, Windows never fails—until it won’t boot. First, check power and POST, then remove peripherals. Access BIOS, confirm drives, and reset settings. Use recovery tools, attempt Startup Repair, Safe Mode, or Command Prompt for repairs.
How Can I Reset My Windows Password if I Forget It?
If you forget your Windows password, use the Microsoft password reset page for online accounts, a pre-made password reset disk, or alternative sign-in options. For local accounts, boot recovery media to access command prompt or third-party tools for reset.
How Do I Securely Erase All Data Before Selling My PC?
Coincidentally, you’re ready to sell just as you’re considering security. Open Settings, go to System > Recovery, click “Reset this PC,” choose “Remove everything,” enable “Clean data.” For SSDs, consider third-party erase tools for thoroughness.
What’s the Safest Way to Upgrade to a New Windows Version?
To safely upgrade, start by backing up all data and checking hardware/software compatibility. Disconnect unnecessary devices, apply pending updates, and use official Microsoft tools. Test the upgrade on a spare device first, then monitor for issues post-upgrade.
Conclusion
Now that you’ve explored these troubleshooting steps, doesn’t it feel empowering to tackle Windows issues head-on? With each method—whether resolving error codes, fixing crashes, or using built-in tools—you’ll keep your system running smoothly. Remember, most problems have clear solutions if you approach them systematically. Bookmark this guide, and next time Windows misbehaves, you’ll know exactly what to do. Stay proactive, and you’ll spend less time fixing and more time getting things done.


