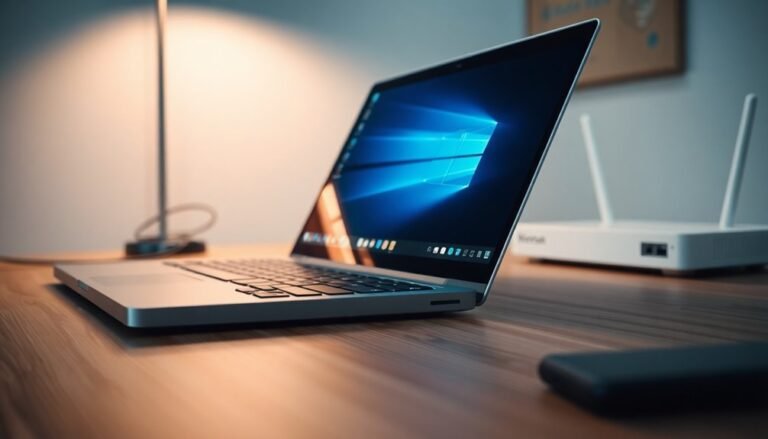
Windows Problem PnP Devices: Fix Plug and Play Problems
If you’re having Plug and Play problems in Windows—like devices not being recognized or error icons in Device Manager—start by updating or reinstalling device drivers. Run the Hardware Troubleshooter from the Start menu to auto-fix detection issues.
Reset the Plug and Play service by restarting your PC. Check USB controllers in Device Manager and make sure BIOS/UEFI settings allow for device detection.
Addressing these key steps tackles most PnP issues. Further steps offer deeper fixes and maintenance techniques.
Understanding Plug and Play Service in Windows
Plug and Play Service in Windows: Automatic Hardware Detection and Configuration
When you connect new hardware to a Windows PC, the Windows Plug and Play (PnP) service automatically detects and configures the device, eliminating the need for manual setup. The PnP service assigns critical system resources such as I/O addresses, interrupts, and memory locations to each device, ensuring smooth operation without hardware conflicts.
Using unique device identification codes, Windows recognizes the hardware and loads the appropriate drivers from built-in Windows libraries or vendor sources, saving users time and effort.
Windows Plug and Play Manager continuously monitors hardware changes during system startup and while Windows is running. It supports standardized communication protocols like USB, enabling hot swapping for devices such as USB drives without requiring a system reboot.
Additionally, Plug and Play manages device states and handles surprise removals to maintain system stability and performance. While PnP simplifies device integration and enhances compatibility, it’s important to consider security measures since unrestricted Plug and Play access can expose your system to risks from unauthorized or malicious devices. Plug & Play technology can pose security vulnerabilities, so businesses often protect or disable automatic device installation on sensitive systems.
Optimize your Windows experience by understanding how the Plug and Play service works to detect, configure, and manage hardware automatically. This essential Windows feature improves device compatibility, reduces setup time, and enables seamless hardware upgrades.
For more tips on Windows device management and troubleshooting, explore our comprehensive guides.
Identifying Common Plug and Play Device Issues
Common Plug and Play Device Issues and How to Identify Them
Are you experiencing problems with your Plug and Play (PnP) devices not working or being recognized after plugging them in? Common Plug and Play device issues often arise from driver conflicts, hardware recognition failures, system instability, or power management settings.
To quickly identify these problems, check the Device Manager for yellow exclamation marks or error codes such as 31 and 43. Intermittent disconnection of USB devices typically indicates power management issues or faulty USB controllers.
Additionally, BIOS or UEFI settings and corrupted PnP services can prevent devices from appearing altogether. Plug and Play (PnP) automates hardware recognition and configuration, which means that when this service fails, your computer may not assign the necessary resources or drivers to new hardware, causing it to remain undetected.
Key signs to watch for include:
- Yellow exclamation marks or error codes (31 and 43) in Device Manager
- Devices disappearing or failing to be recognized after sleep or hibernation mode
- USB devices disconnecting unexpectedly or intermittently
- Power management features like USB selective suspend disabling ports
- BIOS/UEFI settings that restrict or disable device recognition
By identifying these Plug and Play device issues early, you can implement effective troubleshooting steps to restore your hardware functionality.
For more tips on fixing Plug and Play problems, keep monitoring the latest updates and solutions.
How to Reset Plug and Play Service to Default
To fix deeper issues with the Plug and Play service, restore its registry settings using a trusted default .reg file.
Make sure you have administrator rights and are comfortable editing the Windows registry before proceeding.
Always restart your computer after making changes to ensure the Plug and Play service resets properly.
Avoid resetting all Windows services at once—focus on the Plug and Play service unless you suspect widespread service corruption.
This targeted approach helps maintain system stability while resolving Plug and Play problems effectively.
Resolving Driver Problems Affecting PnP Devices
Troubleshooting Driver Issues for Plug and Play (PnP) Devices: A Complete Guide
Plug and Play (PnP) devices are designed for easy installation and immediate use, but driver problems can often cause these devices to malfunction. Common issues such as outdated, missing, or incompatible drivers frequently lead to connection errors, limited functionality, or device detection failures.
To fix these driver-related problems and ensure your PnP devices work flawlessly, follow this comprehensive troubleshooting guide.
How to Identify Driver Problems with PnP Devices
Start by opening Device Manager on your Windows PC. Look for yellow warning triangles or red X icons next to your devices, which indicate driver conflicts or errors. Common error codes like Code 40 or Code 41 typically reveal registry issues or driver detection failures that require attention.
Step-by-Step Solutions to Fix PnP Device Driver Problems
1. Update Drivers Automatically in Device Manager
Right-click the problematic device, select “Update driver,” and choose “Search automatically for updated driver software.” This lets Windows find and install the latest compatible drivers.
2. Uninstall and Reinstall Device Drivers
Remove the device by right-clicking it in Device Manager and selecting “Uninstall device.” Then, click “Scan for hardware changes” to reinstall the driver fresh, which can resolve corruption or misconfiguration.
3. Download Drivers from the Manufacturer’s Website****
For guaranteed compatibility and the latest features, download and install drivers directly from the device manufacturer’s official support page.
4. Reinstall USB Controllers
If USB PnP devices are malfunctioning, uninstall all entries under “Universal Serial Bus controllers” in Device Manager and restart your PC. Windows will automatically reinstall the USB controller drivers.
5. Update BIOS/UEFI and Chipset Drivers****
Ensure your motherboard’s BIOS/UEFI firmware and chipset drivers are up to date and compatible with your operating system. Incorrect or outdated firmware can prevent proper device recognition.
By following these proven steps, you can quickly resolve driver issues affecting Plug and Play devices and restore full functionality.
Regularly updating drivers and system firmware will help maintain optimal device performance and prevent future problems.
For more detailed guides and troubleshooting tips on PnP device drivers, keep visiting our blog. Stay updated and keep your devices running smoothly!
Using Windows Troubleshooters for Hardware Detection
How to Use Windows Troubleshooters to Fix Hardware Detection Issues
One of the most effective methods to diagnose and resolve hardware detection problems in Windows is by using the built-in Windows Troubleshooters. To get started, type “Troubleshoot” into the Windows Start menu search box and select Troubleshoot settings.
Next, click on Additional troubleshooters and choose Hardware & Devices to run a comprehensive hardware scan. Alternatively, you can access troubleshooters via the Control Panel by navigating to Hardware and Sound > Configure a device, or select View All to explore all available troubleshooting tools.
Running the Windows Hardware Troubleshooter quickly detects and automatically fixes common issues with Plug and Play devices, such as missing drivers, misconfigured hardware, or device conflicts.
If the troubleshooter can’t resolve the problems, it will provide a detailed diagnostic report along with recommended next steps to fix the hardware detection errors.
For deeper analysis, supplement the troubleshooter by checking Event Viewer for hardware-related error logs or using Resource Monitor to monitor device performance in real-time.
Advanced users can also leverage PowerShell or Command Prompt commands for in-depth hardware diagnostics on Windows.
By regularly using Windows Troubleshooters and reviewing diagnostic reports, you can efficiently maintain optimal hardware performance and quickly fix detection issues on your PC.
For more tips on troubleshooting hardware problems in Windows, explore related guides and support articles.
Dealing With Device Manager Errors and Conflicts
How to Fix Device Manager Errors and Resolve Hardware Conflicts on Your PC
If you’re experiencing hardware issues on your PC, Device Manager is the essential tool for diagnosing and fixing errors and conflicts. Common error codes like Code 31 or Code 43 indicate problems such as missing, corrupted, or incompatible drivers.
To start troubleshooting, open Device Manager and double-click the device with a warning icon to view its error code and status. Be sure to document the error code for future reference.
To resolve most Device Manager errors, uninstall the problematic device, then restart your computer to allow Windows to automatically reinstall the correct driver. If Windows doesn’t reinstall the driver properly, manually update the driver through Device Manager or download the latest driver version directly from the device manufacturer’s website.
Always verify that the driver matches your specific device model and Windows version to prevent compatibility issues.
Device conflicts, often caused by shared system resources, can also lead to hardware problems. You can fix these conflicts by disabling unused devices or upgrading to newer hardware components.
Key Steps to Fix Device Manager Errors and Conflicts:
- Identify and document error codes in Device Manager
- Uninstall and reinstall problematic device drivers
- Manually update drivers via Device Manager or manufacturer’s website
- Disable unused devices to resolve hardware conflicts
Managing USB Controllers and BIOS/UEFI Settings
Managing USB Controllers and BIOS/UEFI Settings for Optimal USB Device Detection
Understanding how USB controllers and BIOS/UEFI settings affect your computer’s ability to detect and manage external USB devices is essential for seamless Plug and Play functionality. To start, open Device Manager to view all USB controllers installed on your system. Here, you can update drivers, disable, or uninstall USB controllers to troubleshoot recognition issues.
If your USB devices aren’t detected, try disabling and then re-enabling the USB controllers to reset the USB subsystem. Updating USB controller drivers through Device Manager or directly from the manufacturer’s website can resolve many compatibility problems. For persistent USB recognition issues, uninstall all USB controllers and restart your PC—Windows will automatically reinstall them, restoring default configurations.
Additionally, review your BIOS or UEFI settings to ensure proper USB device support. Enable USB Legacy Support if you use older USB devices, and confirm that all relevant USB ports are activated. Some BIOS/UEFI setups allow disabling individual USB ports for security or troubleshooting purposes—make sure the necessary ports are enabled.
Updating your BIOS or UEFI firmware can also resolve hardware-level USB detection problems. Adjusting USB boot priority in BIOS/UEFI may improve device enumeration consistency during startup. By managing USB controllers and BIOS/UEFI settings effectively, you can ensure reliable detection and smooth operation of all your USB devices.
Cleaning Up Non-Present and Obsolete Devices
How to Clean Up Non-Present and Obsolete Devices in Windows for Better Performance
Even after disconnecting external devices, Windows often keeps entries for non-present or obsolete devices, which can clutter your system and cause driver conflicts.
To improve system performance and avoid driver issues, it’s essential to clean up these hidden devices regularly.
Step-by-Step Guide to Remove Non-Present and Obsolete Devices in Windows:
- Open Device Manager: Press Windows + X and select Device Manager.
- Show Hidden Devices: Click on the View menu and select “Show hidden devices” to reveal faded icons representing devices no longer connected.
- Uninstall Obsolete Devices: Right-click on each faded device and choose “Uninstall device.” If prompted, check “Delete the driver software for this device” to remove leftover drivers completely.
- Always unplug hardware before uninstalling to prevent Windows from reinstalling drivers automatically.
- Use USBDeview: For a more thorough cleanup of USB devices, download and use USBDeview, a free utility that lists all USB devices ever connected to your PC and allows you to uninstall unwanted entries.
- Backup and Restore: Before making changes, create a system restore point or back up your data to avoid accidental issues.
- Administrative Rights: Ensure you have administrator privileges to uninstall devices and drivers successfully.
Cleaning up non-present and obsolete devices helps optimize Windows performance, reduces driver conflicts, and frees up system resources.
Regular maintenance using Device Manager and tools like USBDeview is recommended for a smoother and more efficient PC experience.
Keywords: clean up non-present devices Windows, uninstall obsolete devices, remove hidden devices Device Manager, USBDeview cleanup, fix driver conflicts Windows
Best Practices for Maintaining Plug and Play Stability
Maintaining Windows Plug and Play (PnP) stability is essential for seamless hardware management and system performance. To ensure reliable PnP operation, follow these best practices for driver management, service configuration, and security monitoring.
Regularly inspect Device Manager for warning icons and update drivers using official manufacturer websites or Windows Update to avoid compatibility issues. Always uninstall faulty drivers before reinstalling to ensure a clean installation. Utilize Windows Driver Verifier to identify and troubleshoot kernel-mode driver problems promptly.
If you experience Plug and Play service issues, reset the service to its default settings and verify that all dependent services are running correctly. Protect system integrity by running system file checks and avoiding manual registry edits unless guided by official Microsoft documentation.
Prioritize installing only digitally signed and thoroughly vetted drivers, and apply security patches promptly to reduce vulnerabilities. Enhance driver health monitoring with tools like CodeQL and built-in Windows security features.
Optimize system performance by disabling unnecessary services and features such as Windows Copilot, and always back up your system before performing updates. Implementing these strategies will minimize hardware conflicts and keep your Windows Plug and Play system stable and efficient.
Frequently Asked Questions
Can Third-Party Security Software Interfere With Plug and Play Device Detection?
Yes, third-party security software can block or interfere with plug and play device detection. You should temporarily disable the software, update it, or set exclusions for device drivers to restore normal detection and resolve recognition issues.
How Does Plug and Play Work in Virtualized Windows Environments?
You might wonder if Plug and Play truly mimics hardware in virtualized Windows. It does—your hypervisor presents virtual devices, Windows detects them, loads drivers, and you can hot-add or remove devices just like on physical hardware.
Are There Group Policy Settings That Affect Plug and Play Behavior?
Yes, you can control Plug and Play behavior using Group Policy. Access gpedit.msc, then navigate to Device Installation policies. Configure rules to allow, block, or restrict device installation, and refresh policies or reboot for them to apply.
Can Plug and Play Issues Impact System Boot Times or Performance?
Did you know PnP delays can add up to 90 seconds to boot time? You should update BIOS, check device connections, and verify drivers are current. Troubleshoot by reviewing event logs for PnP errors affecting performance.
What Logs or Event Viewer Entries Help Diagnose Persistent Plug and Play Failures?
You should check Event Viewer’s System log for Event IDs 10000, 20001, and 6416, explore Security logs for 4663 events, review Application and Services Logs, and analyze Setupapi*.log files in %WINDIR%Inf for deeper troubleshooting.
Conclusion
Picture your PC running smoothly, every device clicking into place like puzzle pieces. By tackling Plug and Play problems—resetting services, updating drivers, and cleaning up Device Manager—you’re restoring harmony beneath the surface. Remember to check BIOS settings and use Windows troubleshooters for stubborn issues. Stay proactive: keep drivers updated and regularly review your devices. With these steps, you’ll keep your system’s hardware humming, ensuring every connection is as seamless as flipping a switch.