Laptop Running Slow Windows 10: Optimize Your Windows 10 Laptop Performance
To speed up your Windows 10 laptop, set your power plan to High or Ultimate Performance. Disable unnecessary startup apps in Task Manager and remove background bloatware.
Keep Windows and drivers updated regularly. Run Storage Sense and use Disk Cleanup to free up space on your device.
Adjust visual effects for best performance. Also, regularly check for malware and dust buildup inside your laptop.
For even faster results, consider upgrading your RAM or switching to an SSD. These hardware changes can make a significant difference.
Optimize Power Settings for Maximum Performance
Optimize Windows 10 Power Settings for Maximum Laptop Performance
Windows 10 automatically manages power settings, but you can significantly boost your laptop’s speed and responsiveness by optimizing its power plan. To get started, open Control Panel > Power Options and select the High Performance power plan for maximum system speed.
For even better responsiveness, enable the Ultimate Performance plan, which eliminates micro-latencies and unlocks your hardware’s full potential. Keep in mind, this plan increases energy consumption, so it’s best used when your laptop is plugged in. If the Ultimate Performance plan isn’t visible, open Command Prompt as an administrator and run the command: powercfg -duplicatescheme e9a42b02-d5df-448d-aa00-03f14749eb61. Different Power Plan Options are designed to cater to various user scenarios, allowing you to balance energy efficiency and speed based on your needs.
For personalized optimization, create a custom power plan tailored to your needs. Adjust settings such as processor minimum and maximum states, display brightness, and system cooling policies to match your workflow.
Use the Power Mode slider on the taskbar for quick performance adjustments, or dive into Power & Battery settings for more detailed control. Optimizing these Windows 10 power settings enhances performance during demanding tasks while allowing flexibility to conserve battery life when necessary.
Disable Unnecessary Background Apps and Startup Programs
How to Disable Unnecessary Background Apps and Startup Programs in Windows 10 for Better Performance
When your Windows 10 laptop runs too many apps and programs in the background, it can significantly slow down your system’s performance. CPU, memory, and disk resources get consumed, leading to longer boot times and slower application launches.
To speed up your device and improve overall responsiveness, follow these simple steps to disable background apps and manage startup programs effectively.
Step 1: Disable Background Apps
Go to Settings > Privacy > Background apps, then toggle off the apps you don’t need running in the background. This reduces unnecessary CPU and memory usage, helping your laptop run smoother and saving battery life. Managing background apps is crucial for maintaining system health and preventing unwanted slowdowns caused by hidden processes.
Step 2: Manage Startup Programs
Press Ctrl + Shift + Esc to open Task Manager. Click the Startup tab and disable non-essential programs that launch automatically when Windows starts. Disabling unnecessary startup items can boost application launch speeds by up to 50%, especially on devices with limited resources.
Step 3: Advanced Optimization
For advanced users, open Services.msc to stop unnecessary service processes, but ensure you don’t disable critical system services. You can also use tools like Windows Performance Analyzer and Resource Monitor to identify and troubleshoot resource-hogging applications.
Benefits of Disabling Background Apps and Startup Programs
- Improves system speed and responsiveness
- Extends battery life by reducing power consumption
- Enhances privacy by limiting apps that transmit data silently
- Optimizes resource usage for better multitasking
For the safest and most effective optimization, prioritize using native Windows tools. Follow these tips to keep your Windows 10 laptop running fast and smooth by disabling unnecessary background apps and startup programs today.
Keep Windows and Drivers Up to Date
Keep Your Windows 10 Laptop Updated for Optimal Performance and Security
To ensure your Windows 10 laptop operates efficiently and stays secure, regularly update both the Windows operating system and hardware drivers. Windows 10 delivers automatic critical quality and feature updates that fix security vulnerabilities, resolve bugs, and add new features. These updates help protect your device from cyber threats and maintain top performance.
Make sure to enable automatic updates in your Windows Update settings to avoid missing important security patches.
For hardware stability and compatibility, rely on Windows Update to manage driver updates for components like graphics cards, audio devices, and network adapters. Keeping drivers up to date ensures your laptop runs smoothly with the latest, most secure software versions.
If you prefer, use Device Manager to manually update specific drivers. Avoid disabling or rolling back updates unless absolutely necessary, as updates typically improve both security and system performance.
Regularly checking for Windows and driver updates is key to maximizing your laptop’s speed, reliability, and overall user experience.
Clean and Optimize Storage Space
Effective Storage Optimization Tips to Boost Your Windows 10 Laptop’s Performance
Maximize your Windows 10 laptop’s speed and reliability with smart storage management strategies. Start by enabling Storage Sense in Settings > System > Storage > Storage Sense. This powerful feature automates the cleanup of junk files, old downloads, and temporary folders, helping free up valuable disk space effortlessly.
Customize Storage Sense to run on a schedule or trigger when disk space is low, and configure it to delete files in the Recycle Bin or move unused files to OneDrive for seamless hybrid cloud storage optimization.
Additionally, manually run Disk Cleanup by searching “Disk Cleanup” in the Start menu. This tool safely removes system cache, Windows update leftovers, and browser caches, freeing up more storage space.
Don’t forget to delete old system restore points to reclaim additional disk space quickly.
For immediate storage relief, apply NTFS compression by right-clicking a folder, selecting Properties > Advanced, and enabling “Compress contents.” This reduces file size without compromising data integrity.
To further optimize storage, offload large and rarely used files to an external drive or cloud services like OneDrive.
Regularly scan your user folders for duplicate or large files and uninstall unused applications to eliminate clutter and improve overall system performance.
Implement these Windows 10 storage optimization tips today to enhance your laptop’s speed, reliability, and storage efficiency.
Adjust Visual Effects and System Settings
Optimize Windows 10 Performance by Adjusting Visual Effects and System Settings
Boost your Windows 10 laptop’s speed and responsiveness by fine-tuning visual effects and system settings. Visual elements such as animations, shadows, and transparency enhance the user experience but can slow down older devices or those with limited hardware resources.
To improve performance, open the Control Panel and navigate to System > Advanced system settings. Under the Performance section, click on Settings and select “Adjust for best performance” to disable all visual effects, or choose “Custom” to keep essential features like font smoothing and window contents while dragging.
For further optimization, go to Start > Settings > Ease of Access > Display. Here, you can disable animations and transparency to reduce GPU strain and extend battery life.
Additionally, set your power plan to “High performance” to avoid resource throttling by Windows 10. Keeping your device drivers up to date also ensures optimal graphics performance.
Remove Bloatware and Unused Applications
How to Remove Bloatware and Unused Applications on Windows 10 Laptops
Many Windows 10 laptops come pre-installed with bloatware—unwanted apps and manufacturer-specific software such as 3D Builder, Cortana, Xbox Live, and trial antivirus programs.
These bloatware apps consume valuable system resources, slow down your laptop’s performance, and take up disk space. To improve speed and responsiveness, it’s essential to remove bloatware and unused applications effectively.
Identify Bloatware and Unused Apps on Windows 10
Use built-in Windows tools or PowerShell scripts to generate a list of all installed AppX packages and OEM software.
Focus on apps you rarely use or those running unnecessary background services that impact CPU and RAM usage.
PowerShell Commands to Remove Bloatware
Remove unwanted apps with PowerShell commands like Remove-AppXPackage for user-installed applications or Remove-AppXProvisionedPackage to uninstall apps system-wide.
These commands help clear out unnecessary software quickly and efficiently.
Automated Tools for Bloatware Removal
Windows10Debloater is a popular tool that automates the removal of bloatware, cleans leftover registry entries, and disables unnecessary scheduled tasks to optimize your system.
Using such tools saves time and ensures a thorough cleanup.
Enterprise Solutions for Multiple Devices
For businesses managing multiple Windows 10 laptops, integrating debloat scripts with deployment tools like Windows Autopilot or Microsoft Intune allows seamless and centralized bloatware removal and system maintenance.
Benefits of Removing Bloatware on Windows 10
Removing bloatware frees up disk space, reduces CPU and memory usage, and decreases system startup times.
This results in a faster, more responsive Windows 10 laptop with fewer background processes slowing down your device.
Follow these steps to remove bloatware on your Windows 10 laptop and enjoy improved performance and efficiency.
Manage Windows Services and Security Settings
How to Optimize Windows 10 Laptop Performance by Managing Windows Services and Security Settings
To boost your Windows 10 laptop’s performance while maintaining strong security, it’s essential to manage Windows services and security settings effectively. Follow these expert tips to find the perfect balance between speed and protection.
1. Review and Adjust Core Isolation’s Memory Integrity in Windows Security
Core Isolation’s Memory Integrity is a key security feature in Windows 10 that helps protect against sophisticated malware. However, disabling Memory Integrity can slightly improve performance, especially on older or less powerful CPUs.
Before turning off this feature, carefully consider your security needs and workplace environment to avoid exposing your system to advanced threats.
2. Optimize Microsoft Defender Antivirus for Better CPU Usage
Microsoft Defender Antivirus provides real-time protection but can increase CPU load during file hash computations and scans, particularly when processing large files or using VPN connections.
To reduce performance impact:
- Use Group Policy Editor to disable unnecessary file hash checks.
- Set precise exclusions based on file hash or digital certificate to avoid over-scanning without compromising core protection.
- Avoid broad path-based exclusions to maintain optimal security.
- Validate all changes with Defender’s diagnostic tools to prevent false positives and ensure continued protection.
3. Apply Microsoft Security Baselines to Streamline Services and Tasks
Implementing Microsoft security baselines helps disable unnecessary Windows services and scheduled tasks, which can free up system resources and improve laptop speed.
Always test any hardening changes in a controlled environment to ensure they don’t interfere with critical applications before deploying them system-wide.
By carefully managing Windows services and security settings as described, you can significantly enhance your Windows 10 laptop’s performance without sacrificing essential security protections.
For more Windows optimization tips, keep following our expert guides.
Perform Regular Hardware and System Maintenance
Regular hardware and system maintenance is essential to keep your Windows 10 laptop running smoothly and efficiently. To optimize performance, clean internal components every 3 to 6 months using compressed air to remove dust from fans, vents, and heat sinks.
Avoid using vacuum cleaners as they can cause static damage. Always remove the battery before cleaning to prevent electrical issues.
For storage maintenance, run Disk Cleanup monthly to delete temporary files and empty the recycle bin. Regularly check for large or unused files and monitor your SSD or HDD health using built-in Windows tools or trusted third-party software.
Remember to defragment only traditional HDDs—not SSDs—and enable Windows Storage Sense for automated cleanup.
Keep your system secure and up-to-date by applying Windows updates promptly and updating device drivers every month. Disable unnecessary startup programs and uninstall unused applications to improve boot times and free up system resources.
Regularly back up your data, perform malware scans, and use Windows built-in tools like System File Checker to repair corrupted files. Following these Windows 10 maintenance tips will enhance your laptop’s reliability and extend its lifespan.
Upgrade Hardware Components for Lasting Speed
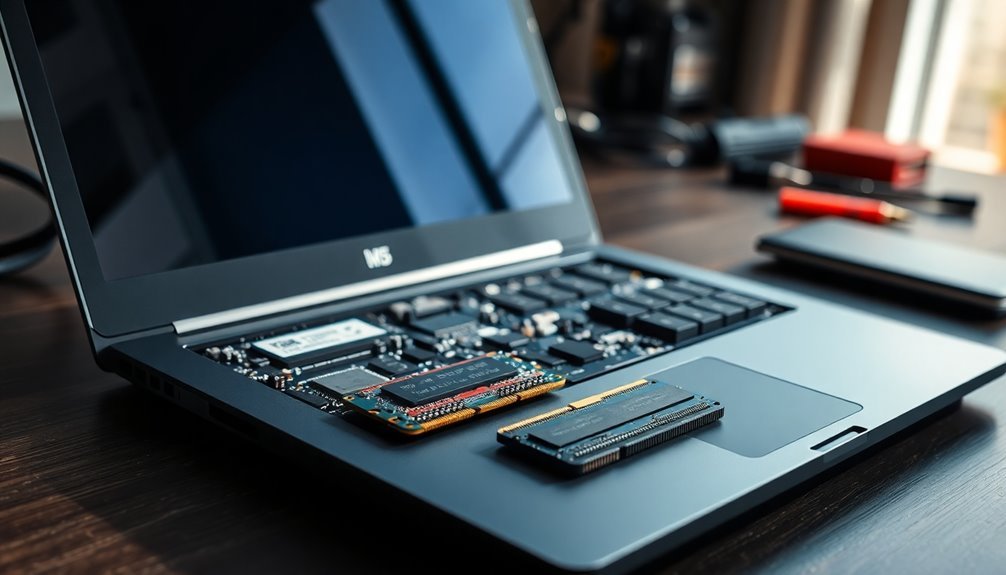
Upgrade Your Laptop Hardware for Faster Performance and Enhanced Speed
To achieve lasting speed improvements and a smoother user experience, upgrading your laptop’s hardware is essential after maintaining a solid maintenance routine.
Boost your laptop’s multitasking capabilities and accelerate demanding applications by upgrading your RAM from 8GB to 32GB, ideally in a dual-channel configuration. Opt for RAM with efficient rank and bank setups, such as x8 over x16, to maximize performance.
Enhance your laptop’s speed further by replacing a traditional HDD with a high-speed SSD. This upgrade dramatically reduces boot times and speeds up file access. Before purchasing, ensure the SSD is compatible with your laptop’s SATA or M.2 interface.
Remember to back up all important data before swapping drives to avoid data loss.
Looking for improved graphics performance? Some laptops allow GPU upgrades or support external GPUs (eGPU), providing a significant boost for gaming and creative tasks. Always verify your laptop’s hardware compatibility before proceeding with GPU enhancements.
Key Hardware Upgrades to Improve Laptop Speed:
- Upgrade RAM from 8GB to 32GB in dual-channel mode for better multitasking
- Replace HDD with SSD to speed up boot times and file access
- Consider GPU upgrades or external GPU (eGPU) solutions for graphics-intensive applications
Frequently Asked Questions
Can a Slow Wi-Fi Connection Cause My Laptop to Run Slowly?
Yes, a slow Wi-Fi connection makes your laptop appear sluggish during online tasks, like browsing or streaming, but it won’t affect offline tasks. Improve speed by moving closer to the router, updating drivers, or reducing network congestion.
Does Overheating Affect Windows 10 Laptop Performance?
Yes, overheating absolutely impacts your Windows 10 laptop’s performance—even if you think it’s not that hot. You’ll notice lag, sudden shutdowns, or freezing. Clean vents, monitor temperatures, and use a cooling pad to prevent issues.
Will Using an External Monitor Slow Down My Laptop?
Yes, using an external monitor can slow down your laptop, especially if it has an integrated GPU or the monitor’s resolution is high. To minimize impact, update drivers, choose compatible displays, and monitor GPU load.
How Does Running Multiple User Accounts Impact Performance?
Running multiple user accounts at once increases CPU, RAM, and disk usage because background processes stay active. You’ll see slower performance, especially at logon or when switching users. Always log off unused accounts and manage startup apps.
Can Malware Infections Make My Laptop Sluggish?
Yes, malware infections can make your laptop sluggish by consuming CPU, memory, and network resources. You should run a reputable antivirus scan, remove suspicious programs, and monitor for unusual activity to restore your laptop’s performance.
Conclusion
By following these steps, you can boost your Windows 10 laptop’s speed and efficiency. Did you know that optimizing startup programs alone can cut boot times by up to 50%? Keep your system updated, clean out unused apps, and adjust settings regularly for best results. If you still notice slowness, consider a hardware upgrade like an SSD. Stay proactive, and you’ll enjoy a faster, more reliable laptop every day.
