S Mode Try Again Error Windows 11: Fix Windows S Mode Problems
If you get a “Try Again” error when switching out of S Mode in Windows 11, start by checking your internet connection, system region, and date. These settings can affect the process.
Next, reset or repair the Microsoft Store using wsreset.exe. Also, make sure you’ve installed all Windows updates.
If issues persist, use PowerShell to re-register the Store. Alternatively, create a new user account to see if that resolves the problem.
Advanced steps—like adjusting BIOS/UEFI and registry settings—can further resolve stubborn problems. Next, you’ll discover detailed solutions step by step.
Common Causes of S Mode Try Again Errors in Windows 11
Common Causes of “Try Again” Errors When Switching Out of Windows 11 S Mode
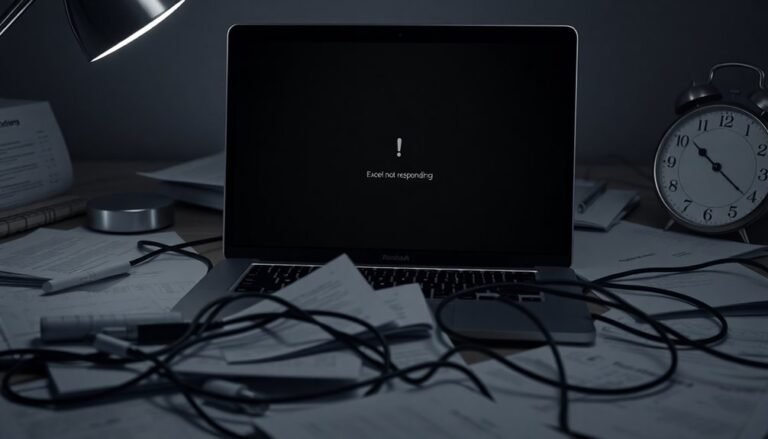
If you’re experiencing persistent “Try Again” errors while trying to switch out of Windows 11 S Mode, several key system issues could be causing the problem.
One of the most frequent causes is Microsoft Store problems. If your Microsoft Store app is outdated, corrupted, or unable to update properly, the switch from S Mode may fail. To fix this, try resetting or reinstalling the Microsoft Store through PowerShell commands or the Apps & Features settings in Windows 11.
Another major factor is Windows Update service issues. Missing updates or a disabled Windows Update service can prevent you from leaving S Mode. Open Services.msc to restart the Windows Update service and ensure all system updates are fully installed.
Stable internet connectivity is also critical for switching out of S Mode. Network problems, firewall blocks, or Microsoft server outages can cause “Try Again” errors, so verify your internet connection is strong and unrestricted.
Security settings like Secure Boot and third-party antivirus software can interfere with the S Mode exit process. Check your BIOS or UEFI settings and temporarily disable any antivirus programs that might be causing conflicts. Newer devices may have unexpected limitations or restrictions in the BIOS/UEFI settings, which can complicate the process of disabling Secure Boot or accessing certain options.
Lastly, make sure you’re signed in with a Microsoft account that has the correct permissions and synchronization enabled to complete the switch.
By addressing these common causes—Microsoft Store malfunctions, Windows Update service errors, network connectivity issues, security settings conflicts, and account permissions—you can successfully resolve “Try Again” errors and switch out of Windows 11 S Mode.
For more troubleshooting tips and detailed guides, stay tuned to Windows 11 support resources.
Verifying System Time, Date, and Region Settings
Next, navigate to *Language & region* settings and verify that your Country or region is correctly set to match your actual location.
This setting directly impacts app availability, regional content, and software licensing. You can easily access these options through the Settings app for quick adjustments.
Additionally, check and adjust the Regional format to ensure that date, time, and number formats display correctly according to your preferences.
For advanced customization, modify regional formats through the Windows Registry Editor at `HKEY_CURRENT_USERControl PanelInternational`.
Remember to restart your PC after making these changes to apply them system-wide and avoid any synchronization or functionality issues.
Resetting and Repairing the Microsoft Store
How to Reset and Repair the Microsoft Store to Fix App Installation Issues in Windows S Mode
If you’re experiencing problems with app installations or updates in Windows S Mode, the Microsoft Store might be the culprit. Ensuring your system’s regional settings are correct is the first step, but addressing Microsoft Store issues is crucial for smooth app management.
Here’s how to reset and repair the Microsoft Store to resolve common errors and improve performance:
1. Clear the Microsoft Store Cache
Press Windows key + R, type `wsreset.exe`, and press Enter. This command resets the Store cache without affecting your installed apps or data, often fixing launch or download problems quickly.
2. Delete the LocalCache Folder Contents
For a more thorough cleanup, navigate to the Microsoft Store’s LocalCache folder and delete its contents. This can help eliminate corrupted cache files that cause errors.
3. Use Repair or Reset via Settings
Go to Settings > Apps > Installed apps, find Microsoft Store, then select Advanced options. Use the Repair option first; if that doesn’t work, choose Reset. Resetting may remove some preferences but keeps your apps intact.
4. Re-register Microsoft Store Using PowerShell
Open PowerShell as an administrator and run the command to re-register the Store app. This step addresses deeper store corruption and restores essential components.
5. Check for Windows and Microsoft Store Updates
Keeping your system and Store updated ensures you have the latest fixes and improvements.
By following these Microsoft Store reset and repair methods, you can fix store-related errors, restore store functionality, and enable successful app installations in Windows S Mode.
For best results, perform these troubleshooting steps regularly or whenever you encounter Store issues.
Steps to Switch Out of S Mode Successfully
If you experience problems switching out of S Mode, try disabling Secure Boot in your UEFI/BIOS settings or use advanced command-line and registry techniques.
These methods are particularly useful if you want to switch out of S Mode without a Microsoft account.
Always proceed with caution, as incorrect changes may impact your system’s stability and performance.
Follow these expert tips to successfully switch out of S Mode and enhance your Windows experience.
Updating Windows 11 and Microsoft Store for Compatibility
How to Update Windows 11 and Microsoft Store for Optimal Compatibility and Performance
Keeping Windows 11 and Microsoft Store up to date is essential for ensuring smooth compatibility and enhanced functionality, especially when using S Mode, which restricts app installations for added security.
Outdated system files or app versions can cause Microsoft Store errors, failed app launches, or update failures.
Follow these steps to keep your system running flawlessly:
1. Check for Windows 11 Updates
Navigate to Start > Settings > Windows Update > Check for updates**. Installing the latest Windows updates, particularly if you’re on version 24H2 or newer, helps resolve compatibility issues and improves Store performance** by applying necessary patches.
2. Update Microsoft Store Apps
Open Microsoft Store, go to Library > Get updates, and install all available app updates. Regularly updating your apps fixes bugs and prevents initialization errors.
3. Ensure a Stable Internet Connection
A reliable internet connection is critical during updates. Verify your network settings and check firewall configurations if you experience update errors or download interruptions.
4. Use Windows Troubleshooters for Store and Update Issues
If you encounter problems updating Windows or Microsoft Store apps, run the built-in Windows Troubleshooters found under Settings > System > Troubleshoot > Other troubleshooters to automatically detect and fix common errors.
5. Reset Microsoft Store if Problems Persist
For persistent issues, reset the Microsoft Store by going to Settings > Apps > Apps & features > Microsoft Store > Advanced options > Reset. This often resolves update or launch problems.
By regularly updating Windows 11 and Microsoft Store, maintaining a stable internet connection, and utilizing troubleshooting tools, you can ensure reliable performance and avoid common errors.
Stay proactive to enjoy the best experience on your Windows 11 device.
Advanced Troubleshooting Using PowerShell Commands
Windows 11 S Mode restricts PowerShell access for enhanced security, but advanced troubleshooting often requires command-line tools to fix issues like the “Try Again” error when switching out of S Mode. If you temporarily gain PowerShell access—such as after a system glitch or incomplete update—you can use specific PowerShell commands to reset or repair the Microsoft Store and Windows Update services, which are common sources of problems.
To reset the Microsoft Store in Windows 11 S Mode, run this command in an elevated PowerShell window (Run as Administrator):
“`
Get-AppxPackage *Microsoft.WindowsStore* | Reset-AppxPackage
“`
After executing, reboot your PC to apply changes. If the Store is corrupted, uninstall and reinstall it using these PowerShell commands:
“`
Get-AppxPackage -Name “Microsoft.WindowsStore” | Remove-AppxPackage
Get-AppxPackage -allusers Microsoft.WindowsStore | Foreach {Add-AppxPackage -DisableDevelopmentMode -Register “$($_.InstallLocation)AppXManifest.xml”}
“`
Restart your computer once the process completes. Additionally, you can restart Windows Update services to resolve update-related issues by running:
“`
Restart-Service -Name wuauserv
“`
Alternatively, clear the Microsoft Store cache quickly with the built-in command:
“`
wsreset.exe
“`
Always ensure you launch PowerShell with administrative privileges to avoid permission errors. Note that these PowerShell troubleshooting steps do not directly disable S Mode but help overcome common barriers preventing users from switching out of S Mode successfully. If commands fail, system policies or recent updates might have re-applied S Mode restrictions.
Adjusting BIOS and UEFI Firmware Settings

How to Adjust BIOS and UEFI Firmware Settings to Fix Windows 11 S Mode Issues
If you’re facing persistent Windows 11 S Mode problems, adjusting your BIOS or UEFI firmware settings can help resolve boot-related restrictions and improve system performance. These firmware settings control how your PC starts up and influence critical features like Secure Boot and TPM 2.0, which are essential for Windows 11.
Access BIOS or UEFI Firmware Settings in Windows 11
To enter your BIOS or UEFI firmware settings, use one of the following methods:
- Navigate to Settings > System > Recovery > Advanced Startup > Restart Now.
- Open an elevated Command Prompt and run: `shutdown /r /fw /t 0`.
- Press keys such as F2, Del, or Esc immediately during the boot process.
- Hold the Shift key while clicking Restart to access Advanced Startup options.
Check Your System’s Boot Mode****
Before making changes, verify whether your PC is using Legacy BIOS or UEFI boot mode:
- Open System Information by typing `msinfo32` in the Run dialog (Win + R).
- Look for the BIOS Mode entry; it should show either Legacy or UEFI.
Windows 11 requires UEFI mode to support essential security features like Secure Boot and TPM 2.0. If your system is in Legacy mode, convert your disk from MBR to GPT using Microsoft’s built-in MBR2GPT tool for compatibility.
Key BIOS/UEFI Settings to Adjust for Windows 11
Ensure the following settings are properly configured to fix Windows 11 S Mode issues:
- Secure Boot: Enable this to enhance security and comply with Windows 11 requirements.
- Boot Device Order: Set the primary boot device correctly to avoid boot failures.
- Fast Boot: Disable if causing startup problems.
- EFI Boot Entries: Verify boot entries to ensure proper OS loading.
- Partition Style (MBR/GPT): GPT is required for UEFI boot mode and Windows 11 support.
By carefully adjusting BIOS and UEFI firmware settings, you can troubleshoot and resolve Windows 11 S Mode problems effectively, ensuring a smoother and more secure boot experience.
For more detailed guidance, refer to your PC manufacturer’s documentation or official Microsoft resources.
Creating a New User Account to Resolve Persistent Errors
How to Fix Persistent Windows 11 S Mode Errors by Creating a New User Account
If you’ve confirmed that your BIOS and UEFI settings support Windows 11 S Mode but still face persistent errors like “Try Again” messages, login failures, or crashes in the Settings app, the problem may lie in a corrupted user profile.
Creating a new user account is a proven solution to isolate and resolve these issues by providing a fresh profile without inherited corruptions.
Step-by-Step Guide to Create a New User Account in Windows 11:
- Use the Run Command:
- Press Windows + R keys to open the Run dialog.
- Type `netplwiz` and press Enter.
- Click the Add button to create a new user account, bypassing any potential issues with the Settings app.
- For Windows 11 Pro Users:
- Right-click the Start button and select Computer Management.
- Navigate to Local Users and Groups.
- Right-click Users and select New User to add a new account.
- For Windows 11 Home or When GUI Tools Fail:
- Open Command Prompt as Administrator.
- Enter the command: `net user NewUsername NewPassword /add` replacing NewUsername and NewPassword with your preferred credentials.
Troubleshooting Account Creation Issues:
If the new account creation process stalls or fails, try deleting the Default user folder located at `C:UsersDefault`.
After deletion, reboot your PC and allow Windows to regenerate the folder automatically.
Verifying the New User Account:
Always sign in with the newly created account to test if Windows 11 S Mode errors have been resolved.
If the errors disappear, carefully transfer your essential files from the old profile to the new one.
By following this guide to create a new user account, you can effectively fix persistent Windows 11 S Mode errors and enjoy a smoother, error-free experience.
For more Windows 11 troubleshooting tips, stay tuned to our blog.
Frequently Asked Questions
Will Switching Out of S Mode Affect My Device Warranty or Support?
Switching out of S Mode won’t void your device warranty or affect standard support. Your warranty stays valid, since mode changes are software-based. You’ll still get hardware support, but follow your original purchase agreement and manufacturer’s warranty terms.
Can I Revert to S Mode After Switching Out?
No, you can’t revert to S Mode after switching out. Microsoft’s process is one-way. To return, you’ll need to fully reset or reinstall Windows using recovery tools, which erases all files and apps—so back up first.
Is There a Cost to Switch Out of S Mode?
Imagine opening a door with no toll—switching out of S mode costs you nothing. You won’t pay any fees or need a new license. Just follow the Microsoft Store prompts, and your device transforms instantly, permanently.
Do Installed Apps or Files Get Deleted When Exiting S Mode?
When you exit S mode, you won’t lose your files or installed Microsoft Store apps. Your personal data stays intact. Only apps outside the Microsoft Store, which you couldn’t install in S mode, become available afterward.
How Does S Mode Impact Battery Life Compared to Standard Windows 11?
Think of S Mode as driving a hybrid car—it’s streamlined for efficiency, running fewer background apps and only vetted software. You’ll notice longer battery life versus standard Windows 11, especially if you troubleshoot by minimizing unnecessary tasks.
Conclusion
Think of fixing S Mode errors in Windows 11 like untangling a stubborn knot—it takes patience and the right steps. By checking your system settings, updating Windows, repairing the Microsoft Store, and using PowerShell, you’ll cover all the bases. If problems still cling on, try tweaking BIOS settings or creating a new user account. Following these troubleshooting steps will help you break free from the S Mode loop and get your system running smoothly.