Windows Issue: General System Problem Resolution

To resolve general Windows system problems, start by updating Windows, drivers, and antivirus software. Next, scan for malware to ensure your system is clean.
Repair system files using the SFC (`sfc /scannow`) and DISM commands. Check disk health with CHKDSK to identify potential issues.
Clear storage space to improve performance. Disable unnecessary startup programs via Task Manager to speed up boot times.
If crashes persist, monitor hardware health and remove recent peripherals. These steps tackle most common issues.
Next, you’ll see how to address tougher crashes, update failures, and tricky hardware conflicts.
Common Causes of Windows System Crashes and Freezes
Common Causes of Windows System Crashes and Freezes Explained
Windows system crashes and freezes are often caused by a combination of software and hardware issues that disrupt normal computer performance. One of the leading causes is malware infections. Malicious software can overload your CPU or memory with background processes, causing your system to freeze or crash unexpectedly. These infections typically come from unsafe downloads, email attachments, or visiting compromised websites, resulting in abnormal Windows behavior.
Another major factor is outdated or incompatible operating system files and software. Running programs that aren’t updated to match your current Windows OS version can lead to frequent crashes and system instability. Insufficient storage space is another underlying issue that can hinder system functionality and make your computer more prone to freezing.
Hardware problems also play a significant role. Failing RAM modules, hard drives nearing failure, or overheating caused by dust buildup and blocked air vents will degrade system performance and trigger sudden stalls or shutdowns.
Additionally, insufficient memory (RAM) or low storage space can destabilize your Windows PC, causing slowdowns or blue screen errors. Faulty or outdated device drivers are common culprits behind freezes, as are conflicts between peripheral devices connected to your computer.
To minimize Windows system crashes and freezes, it’s essential to regularly install Windows updates, run antivirus and malware scans, perform hardware diagnostics, and keep device drivers up to date.
Maintaining your PC with these best practices helps improve stability and prevents unexpected Windows crashes and freezes.
Repairing System Files and Disk Corruption
How to Repair System Files and Fix Disk Corruption on Windows PC
Even the most well-maintained Windows PC can experience file corruption or disk errors, leading to persistent system errors, failed Windows updates, or overall system instability. To effectively repair system files and fix disk corruption, follow these essential steps using built-in Windows tools.
1. Repair Windows System Files with DISM and SFC Commands
Start by running the Deployment Image Servicing and Management tool (DISM) to fix the Windows system image. Open an elevated Command Prompt (Run as Administrator) and enter:
“`
DISM /Online /Cleanup-Image /RestoreHealth
“`
This command repairs the Windows image, preparing your system for the System File Checker (SFC) tool.
Next, run:
“`
sfc /scannow
“`
This scans all protected system files and repairs corrupted files automatically. If SFC detects files it can’t repair, review the CBS log located at `%windir%LogsCBSCBS.log` for detailed information.
2. Fix Disk Corruption Using CHKDSK
To address disk-level issues, use the Check Disk utility. Run Command Prompt as administrator and enter:
“`
chkdsk /f
“`
This fixes file system errors. For a deeper scan that locates bad sectors and recovers readable information, use:
“`
chkdsk /r
“`
Note that CHKDSK may require a system reboot if the drive is in use during the scan. If you need to manually replace a corrupted system file that SFC could not repair, you can use the takeown and icacls commands to take ownership and grant permissions before copying a known good file to the correct location.
Important Tips for Repairing Windows System Files and Disk Errors
- Always run repair commands from an elevated Command Prompt to ensure proper permissions.
- Back up important data before running disk repair tools to prevent data loss.
- Consider using trusted third-party utilities like Tweaking Repair for an automated, user-friendly interface to perform these fixes.
By regularly using DISM, SFC, and CHKDSK, you can maintain Windows system integrity, prevent errors, and improve overall PC stability.
For more detailed guides on repairing Windows system files and fixing disk corruption, explore our step-by-step tutorials and expert tips.
Troubleshooting Windows Update Failures
Troubleshooting Windows Update Failures: Step-by-Step Guide
Many Windows users experience Windows Update failures that prevent important security patches and feature improvements from installing correctly.
These update errors can cause persistent error messages or incomplete installations, affecting your system’s performance and security.
To fix Windows Update problems, follow this comprehensive troubleshooting guide.
1. Run the Windows Update Troubleshooter
Start by using the built-in Windows Update troubleshooter. Navigate to Settings > System > Troubleshoot > Other troubleshooters (or Update & Security > Troubleshoot > Additional troubleshooters on some Windows versions).
This automated tool diagnoses common Windows Update issues, resets update components, and repairs corrupted files to help resolve update errors quickly.
2. Manually Reset Windows Update Components
If update failures continue, open Command Prompt as an administrator and stop key services: `wuauserv`, `cryptSvc`, `bits`, and `msiserver`.
Then, rename the SoftwareDistribution and Catroot2 folders to clear cached and potentially corrupted update files.
After this, restart the stopped services to refresh the update process.
3. Free Up Disk Space
Insufficient disk space can cause Windows Update errors. Use Disk Cleanup or manually delete unnecessary files to free up storage.
Ensuring enough free space improves the likelihood of successful updates.
4. Disconnect External Devices and Disable Third-Party Software
External hardware devices or third-party antivirus and firewall software might interfere with Windows Update.
Temporarily disconnect external devices and disable antivirus or firewall programs to rule out these conflicts.
5. Use System Restore or Reset Your PC
If Windows Update still fails, use System Restore to revert your computer to a previous working state.
As a last resort, perform a full system reset after backing up your important files.
This step reinstalls Windows and resolves persistent update issues.
By following these troubleshooting steps, you can fix Windows Update errors and keep your PC secure and up to date.
For more Windows Update tips and solutions, visit our blog regularly.
Addressing Unexpected Restarts and Blue/Black Screen Errors
How to Fix Unexpected Restarts and Blue or Black Screen Errors on Your PC
Unexpected restarts and blue or black screen errors are common issues that indicate hardware or software problems on your PC. To troubleshoot these errors and keep your computer running smoothly, follow these expert tips.
1. Check for Overheating
Monitor your CPU and GPU temperatures using reliable software tools. Overheating can cause sudden restarts or screen errors. Clean dust from fans and vents to improve airflow and prevent thermal shutdowns.
2. Inspect Your Power Supply
An unstable or failing power supply can lead to random shutdowns and restarts. Ensure your power supply unit (PSU) is functioning correctly and providing consistent power to your system.
3. Disable Automatic Restart on System Failure
To identify error codes causing blue or black screen crashes, disable automatic restart:
- Go to System Properties > Advanced > Startup and Recovery.
- Uncheck “Automatically restart.”
This stops endless reboot loops and displays the error code for troubleshooting.
4. Update Device Drivers and BIOS
Outdated or corrupt drivers often cause system instability. Use Device Manager or trusted third-party tools to update all drivers. If problems started after a driver update, roll back to a previous version.
Also, check your motherboard manufacturer’s website for BIOS updates that can fix compatibility issues.
5. Run Memory and Storage Diagnostics
Use Windows Memory Diagnostic and manufacturer-specific tools to test your RAM and storage devices. Faulty memory or hard drives can trigger blue or black screen errors.
6. Remove Recently Added Hardware and Boot into Safe Mode
If you’ve added new hardware recently, remove it to see if the problem resolves. Boot into Safe Mode to identify software or driver conflicts that may be causing system crashes.
7. Use System Restore for Stability
If issues persist, use Windows System Restore to revert your PC to a previous stable state, resolving software-related errors.
By following these steps, you can effectively troubleshoot and fix unexpected restarts and blue or black screen errors on your PC, ensuring better performance and reliability.
For more detailed guides on fixing PC errors and improving system stability, explore our troubleshooting resources and stay updated with the latest tech solutions.
Resolving Slow Boot and Performance Problems

How to Fix Slow Boot and Improve Windows PC Performance
If your Windows PC is experiencing slow boot times or sluggish performance, several factors could be the cause—from misconfigured startup programs to hardware limitations.
To boost your computer’s boot speed and overall responsiveness, follow these effective troubleshooting steps.
1. Disable Unnecessary Startup Programs
Use Task Manager to manage startup applications. Disabling unwanted programs that automatically launch at startup can significantly reduce boot time.
Be sure to keep essential security software enabled to maintain system protection.
2. Repair Windows System Files and Disk Errors
Corrupted system files and disk issues often slow down your PC. Run built-in Windows tools like `sfc /scannow` to scan and repair system files, `DISM.exe /Online /Cleanup-image /Restorehealth` to fix Windows image corruption, and `chkdsk /f /r /b` to check and repair disk errors.
These utilities help restore system integrity and improve performance.
3. Upgrade to a Solid State Drive (SSD)
If your PC still boots slowly after software optimizations, consider upgrading from a traditional hard disk drive (HDD) to a solid state drive (SSD).
SSDs provide faster data access speeds and drastically shorten boot times, delivering a noticeable performance boost.
4. Update Drivers and Firmware
Ensure all your device drivers are current and check for BIOS or UEFI firmware updates.
Updated drivers and firmware can resolve hardware initialization delays and compatibility issues that affect startup speed.
By following these proven methods to optimize startup settings, repair system files, and upgrade hardware, you can significantly improve your Windows PC’s boot time and overall performance.
Keywords: slow boot Windows, fix slow startup, improve Windows performance, disable startup programs, repair Windows system files, upgrade to SSD, update drivers and BIOS
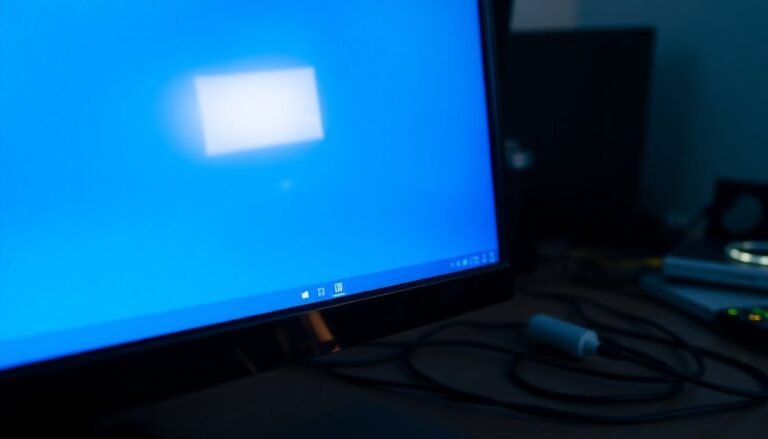
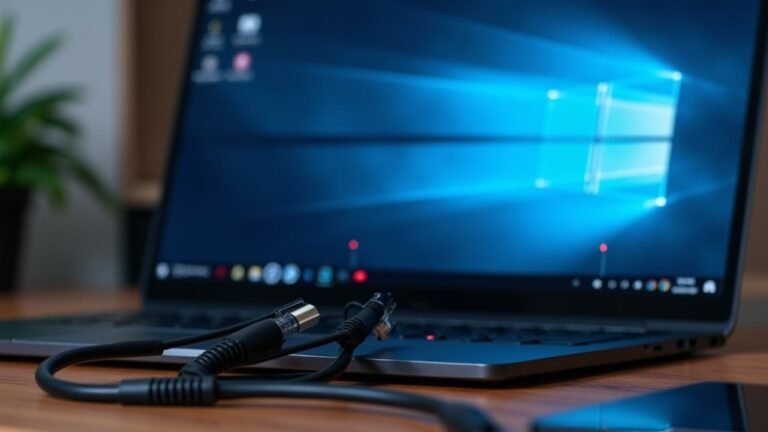
Managing Display and Peripheral Hardware Issues
Common Display and Peripheral Hardware Issues on Windows and How to Fix Them
Experiencing display problems like flickering screens, blank monitors, or unrecognized USB devices can significantly impact your Windows performance. To resolve these common hardware issues, start by verifying all physical connections—make sure your video cables and USB cords are securely connected and free from damage.
Test your monitor with a different device to eliminate the possibility of hardware failure.
Next, open Device Manager and look for any yellow exclamation marks next to display adapters or USB controllers. These indicators suggest driver problems that can often be fixed by updating, rolling back, or reinstalling the drivers.
Utilize Windows Troubleshooters found under Settings > Update & Security > Troubleshoot for automated diagnostics and repairs.
If your display issues began after recent system changes, use System Restore to revert to an earlier state, or boot Windows into Safe Mode to diagnose potential software conflicts.
For unresolved problems, run the Windows Memory Diagnostic tool to check for faulty RAM and review the Event Viewer for hardware-related errors.
Resetting your BIOS/UEFI settings to default can help if devices aren’t being detected properly. Additionally, updating your BIOS firmware ensures compatibility with your hardware.
Temporarily disconnect nonessential peripherals to isolate and identify conflicts.
Regularly performing hardware diagnostics and keeping your drivers up to date can prevent recurring display and peripheral hardware problems, ensuring a smoother Windows experience.
Keywords: Windows display issues, USB device not recognized, fix flickering screen Windows, update drivers Windows, Windows hardware troubleshooting, BIOS reset Windows, Windows Memory Diagnostic, Device Manager errors
Frequently Asked Questions
How Do I Back up My Important Files Before Troubleshooting System Issues?
Back up your important files by copying them to an external drive, cloud storage, or using Windows File History. Create a system image for full recovery. Confirm backup completion and test file access before starting any troubleshooting steps.
What Steps Should I Take to Recover Deleted Files in Windows?
First, check the Recycle Bin and restore files if present. If not, use File History or the Windows File Recovery app with appropriate commands. Avoid using the source drive and save recovered files to a different location.
How Can I Create a System Restore Point in Windows?
To create a system restore point, open “Create a restore point” from the search bar, select your system drive under the System Protection tab, click Create, enter a descriptive name, then confirm. Wait for Windows to finish.
What Are the Safest Ways to Reset Windows Without Losing Data?
To safely reset Windows without losing data, use “Reset This PC” with “Keep my files” or reinstall via installation media, selecting to keep files. Always create a full backup beforehand to safeguard against accidental data loss.
How Do I Transfer My Settings and Apps to a New PC?
To transfer your settings and apps to a new PC, use migration software like EaseUS Todo PCTrans or leverage your Microsoft account for cloud sync. You’ll need to reinstall some apps, as direct transfer isn’t always possible.
Conclusion
You’ve just tackled a mountain of Windows issues that could make even the bravest PC user want to toss their computer out the window. With systematic troubleshooting—repairing files, fixing updates, managing crashes, and optimizing performance—you’re now equipped to resolve most system problems. Remember, staying proactive with maintenance and updates will keep your system running smoother than ever. If all else fails, don’t hesitate to seek expert help. Your PC’s reliability is truly in your hands.