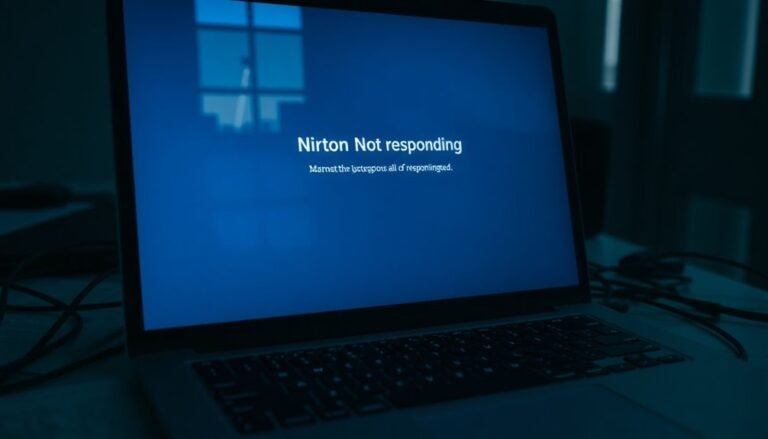
Windows Problems Fix: General System Repair Guide

To fix general Windows problems, start by running System File Checker (`sfc /scannow`) to repair corrupted files. Next, use DISM commands to repair deeper Windows image issues.
Check your drive with `chkdsk`, and address boot failures with Startup Repair or bootrec commands in WinRE. If apps misbehave, try built-in repair or reinstall options.
For persistent issues, use Windows installation media for repair or a clean install. There’s more to streamline your troubleshooting process ahead.
Running System File Checker (SFC) for Corrupted System Files

How to Run System File Checker (SFC) in Windows to Fix Corrupted System Files
If your Windows PC is showing errors or acting unpredictably, running the System File Checker (SFC) tool is a fast and effective way to detect and repair corrupted or missing system files. Follow these simple steps to run SFC and improve your system stability.
Step 1: Open Command Prompt as Administrator
Type “Command Prompt” in the Windows search bar, right-click the result, and select Run as administrator. This opens an elevated Command Prompt window with the necessary permissions.
Step 2: Run the SFC Scan
In the Command Prompt window, enter the following command and press Enter:
“`
sfc /scannow
“`
The System File Checker will begin scanning all protected system files and automatically repair any corrupted or missing files it detects. You can also run SFC using Windows Recovery Media if your computer cannot boot normally.
Step 3: Wait for the Scan to Complete
Allow the scan to reach 100% without interruption. This ensures that all repairs finish properly.
What SFC Does
SFC compares your current system files against a cached copy stored in the `%WinDir%System32dllcache` folder. If any files are damaged or missing, SFC replaces them with the correct versions from the cache.
Possible SFC Scan Results
- No integrity violations found: Your system files are intact.
- Corrupted files repaired: SFC fixed the issues automatically.
- Corrupted files found but not repaired: You may need to manually fix problems using the CBS log.
Step 4: Review the CBS Log (If Needed)
If SFC reports it couldn’t fix some files, check the detailed log file located at:
“`
%WinDir%LogsCBSCBS.log
“`
This log provides insights on files that require manual attention.
Pro Tips for Running SFC
- Always install the latest Windows updates before running SFC to ensure maximum compatibility and repair success.
- Restart your PC after the scan completes to apply any system file repairs.
- If problems persist, consider running the Deployment Image Servicing and Management tool (DISM) for advanced repairs.
Repairing Windows Images With DISM
How to Repair Windows System Images Using DISM Tool
One of the most effective ways to fix deep Windows system issues is by using the Deployment Image Servicing and Management (DISM) tool. To get started, open Command Prompt as an administrator.
Begin by running a quick corruption check with the command:
`DISM /Online /Cleanup-Image /CheckHealth`
For a more thorough scan, use:
`DISM /Online /Cleanup-Image /ScanHealth`
Note that this process may take several minutes. These commands only detect corruption; they don’t repair it. The DISM tool is also capable of preparing, modifying, and repairing system images used in environments like Windows PE, Windows Setup, and the Windows Recovery Environment.
To repair corrupted Windows image files, run the following command:
`DISM /Online /Cleanup-Image /RestoreHealth`
By default, DISM fetches repair files from Windows Update. If your device is offline or Windows Update is unavailable, specify a local repair source using the `/Source:` parameter. For example, you can use the `install.wim` file from a mounted Windows ISO.
Combine this with the `/LimitAccess` switch to prevent DISM from contacting Windows Update. Make sure the repair source matches your installed Windows version to avoid compatibility issues.
If the repair process fails, try running DISM in Safe Mode and review the log file located at `%windir%LogsDISMdism.log` for detailed error information. Always run DISM commands with administrator privileges to ensure successful execution.
Using DISM is a powerful way to maintain and repair your Windows system image, helping to resolve issues without a full system reinstall.
For comprehensive Windows repair, combine DISM with the System File Checker (SFC) tool. Stay updated with the latest Windows maintenance tips to keep your system running smoothly.
Checking and Repairing Disk Errors Using CHKDSK
How to Check and Repair Disk Errors in Windows Using CHKDSK
CHKDSK (Check Disk) is a powerful built-in Windows utility designed to diagnose and repair disk errors, helping to improve your PC’s stability and performance. This tool scans your hard drive for file system errors and bad sectors, ensuring your data remains safe and your system runs smoothly.
To use CHKDSK, open Command Prompt as an administrator. Type the command `chkdsk C: /f` to fix logical file system errors on the C: drive. For a more comprehensive scan that locates and recovers bad sectors, use `chkdsk C: /r`. You can also add the `/x` parameter to force the drive to dismount before the scan begins, which is useful if the drive is currently in use.
If the drive is active, CHKDSK will ask you to schedule the disk check during your next system reboot. Depending on your disk size and the number of errors, the process may take from several minutes to several hours.
Avoid interrupting CHKDSK during its operation to prevent potential data loss. If you experience frequent hangs or CHKDSK failures, it could indicate serious hardware problems, and you might need to consider replacing the hard drive.
Before running CHKDSK, always back up your important files to protect against accidental data loss during repairs. Using CHKDSK regularly can keep your Windows PC running efficiently and help prevent unexpected disk failures.
Using Automatic Startup Repair for Boot Issues
How to Use Automatic Startup Repair to Fix Windows Boot Issues
If your Windows PC refuses to boot and standard recovery steps fail, Automatic Startup Repair is a powerful built-in tool designed to diagnose and fix common startup problems. Here’s how to trigger and use Automatic Startup Repair effectively.
Triggering Automatic Startup Repair
To launch Automatic Startup Repair, interrupt the Windows boot process three times in a row by powering off your PC as Windows begins to load. On the third interruption, Windows Recovery Environment (WinRE) will automatically start.
Alternatively, you can access Advanced Startup Options by pressing F8, Shift + F8, or F11 during system startup.
Prepare Your PC
Before starting the repair, disconnect all external devices such as USB drives, printers, and external hard drives to avoid interference during the troubleshooting process.
Running Startup Repair in Windows Recovery Environment
Once in WinRE, navigate to Troubleshoot > Advanced options > Startup Repair. You’ll be prompted to enter your administrator credentials to proceed.
What Startup Repair Does
Automatic Startup Repair scans your PC for common boot issues including:
- Corrupted Master Boot Record (MBR) or Boot Configuration Data (BCD)
- Missing or damaged system files
- Faulty or incompatible drivers
The tool attempts to repair these issues automatically. If the repair is successful, your PC will restart normally.
If Startup Repair Fails
If Automatic Startup Repair can’t fix the problem, it will generate an error log file named SrtTrail.txt that you can review for detailed information about the failure.
For more advanced troubleshooting, return to the Advanced Options menu to:
- Use the Command Prompt for manual repairs (e.g., running `bootrec /fixmbr`, `bootrec /fixboot`, and `bootrec /rebuildbcd` commands)
- Perform a System Restore to revert your PC to a previous working state
- Boot into Safe Mode to uninstall problematic drivers or software
When to Seek Professional Help
If hardware faults or severe system corruption are causing boot issues, Automatic Startup Repair may not resolve the problem.
In such cases, consider consulting a professional technician or performing a clean installation of Windows.
Fixing Installed Apps and Programs

How to Fix Installed Apps and Programs on Windows
If you’re experiencing issues with installed apps or programs, start by navigating to Control Panel > Programs > Programs and Features. Select the problematic app and click the Repair option if it’s available.
Additionally, Windows Settings offers repair or reset options for many apps, which can help resolve common problems quickly.
For persistent app issues, consider resetting or reinstalling the app. Always back up important data before performing these actions to avoid data loss.
To streamline troubleshooting and improve app stability, you can also use trusted third-party repair tools like Fortect or CCleaner. These utilities automate repairs, optimize performance, and reduce the need for manual fixes.
Repairing Windows With Installation Media
How to Repair Windows Using Installation Media: Step-by-Step Guide
When standard Windows troubleshooting methods fail, repairing your Windows operating system with installation media provides a dependable solution that preserves your personal files. Follow these easy steps to repair Windows using installation media without losing data.
1. Download the Windows ISO File
Use the official Microsoft Media Creation Tool to download the latest Windows ISO file. Make sure to select the correct language, Windows edition, and system architecture (32-bit or 64-bit) that matches your PC.
2. Create Bootable Installation Media
Prepare a USB flash drive with at least 8GB of storage. Keep in mind that all existing data on the USB will be erased during this process. Use the Media Creation Tool or third-party software like Rufus to create a bootable USB drive or burn the ISO to a DVD.
3. Boot from the Installation Media
Insert the bootable USB or DVD into your PC. Restart your computer and enter the BIOS/UEFI settings (typically by pressing F12, Esc, or Delete during startup). Change the boot order to boot from the USB or DVD drive.
4. Access Windows Repair Options
Once Windows Setup loads, select your language and preferences, then click “Repair your computer” instead of “Install now.” This opens recovery tools, including Startup Repair, System Restore, and Command Prompt to troubleshoot system issues.
5. Perform a Repair Install (In-Place Upgrade)
If you can boot into Windows, run the setup.exe file from the mounted ISO or USB drive. Choose the option to keep your personal files and apps to repair the Windows installation without a full reset.
6. Consider a Clean Installation if Needed
For persistent problems, a clean installation of Windows may be necessary. Back up all important data before proceeding, as this will erase your files and applications.
7. Update Drivers and Verify System Integrity
After repairing or reinstalling Windows, update your device drivers and run system file checks (sfc /scannow) to ensure your system runs smoothly.
Frequently Asked Questions
How Can I Prevent Windows System Problems in the Future?
You can prevent Windows system problems by installing updates promptly, managing drivers, running regular malware scans, cleaning hardware, and optimizing storage. Don’t ignore warning signs—check event logs, monitor system temperatures, and back up important files consistently.
What Should I Do if My PC Won’T Turn on at All?
If your PC won’t turn on, check the power source, confirm the power switch is on, inspect power cables for damage, reseat internal connections, and test with minimal hardware. Listen for beeps or lights indicating hardware issues.
How Do I Recover Lost Files After a System Repair?
You feel relief at a repaired system, yet dread lost files. Act quickly: use recovery software, check Previous Versions, and run SFC/DISM commands. Never save recovered data to the repaired drive—preserve hope, not overwrite it.
Can I Repair Windows Without Losing My Personal Data?
Yes, you can repair Windows without losing personal data by using “Reset this PC” with “Keep my files,” System Restore, or reinstalling via installation media. Always back up important files first to avoid unexpected data loss.
Should I Back up My Data Before Attempting Any Repairs?
Yes, you should always back up your data before attempting any repairs. You can use Windows built-in backup tools or external drives. This protects your files from loss due to errors, corruption, or unexpected issues during the process.
Conclusion
Fixing Windows problems can feel overwhelming, but with the right tools, it’s manageable. Instead of frustration, you’ll find solutions—SFC and DISM tackle hidden corruption, while CHKDSK targets disk errors. Automatic Startup Repair gets you back in business, and reinstalling or repairing apps keeps your workflows running. When quick fixes fail, installation media offers a fresh start. Troubleshooting isn’t guesswork; it’s a step-by-step process, turning confusion into confidence as you restore your system’s health.