Run Troubleshooter PC Issues Windows 7: Windows 7 Problem Resolution
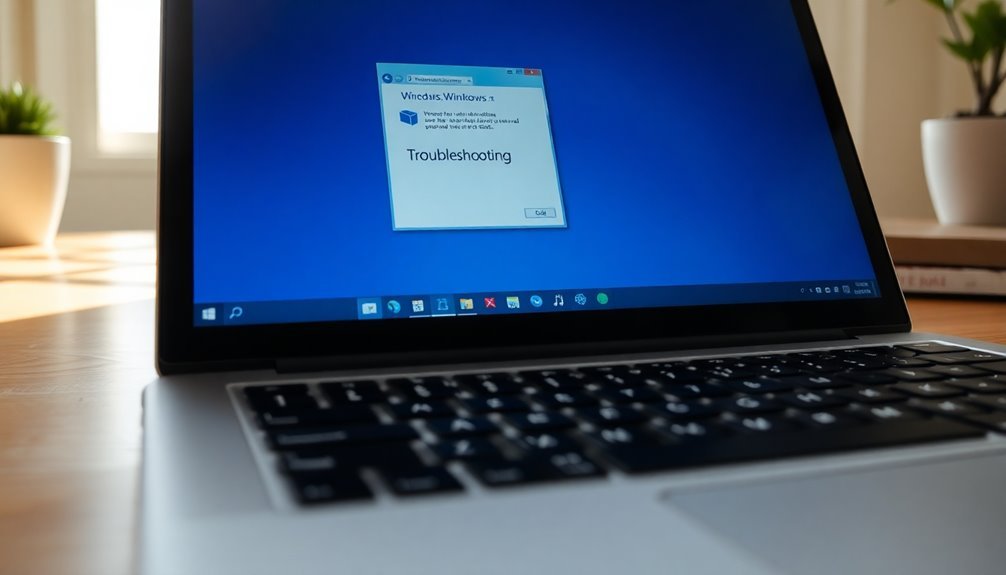
To fix common PC issues in Windows 7, open the Action Center by clicking the flag icon or searching “Action Center” in the Start menu. Select “Troubleshooting,” then choose the problem category, such as hardware, network, or Windows Update.
Click “Next” and follow the prompts. Windows will scan and attempt repairs automatically.
If any troubleshooter fails, try running it as an administrator. Using System File Checker can also help.
There’s more you can do to resolve persistent Windows 7 problems.
Understanding Windows 7 Troubleshooter Categories
Windows 7 Troubleshooter Categories: How to Quickly Fix Common PC Problems
When troubleshooting Windows 7 issues, understanding the different Troubleshooter categories can help you resolve problems faster and more effectively.
If your programs crash or fail to install, use the Programs Troubleshooter to fix compatibility issues, repair corrupted files, and reset default file associations.
For hardware-related problems, the Hardware and Sound Troubleshooter detects device malfunctions, updates drivers, and solves connectivity or audio issues. Each category opens a separate troubleshooting wizard that diagnoses and reports any identified problems, making it easier to pinpoint and address specific hardware or device concerns.
Facing network connectivity problems? The Network and Internet Troubleshooter diagnoses LAN, wireless, and HomeGroup errors, and repairs IP configuration to restore your internet access.
To fix desktop appearance issues like Aero effects not working, display resolution problems, or corrupted themes, the Appearance and Personalization Troubleshooter helps restore visual settings on your PC.
Lastly, the System and Security Troubleshooter addresses Windows Update errors, slow system performance, search problems, and general maintenance tasks to keep your Windows 7 system secure and running smoothly.
Selecting the appropriate Troubleshooter category ensures faster, more targeted fixes for your Windows 7 computer problems.
Accessing Troubleshooting Tools Through the Action Center
How to Access Troubleshooting Tools via the Action Center in Windows 7
Windows 7 offers multiple methods for troubleshooting, but the Action Center stands out as a centralized and efficient tool for diagnosing and resolving common computer problems. To access the Action Center, click the Start button, open the Control Panel, and go to “System and Security.”
Then, select “Action Center” or “Review Your Computer’s Status” to open the interface quickly. For faster access, simply type “Action Center” into the Start menu search box and press Enter.
The Action Center icon, represented by a flag, appears on your taskbar and provides visual alerts—red “X” for urgent issues and yellow for less critical notifications. Inside the Action Center, locate the “Find and Fix Problems (Troubleshooting)” link to open a categorized collection of troubleshooting tools.
These tools help you resolve problems related to hardware, connectivity, Windows Update, and installed programs. [To make sure you have access to the latest troubleshooting features, keep the “Get the Most Up-to-Date Troubleshooters” check box selected so you always use the most current troubleshooters when fixing PC issues.]
Additionally, the Action Center consolidates important security and maintenance messages, allowing you to view message details, send problem reports directly to Microsoft, and check the status of your previously reported problems.
Using the Action Center in Windows 7 is a quick and effective way to keep your PC running smoothly.
Step-by-Step Guide to Running a Troubleshooter
How to Run a Troubleshooter in Windows 7: Step-by-Step Guide
If you’re experiencing issues with your Windows 7 PC, running a troubleshooter can help you quickly identify and fix common problems. Here’s a detailed guide on how to launch and use Windows 7 troubleshooters effectively.
1. Open the Troubleshooting Tools
Start by clicking the Start menu and typing “Troubleshoot” in the search box. This will quickly bring up the Troubleshooting options in Control Panel. Click on the Troubleshooting link to open the Troubleshooting screen.
2. Get the Latest Troubleshooters
To ensure you have access to the most current Windows 7 troubleshooting tools, check the option labeled “Get the Most Up-to-Date Troubleshooters.” This connects to Microsoft online resources and downloads the latest fixes.
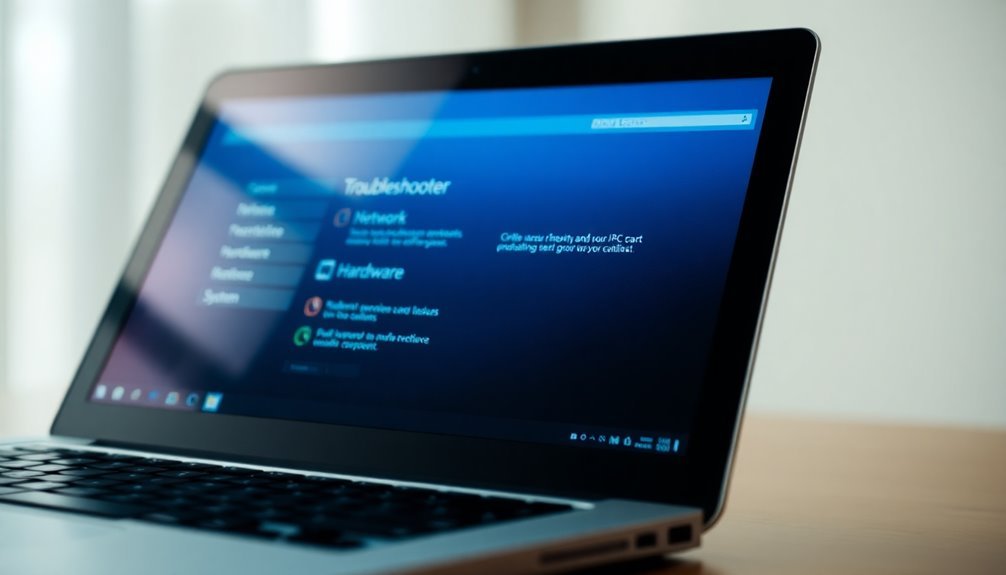
3. Select the Appropriate Troubleshooter Category
Windows 7 offers various troubleshooter categories based on the type of issue you’re facing:
- Programs
- Hardware and Sound
- Network and Internet
- System and Security
Choose the category that best matches your problem to proceed.
4. Prepare Your System Before Running a Troubleshooter
Before starting any automatic repairs, it’s important to create a system restore point or back up your important data. This precaution helps prevent data loss if changes are made during troubleshooting.
If you suspect hardware problems, restart your computer and run built-in diagnostics available via the BIOS menu or your PC manufacturer’s OEM tools. Additionally, use Memtest86+ to test your RAM for errors. Disable unnecessary startup programs to reduce conflicts during troubleshooting.
5. Run the Troubleshooter and Follow Instructions
Finally, launch the selected troubleshooter and carefully follow the on-screen prompts. The tool will scan your system, detect issues, and attempt automatic repairs for your Windows 7 problems.
Common Issues Resolved by Windows 7 Troubleshooters
Common Windows 7 Troubleshooter Solutions for Hardware, Network, and System Performance Issues
If your Windows 7 computer is facing hardware malfunctions, network connectivity errors, or system slowdowns, the built-in Windows 7 troubleshooters can quickly diagnose and fix many common problems.
Running the Hardware and Devices Troubleshooter helps detect unrecognized peripherals, resolve printer errors, and fix audio device conflicts efficiently.
For internet and network-related issues, the Windows 7 Network Troubleshooter analyzes connection problems, repairs Homegroup sharing errors, and corrects firewall or VPN misconfigurations to restore seamless connectivity.
When Windows Update fails, use the Windows Update Troubleshooter to identify corrupt update files, reset update components, and repair critical registry keys or services to ensure smooth update installations.
To improve system performance on Windows 7, tools like the System File Checker (SFC) can repair corrupted system files, while disabling unnecessary startup programs and optimizing maintenance tasks such as disk cleanup and search indexing help speed up your PC.
Additionally, Windows 7 Audio and Display Troubleshooters fix issues with Windows Aero effects, video drivers, audio output, and multi-monitor configurations for enhanced multimedia experience.
Leveraging these Windows 7 troubleshooters offers a comprehensive approach to restoring your PC’s stability, performance, and connectivity efficiently.
What to Do When a Troubleshooter Fails

Why Do Windows 7 Troubleshooters Fail and How to Fix Them?
If your Windows 7 troubleshooter fails to resolve issues, common causes include corrupted system files, broken services, permission conflicts, or disabled troubleshooters after updates.
When you see errors like “An error occurred while troubleshooting” or the troubleshooter won’t start, follow these proven solutions to fix the problem:
1. Run System File Checker (SFC) on Windows 7
Open Command Prompt as an administrator and type `sfc /scannow` to scan and repair corrupted system files. Restart your PC and run the scan again if issues remain.
2. Reset Permissions and Run Troubleshooter as Administrator
Right-click the troubleshooter tool and select “Run as administrator.” Ensure User Account Control (UAC) settings and group policies allow the troubleshooter to run properly.
3. Clear Windows Update and Troubleshooter Cache****
Stop the Windows Update service, delete the `SoftwareDistribution` folder, then restart the service. This refreshes the update cache and can fix troubleshooting errors.
4. Use DISM Tool to Repair Windows 7 Image****
Run the Deployment Image Servicing and Management command: `DISM /Online /Cleanup-Image /RestoreHealth` in an elevated Command Prompt to repair deeper system image issues.
Following these step-by-step fixes will help resolve common Windows 7 troubleshooter failures and improve system stability.
Keep your PC running smoothly with these effective troubleshooting tips.
Using the Windows Update Troubleshooter Effectively
How to Use the Windows Update Troubleshooter on Windows 7 for Quick Fixes
Windows Update problems can negatively impact your system’s security and performance, but the Windows Update Troubleshooter provides an easy and effective way to identify and fix common update issues automatically.
To run the Windows Update Troubleshooter on Windows 7, start by opening the Control Panel. Simply type “control” in the Start menu search box and press Enter. Next, type “troubleshoot” in the Control Panel search bar and select “Troubleshooting” from the results.
In the Troubleshooting window, click “View all” on the left-hand side to access all troubleshooters. Find and select “Windows Update” to launch the troubleshooter. For best results, click on “Advanced” and check the box for “Apply repairs automatically” to allow unattended fixes. Then click “Next” to begin the diagnostic process.
The Windows Update Troubleshooter will scan your computer for corrupted update files, Windows Update database errors, and misconfigured update sources. It also verifies that essential update services are running properly.
The tool automatically attempts to repair detected issues and provides a detailed summary of the problems found and actions taken.
After the troubleshooter finishes, it’s important to restart your computer to apply the repairs. Once rebooted, run Windows Update again to ensure that the issues have been resolved.
If problems continue, you can run the Windows Update Troubleshooter again or consult advanced Windows Update troubleshooting guides tailored to your specific system environment.
Using the Windows Update Troubleshooter regularly helps maintain your Windows 7 system’s stability and security by ensuring timely and error-free updates.
For more tips on fixing Windows Update errors and optimizing your PC, explore additional troubleshooting resources and official Microsoft support pages.
Best Practices for Successful Problem Resolution
Effective Problem Resolution on Windows 7: Best Practices and Troubleshooting Tips
Using automated tools like the Windows Update Troubleshooter can quickly fix many common Windows 7 issues, but achieving consistent problem resolution requires a methodical approach.
Start by accurately identifying symptoms—avoid jumping to conclusions. Utilize built-in diagnostic tools such as Windows Memory Diagnostic and Task Manager to monitor system processes and behavior.
After collecting evidence, develop a hypothesis about the root cause and verify it by running commands like SFC /SCANNOW in safe mode when possible. Before implementing any solution, carefully plan your steps and always back up important data to prevent loss.
To optimize your Windows 7 troubleshooting process and reduce future issues, follow these expert tips:
- Collect comprehensive information before applying fixes to avoid incorrect assumptions.
- Check hardware health first to isolate whether problems stem from hardware or software.
- Keep detailed documentation of your troubleshooting steps and observations for easy reference and rollback if necessary.
- Regularly update antivirus software and Windows updates to maintain system security and stability.
Frequently Asked Questions
Can I Create Custom Troubleshooters for Specific Recurring Issues in Windows 7?
Yes, you can create custom troubleshooters in Windows 7 using the Troubleshooting Platform SDK. Define root causes, write Verifier and Resolver scripts, assemble them, and test thoroughly. You’ll need scripting skills since no native GUI authoring tool exists.
Are Third-Party Troubleshooting Tools Compatible With Windows 7 Troubleshooters?
Don’t put all your eggs in one basket—you can use third-party troubleshooting tools alongside Windows 7’s built-in troubleshooters. Just install, run with admin rights, and alternate as needed; they don’t conflict but work best complementing each other.
Do Troubleshooters Collect or Send Personal Data to Microsoft During Operation?
You don’t automatically send personal data to Microsoft when running troubleshooters. The tools collect technical logs locally. You’ll only share information if you explicitly choose to send logs to support or follow prompts requesting consent for data transfer.
How Do I Uninstall or Roll Back Problematic Troubleshooters After a Windows Update?
Think of your PC as a car needing a tune-up—head to Settings > Windows Update > View update history > Uninstall updates, choose the troublesome update, and uninstall. Restart, then monitor your system for stability and improved performance.
Can Troubleshooters Be Run From Safe Mode or the Windows Recovery Environment?
Yes, you can run basic troubleshooters like System Restore and SFC in Safe Mode, but some advanced tools won’t work. In Windows Recovery Environment, launch recovery troubleshooters like Startup Repair or Command Prompt for deeper repair tasks.
Conclusion
By mastering Windows 7’s troubleshooters, you’ll tackle PC issues faster than lightning. Just access the Action Center, select the right tool, and follow the prompts. If a troubleshooter fails, don’t panic—manually update drivers or consult Windows Help. Always keep your system updated and document solutions for future reference. With these steps, you’ll transform troubleshooting from a headache into a streamlined, solution-oriented process that keeps your Windows 7 machine running smoothly.